Blog

Instant Pot Chicken and Rice Burrito Bowls

Jump to Recipe

These chicken and rice bowls are amazing. Flat out amazing. There are a lot of ingredients and you need an Instant Pot (go out and buy one already! here’s another reason why!), but it’s totally, completely worth it. Thank you kitchn!

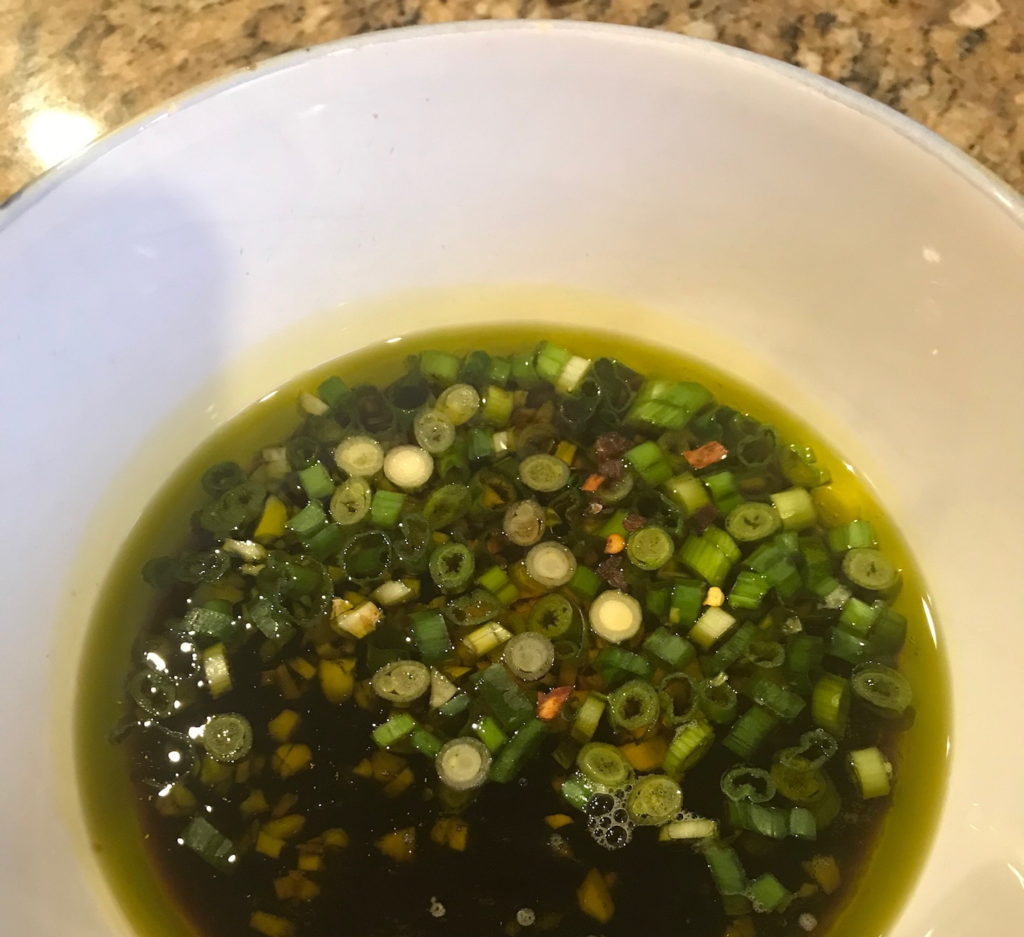
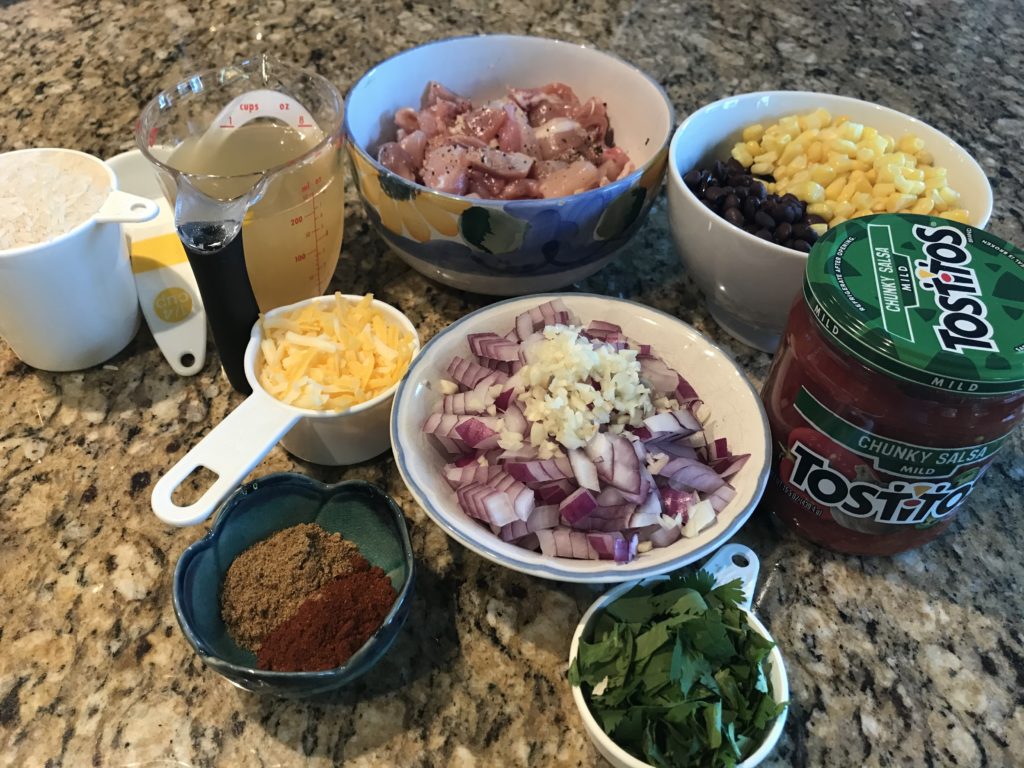
First, do your prep. The kitchn says to do it as you go, but I disagree. Because there are a lot of ingredients, I would rather be prepared than frantically chopping chicken and opening cans. So…dice up an onion. Mince a couple cloves of garlic (lately I’ve been using a microplane/zester and finding it faster). Measure out some chili powder and cumin. Open your cans of broth and black beans. Cut chicken thighs into 1-inch chunks, and season with salt and pepper. Grab the frozen corn, a jar of salsa, and rice. Shred some cheese and chop up fresh cilantro. Whew. Ok, take a break. Admire your work.

Instant Pot Chicken and Rice Burrito Bowls

In your Instant Pot, heat some oil until shimmering, which means there are little ripples rolling in it. Or you can just time it to about 2 minutes or so. Throw in the onion and garlic, and cook until the onion is soft. Be sure to stir it occasionally so the garlic doesn’t burn. Stir in your seasonings and cook until it smells really good, which is really only about a half a minute. I mean it’ll continue smelling good, but don’t get distracted. Add some chicken broth, scrap the bits from the bottom, and simmer for a minute.

Add chicken, beans, corn, and salsa. Stir. Now the technical part: pour the rice over this. Do NOT stir. You might feel compelled to submerge the rain. Just leave it be. Trust me on this one. You’ll then pour some more broth over it, but again, don’t stir.

Set the pressure to high for 10 minutes and let it do its thing. Go watch the news. Actually, don’t watch the news. It’s super depressing these days. Go make a salad instead. It’s better for you than the news.

It’ll take about 10-12 minutes to come to pressure, and I have to say, I love it when Instant Pot recipes tell you this. Yes, it’s faster to cook in an Instant Pot, but when the recipe tells you to cook it for 10 minutes, it’s really at least double than that.

After the Instant Pot beeps, quick release the pressure and then carefully open the lid. Don’t panic when you see the rice sitting on top looking raw. I promise you it’s fully cooked. Just stir everything together, scoop some into a bowl, and top with shredded cheese and chopped cilantro.

Instant Pot Chicken and Rice Burrito Bowls

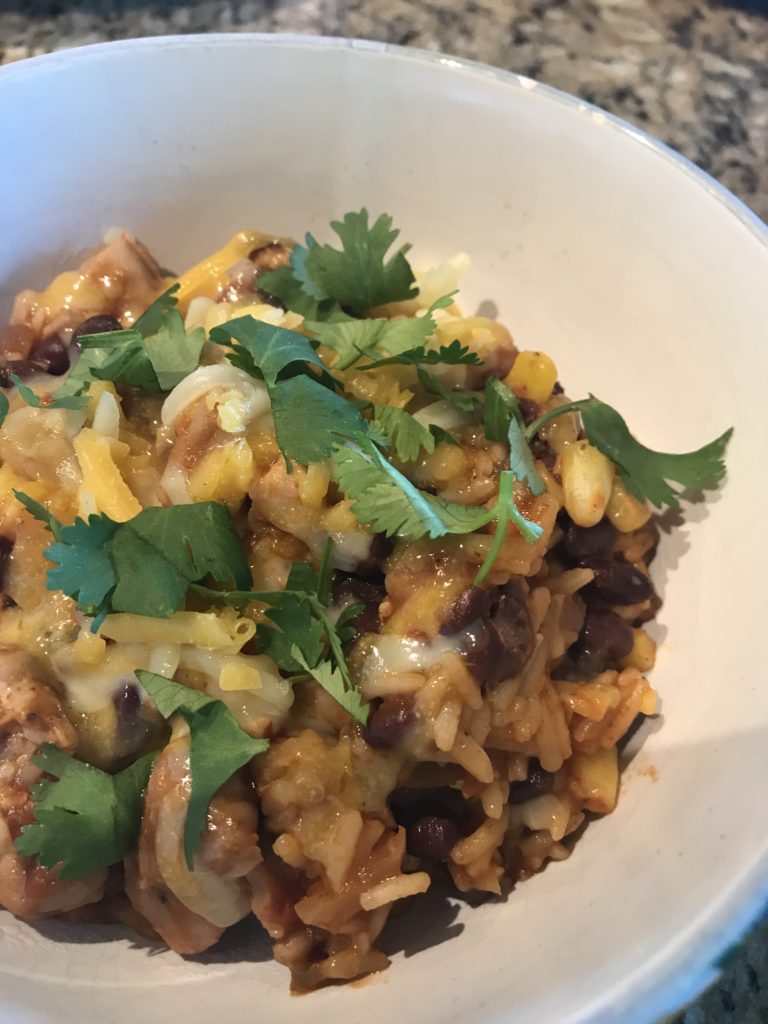
The cheese is all gooey. The beans are all soft. The rice is all tender. Oh, deliciousness! What’s not to love? This one is a make again.

Instant Pot Chicken and Rice Burrito Bowls

Instant Pot Chicken and Rice Burrito Bowls

Servings 6

Ingredients
  

  • 1 1/2 tablespoons canola oil
  • 1 medium onion diced
  • 2 cloves garlic minced
  • 1 tablespoon chili powder
  • 1 1/2 teaspoons ground cumin
  • 1 cup low-sodium chicken broth divided
  • 1 1/2 pounds boneless, skinless chicken thighs cut into 1-inch pieces
  • Kosher salt and freshly ground pepper
  • 15 ounces canned black beans drained and rinsed
  • 1 cup frozen corn kernels
  • 16 ounces salsa
  • 1 cup long-grain white rice
  • 1/2 cup shredded cheese (cheddar, jack, or a blend)
  • 1/4 cup fresh cilantro coarsely chopped

Instructions
 

  • Add the oil to the Instant Pot, turn on saute setting. Heat until shimmering.
  • Add the onion and garlic. Cook, stirring occasionally, until softened, about 4 minutes.
  • Stir in the chili powder and cumin. Cook until fragrant, about 30 seconds.
  • Add 1/4 cup of the chicken broth. Cook, gently scraping the bottom of the pot with a wooden spoon to loosen any stuck-on bits, and simmer for 1 minute.
  • Season the chicken with the salt and pepper. Add the chicken, beans, corn, salsa, and stir to combine.
  • Sprinkle the rice over the top. Pour the remaining 3/4 cup broth over the rice, but do not stir.
  • Using the manual setting, set the pressure to HIGH for 10 minutes. Close and lock the lid. It should take the pressure cooker about 10 to 12 minutes to come to pressure and begin the 10 minute countdown. When the cooking time is complete, do a quick release of the pressure.
  • Gently stir everything together. Divide between bowls and top with the cheese and cilantro.
Blog

Instant Pot Honey Garlic Chicken

Jump to Recipe

Yes, another Instant Pot recipe. I can’t help it. It makes cooking so much easier. You really need to run out and buy one if you haven’t. Amazon has them for under $100. You don’t need to get the fancy WiFi version either. Just break down and get one already. You’ll use it more than you think. But I digress…I’ve promised myself that from now on, I’ll try to share more traditional recipes that don’t require fancy gadgets. Next time.

I’ve been on vacation for a couple of weeks and have been super lazy. After all the Christmas cooking, I needed a rest. We’ve all been living off leftovers like turkey and dressing. While this is all fine and good, it was starting to get a little old, even with the tri tip (and more leftovers) we made for New Year’s Eve.

To break the cycle, I decided to ease back into cooking by making this delicious pressure cooker dish from Delish. For those of you who are trying to stick to your New Year resolution of healthier eating, this recipe is very accommodating. If you are watching carbs, serve it with a salad instead of rice. If you’re watching your sugar, skip the glaze.

Season your chicken with salt and pepper. In general, you always want to season your meat, even if the recipe doesn’t call for it. It’ll make the meat taste better by adding the first layer of flavor. I’m usually generous with the ground pepper too.

I used boneless, skinless chicken because I like it better. I find it easier to work with, has a shorter cook time, and is just as tasty. I’m simply not a big fan of skin so when I remove the skin before eating the chicken, all those yummy seasonings disappear with it. Sadness. Granted bone-in, skin-on chicken might be juicer, it doesn’t matter for this recipe because the pressure cooker infuses so much liquid into the chicken.

Sauté the chicken in olive oil. In the meantime, make the marinade: olive oil, soy sauce, honey, sesame oil (don’t skip this ingredient!), garlic, lime juice, green onions, and red pepper flakes (don’t skip this either!). Be sure to whisk it completely so the honey is fully incorporated. The sesame oil provides that nuttiness reminiscent of Asian flavors that this dish needs while the red pepper enhances the dish. I’m always cautious with anything spicy because of the rest of my family (not big fans of red pepper), but trust me when I say you won’t be able to taste it. In fact, I usually add a pinch to spaghetti sauce because it takes the sauce over the top good in a subtle not-sure-what-that-secret-ingredient-is way. It’s the same here.

When the chicken is browned, add the marinade.

Lock it up and pressure cook on high for 10 minutes. Go make a salad or some rice.

When it’s done, make the glaze. Take out the chicken. Then, remove 1/4 cup of the sauce and whisk in some cornstarch. Add that back to the pot and simmer until thickened. Serve over the chicken and rice, garnished with green onions.

To be completely honest, everyone thought this glaze was completely unnecessary. Maybe we’re just not fancy people, but it’s just there to add a sauce to the rice. I ate the chicken without the glaze along with a salad, and found the chicken to be very flavorful and fall apart tender. My son wanted nothing to do with the glaze (and god forbid the chicken touched the rice, but that’s a different story for another day). My husband tried it with the glaze and said it wasn’t anything special. No glaze it is! Also, I found the glaze to be a bit oily. The sauce called for 1/4 cup of olive oil, which at the time I was blown away at the amount, but then again, it’s for a marinade so that’s a perfectly respectable amount. When converted over to a glaze, it’d hard to disguise. Regardless, this recipe got three thumbs up by all of us. Definitely a make again recipe.

Instant Pot Honey Garlic Chicken

Instant Pot Honey Garlic Chicken

Servings 4

Ingredients
  

  • 4 boneless, skinless chicken thighs
  • kosher salt
  • ground black pepper
  • 1/4 cup extra-virgin olive oil plus 2 tablespoons for browning the chicken
  • 1/4 cup low-sodium soy sauce
  • 2 tablespoons honey
  • 1 tablespoon sesame oil
  • 2 cloves garlic minced
  • 1 lime juiced
  • 2 green onions thinly sliced, plus more for garnish
  • pinch crushed red pepper flakes
  • 1 tablespoon cornstarch
  • cooked rice

Instructions
 

  • Season chicken with salt and pepper on both sides. Set Instant Pot to Sauté function and add 2 tablespoons olive oil. Add chicken and cook until golden, about 3 minutes. Then flip and cook for another 3 minutes more. Work in batches as necessary. Turn Instant Pot off of Sauté function.
  • In a medium bowl, whisk together remaining 1/4 cup olive oil, soy sauce, honey, sesame oil, garlic, lime juice, green onions, and pinch of red pepper flakes. Place chicken in Instant Pot and pour sauce over. Lock lid and set to Pressure Cook on High for 10 minutes.
  • Quick release, making sure to wait until cycle is completely before, unlocking and removing lid. Using tongs, remove chicken from Instant Pot and set on plate to keep warm.
  • Ladle out about 1/4 cup of sauce from Instant Pot and whisk in cornstarch. Pour liquid back into Instant Pot and set to Sauté function. Let sauce simmer until thickened slightly, about 5 minutes.
  • Pour sauce over chicken, and garnish with green onions, and serve over rice.
Blog

Instant Pot Green Bean Casserole

Jump to Recipe

I’ve said this before (see Instant Pot Spaghetti and Meatballs) and I’ll say it again, I love my Instant Pot. I’m frequently surprised at what it can do. When I heard about the classic Thanksgiving Green Bean Casserole dish ala Instant Pot, I knew I had to see if it was the real thing or too good to be true. I decided to try it out today instead of on Thanksgiving in case it failed miserably. I discovered that was completely unnecessary.

First of all, I don’t want you to think you have to run out and buy an Instant Pot. You can very easily make this recipe on the stove. Instead of using an instant pot, simply follow the recipe to cook in a skillet on the stove and you’ll get the same results. Times will obviously vary, but you should get the same results.

I did my prepping first: measured out the ingredients, diced an onion, shredded some cheese, and trimmed/cut up my green beans. Honestly, green beans are a high maintenance vegetable. I would make them more often if I didn’t have to trim the ends. I didn’t take a short cut this time and use bagged, trimmed green beans, but that route was starting to sound like a good thing after trimming a pound and a half of green beans. That was a lot of beans.

In your Instant Pot (or skillet if you choose), saute chopped onions in butter until they are soft, which takes about 5 minutes. I would have loved to show you some pictures of this, but the lightening was not cooperating (aka the sun was going down, casting a yellow hue) and the onions kept steaming up my lens. I really need to rethink how I take pictures.

BTW, because of the mushroom haters in my family (and let’s be clear, I’m not a hater), I skipped them. Feel free to saute about 8 ounces right now if you can’t live without them.

Season, add broth, and stir in green beans.

At this point, pressure cook the beans on LOW (not high) for 3 minutes.

While this is going on, combine butter, Parmesan cheese, and flour. I was sort of questioning this step. And then I was sort of impressed. It makes a really nice compote to thicken the sauce. Just be sure to use room temperature butter or you’ll struggle mixing it together.

When your beans are done cooking, release the pressure and set the Instant Pot to saute. Add the butter mixture, let it melt, and then mix, coating the green beans completely. Pour in the cream and cook until thickened.

Serve in a large bowl topped with toasted fried onions. Just to let you know, I recommend this recipe. It was oniony, creamy green bean goodness that you must have on Thanksgiving. You can find the original at The Food Network, minus a few of my tweaks.

Instant Pot Green Bean Casserole

Instant Pot Green Bean Casserole

Servings 8

Ingredients
  

  • 2 tablespoons butter
  • 1 medium yellow onion chopped
  • 2 teaspoons kosher salt
  • 1/2 teaspoon black pepper
  • 1 cup low-sodium chicken broth
  • 1 1/2 pounds green beans trimmed and cut into bite-size pieces
  • 1 cup crispy fried onions
  • 2 tablespoons butter at room temperature
  • 2 tablespoons Parmesan cheese grated
  • 2 tablespoons all-purpose flour
  • 1/2 cup heavy cream

Instructions
 

  • Preheat the oven to 350 F.
  • Set a 6-quart Instant Pot® to saute and heat for 3 to 4 minutes. Add 2 tablespoons butter and melt. Add the diced onion. Cook, stirring frequently, until softened and translucent, 4 to 5 minutes. Season with salt and pepper.
  • Add the broth and green beans. Stir until coated. Turn the pot off.
  • Follow the manufacturer's guide for locking the lid and preparing to cook. Set to pressure cook on manual LOW pressure for 3 minutes. After the pressure cook cycle is complete, follow the manufacturer's guide for quick release and wait until the quick release cycle is complete. Be careful of any remaining steam and unlock and remove the lid.
  • While the beans are cooking, toast the fried onions on a baking sheet in a 350 F oven for 5 minutes.
  • In a small bowl, mix together flour, butter, and Parmesan cheese with your hands until completely combined.
  • Set the Instant Pot to saute. Stir the butter mixture into the hot green beans. Add the cream. Stir until all the butter has melted and the cream has thickened the sauce, about 2 minutes.
  • Pour into a serving dish and top with crispy fried onions.