Blog

Pan Fried Cod in a Citrus and Basil Butter Sauce

Jump to Recipe

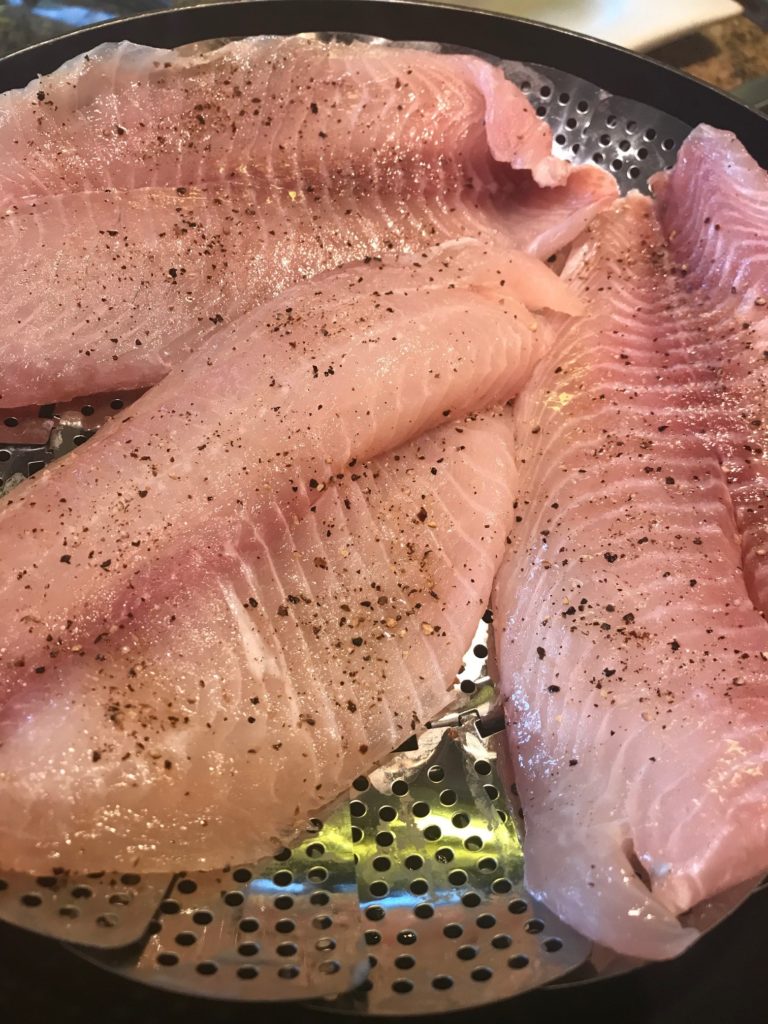
Cod is a versatile white fish. Tilapia is cheaper, but I like the thickness of cod better because it’s easier to work with. Cod’s not as pricey as halibut, and I must tell you, I’m watching prices these days. It’s kinda funny though. I always think of fish sticks when I think of cod. It deserves a better rep. So let’s make cod fancier.

You don’t have to do much to cod to make it taste delicious. I found this simple recipe on Foodness Gracious for this recipe. It’s pretty much perfect.

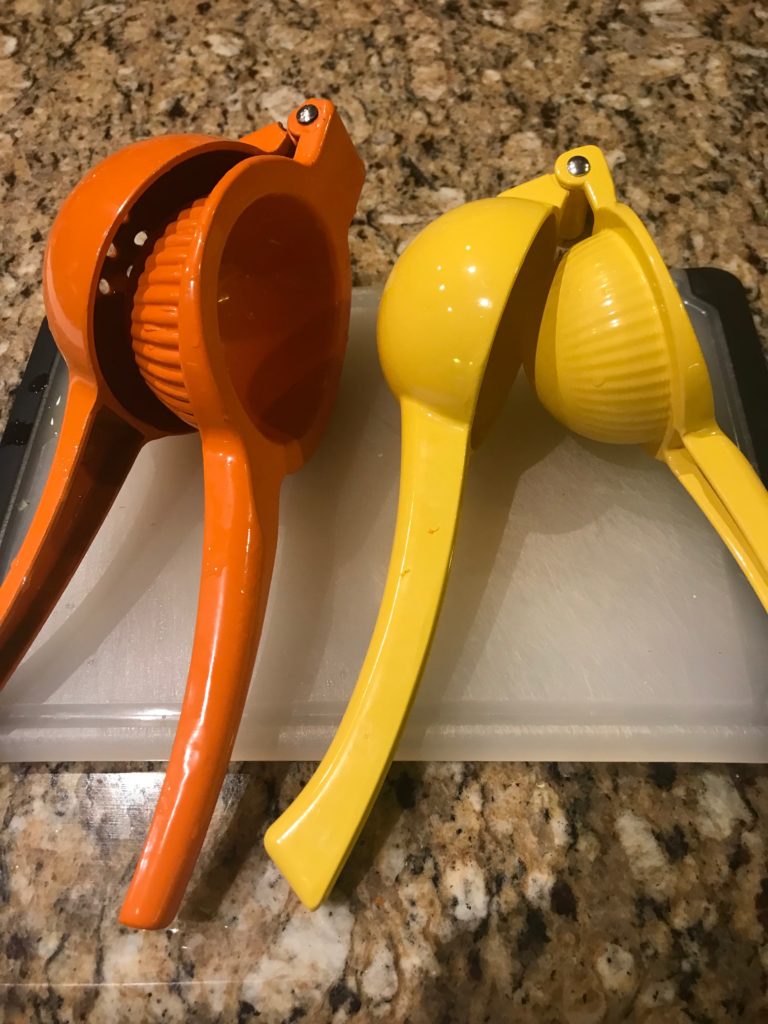
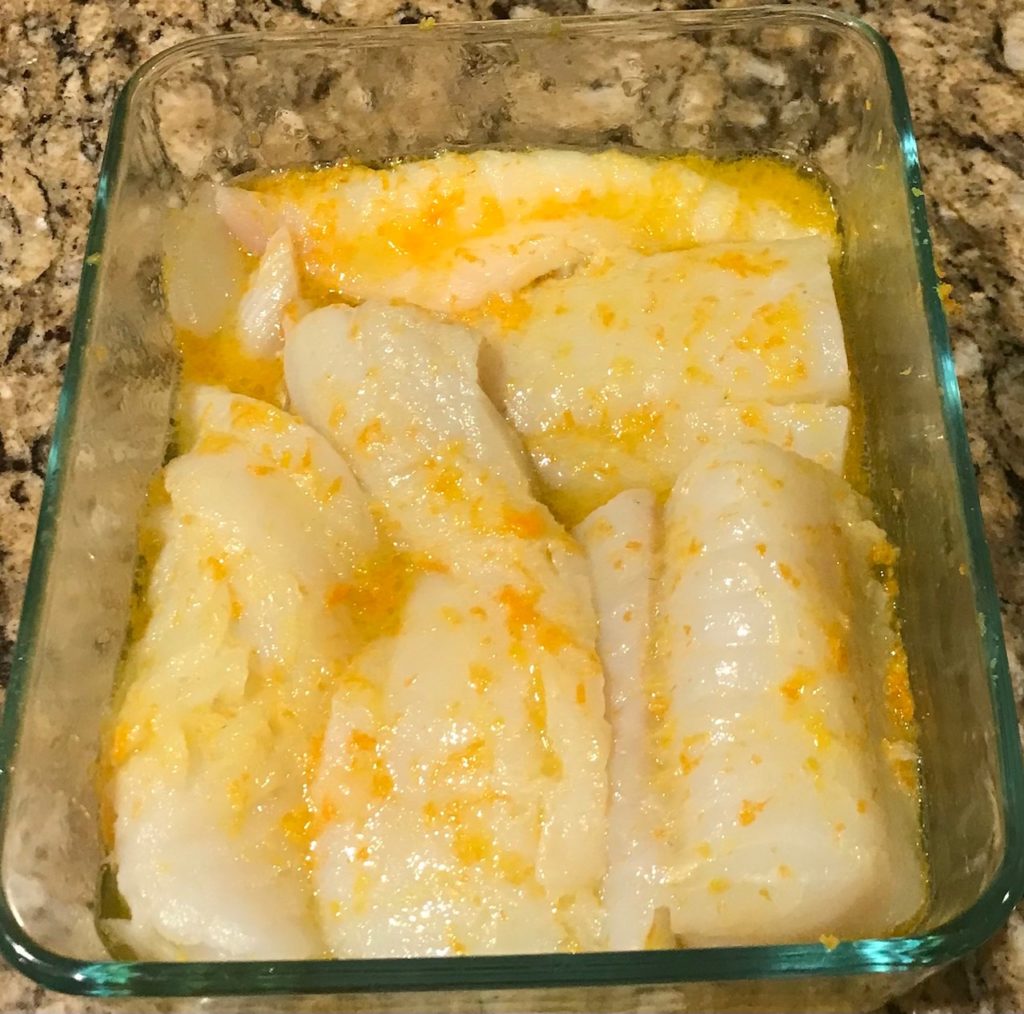
In a bowl, zest an orange and lemon. Then, squeeze the juice. I love my squeezers and highly recommend them.

Citrus Cod

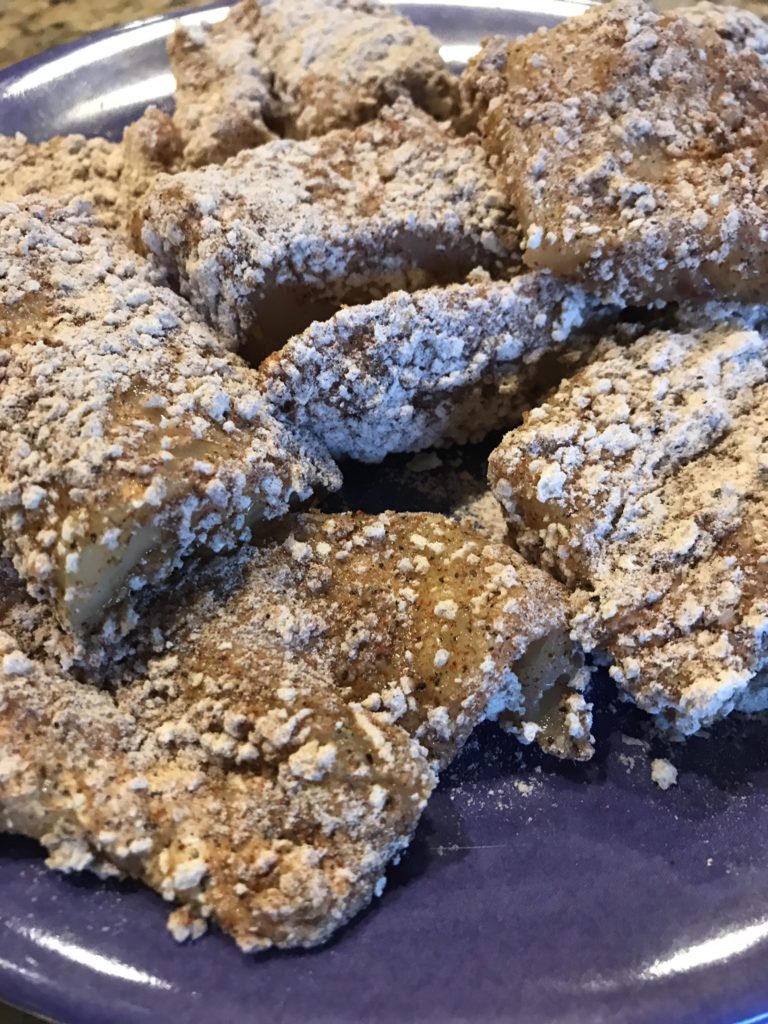
Add some olive oil, mix it up, and then pour it over your fish. Let this soak up for about 30 minutes, or more, if you can stand it. I get sort of impatient with marinades.

Citrus Cod

Preheat your oven to 250F. Yes, it’s low, but it’s all good. You’ll see.

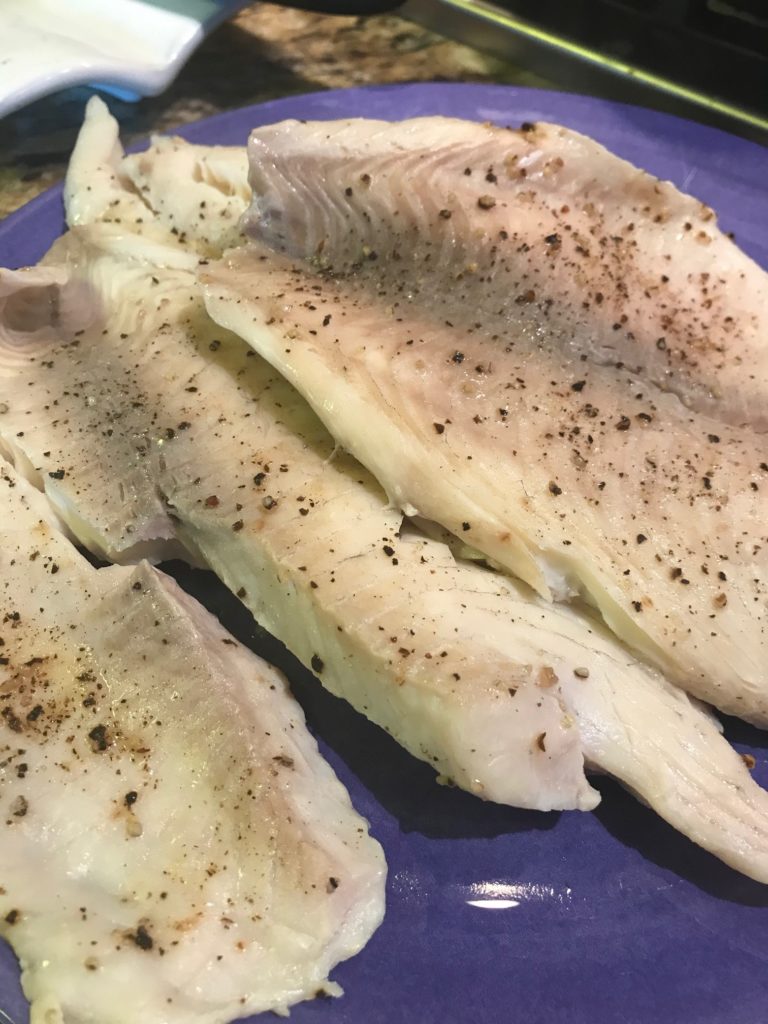
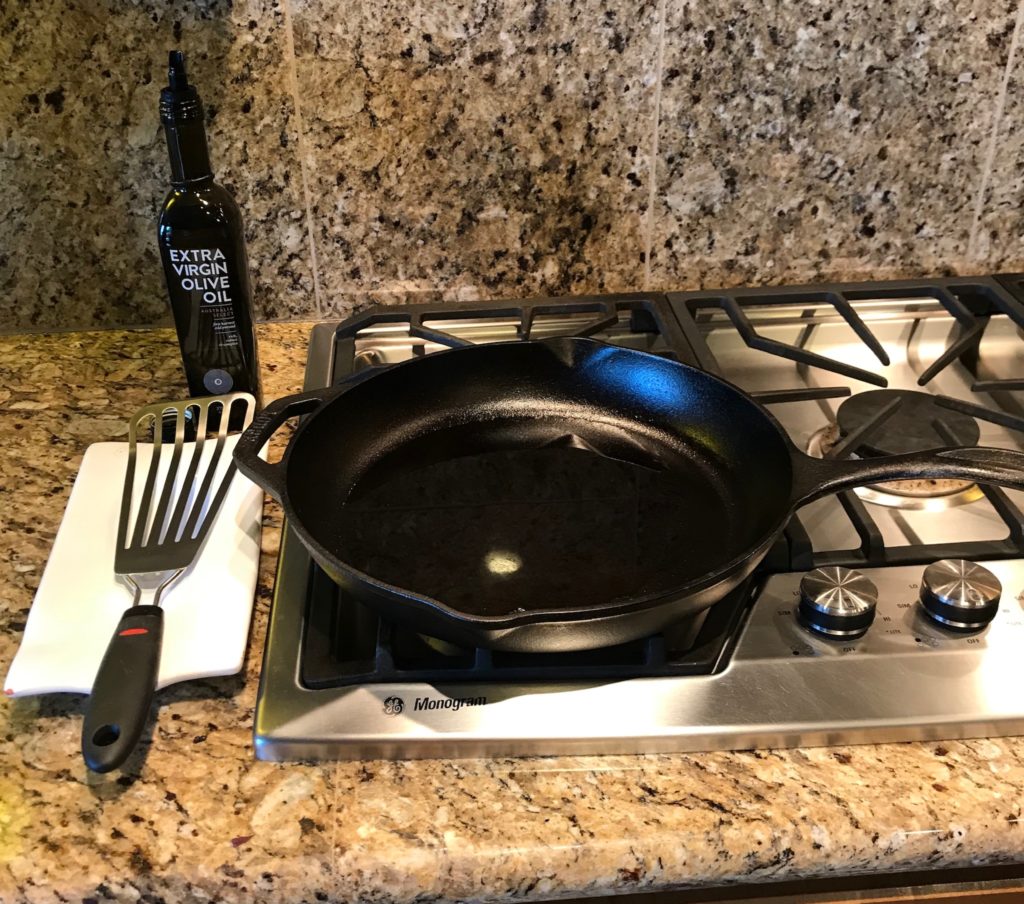
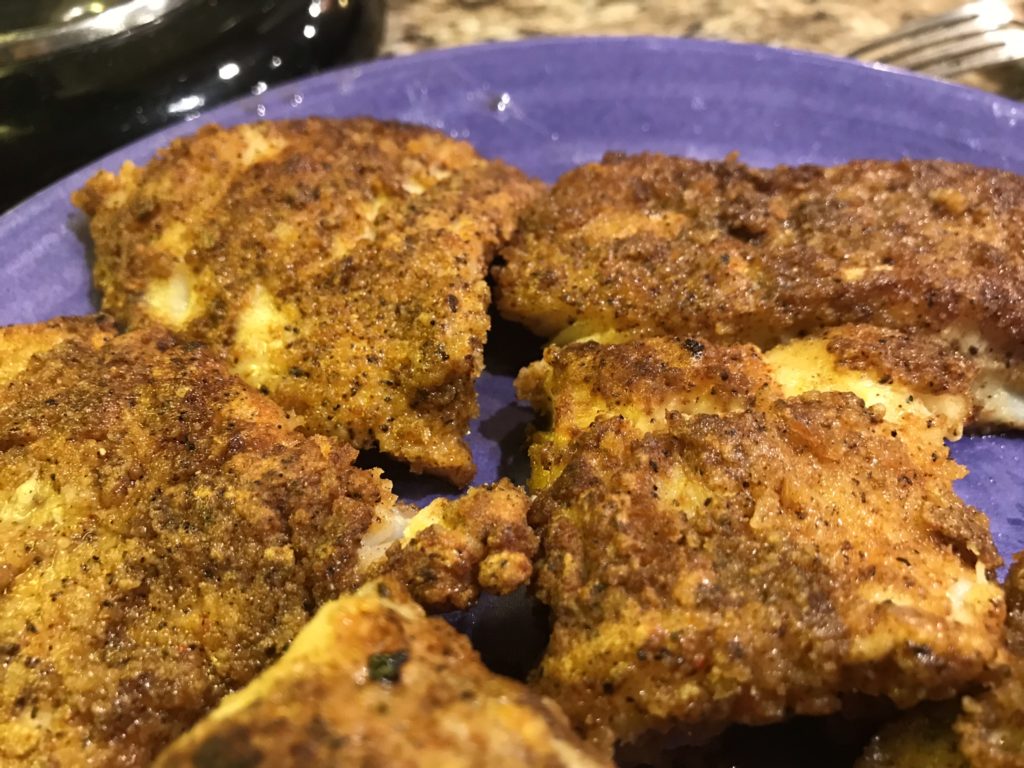
After 30 minutes, heat up an oven-proof skillet with some olive oil until it’s hot. Shake the excess marinade from your fish and place it in the pan. You’re going to be saving this marinade for a sauce. Cook each side for about 4 minutes. Season it with some salt and pepper because bland fish is no good. Leave it in the skillet and put it in the oven so it stays warm. I suppose you could skip the whole oven situation, but it’s a nice touch. No one likes cold fish. Unless it’s salmon over a delicious salad, but that’s for another day.

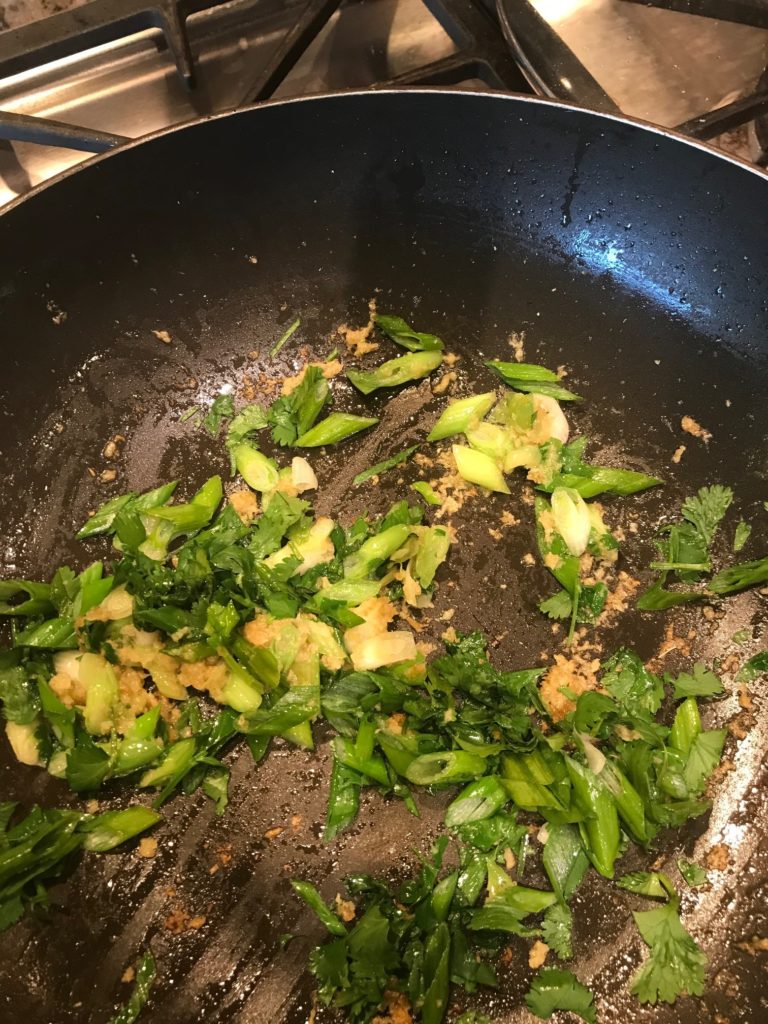
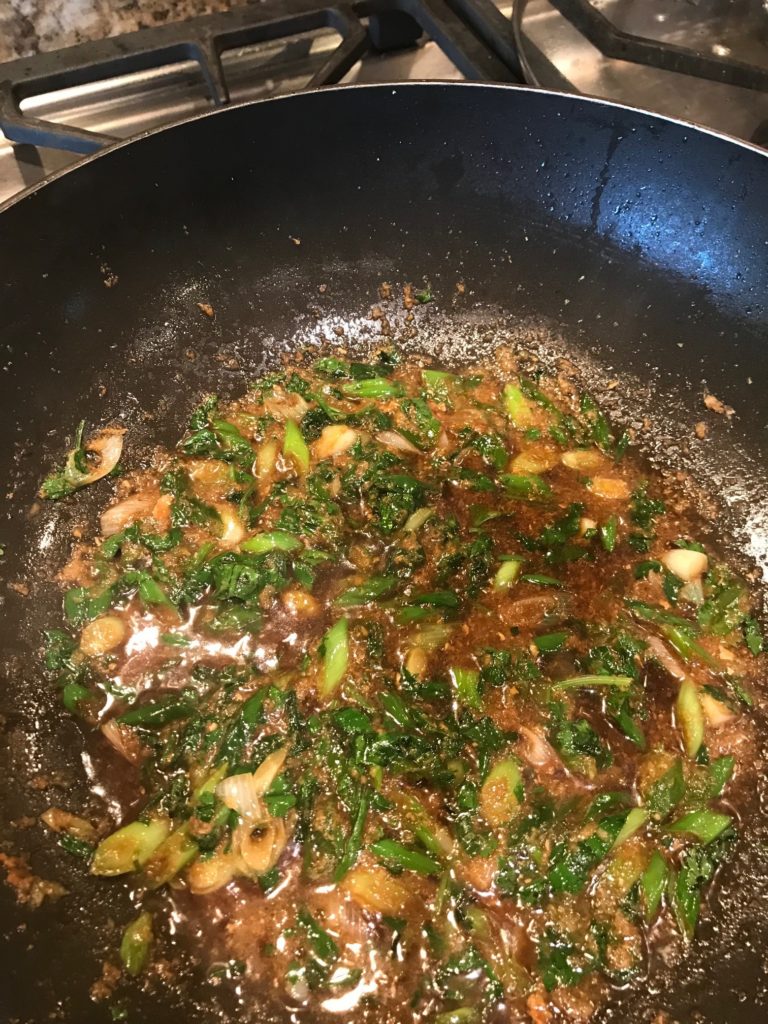
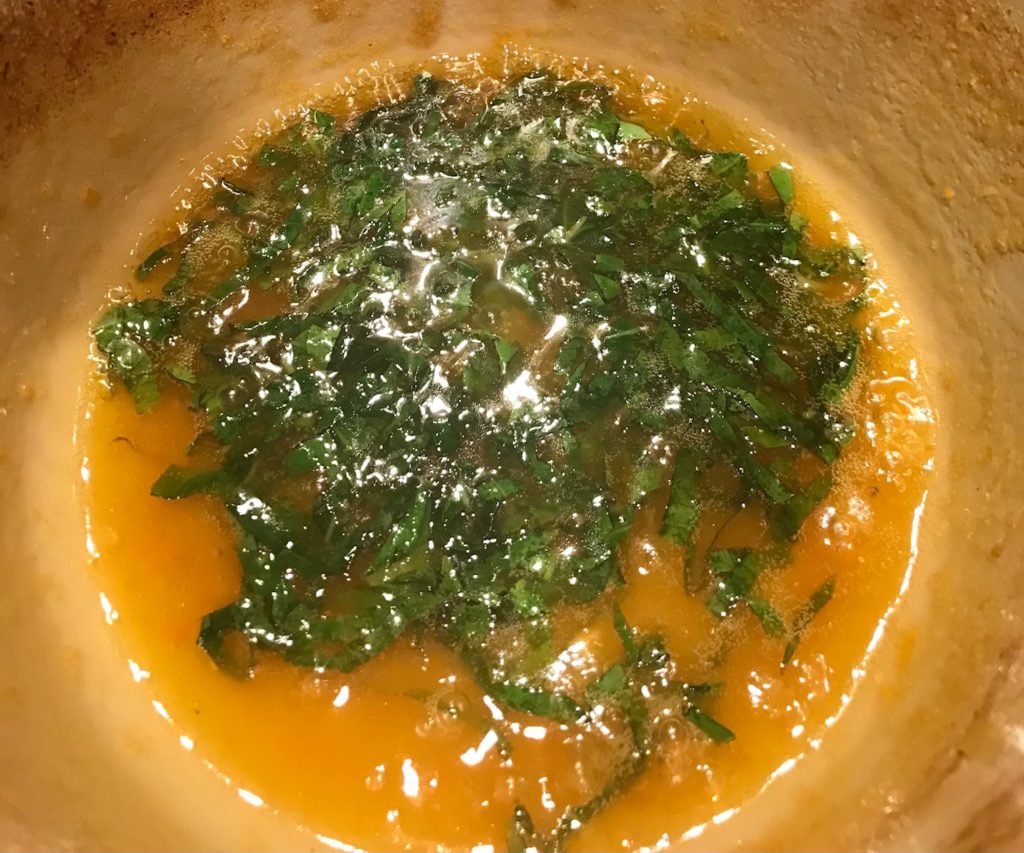
Time to make your sauce. Melt some butter with some brown sugar in a pan and throw in the marinade. Squeeze a couple more oranges and add the juice. Boil it up and be patient. It needs to thicken and I swear it will eventually. It took me about 7 minutes, which doesn’t sound like a long time, but it is if you’ve never done this before and you’re staring at it (hurry up and boil, why don’t you!). But take my advice. You basically want to coat your spoon with the sauce and call it good. When it finally does thicken, throw in some shredded basil. Taste it. Add some salt and/or pepper if it needs it.

Citrus Cod

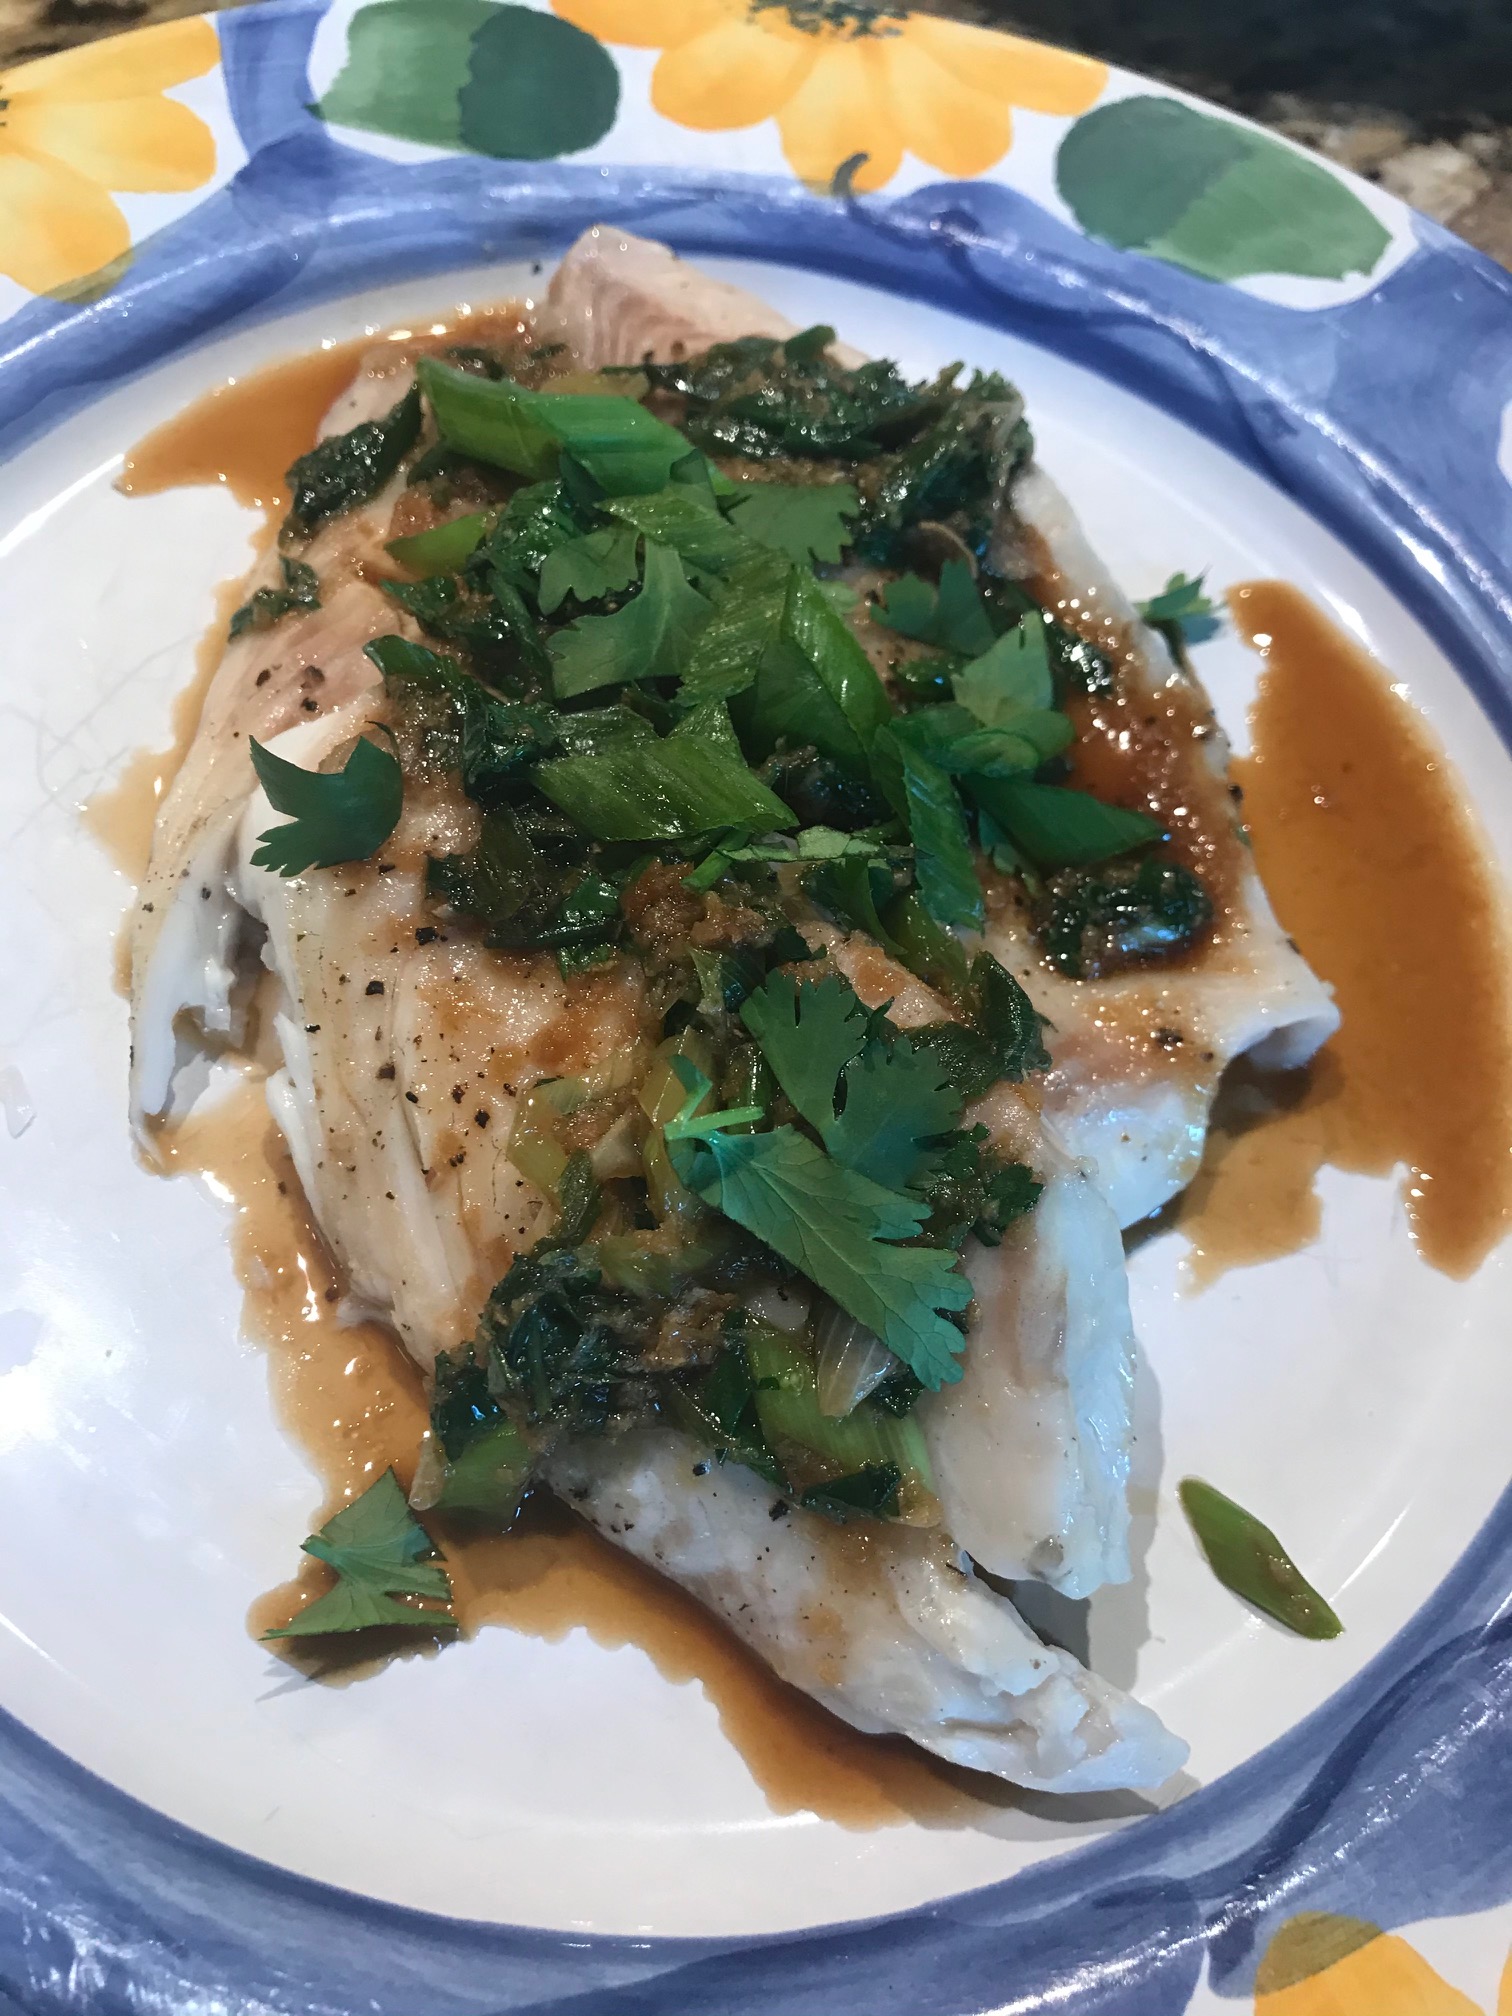
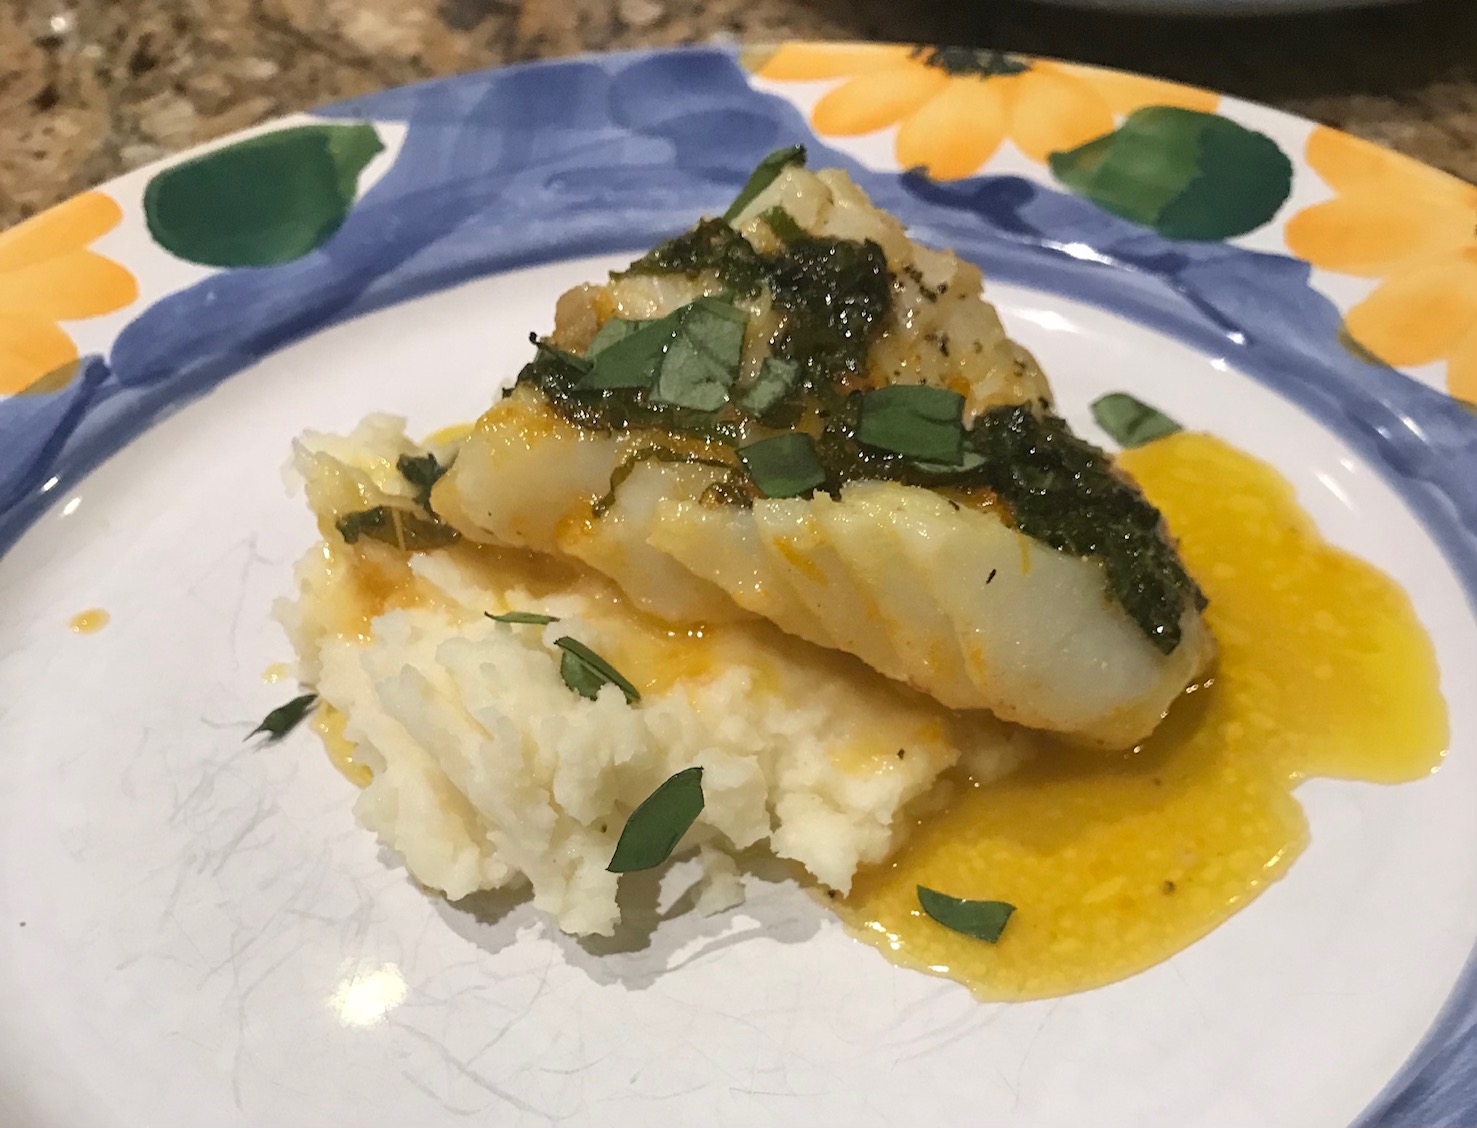
Pull your fish out of the oven and pour the sauce over it. Garnish with some more basil and serve with your favorite starch, like bread or rice. I think I had some leftover mashed potatoes that worked quite nicely.

Citrus Cod

I’m trying to incorporate more fish into my diet and this dish is an easy way to do that. It’s fancy while being easy. It’s light for summer without being too heavy. I think you’ll really like it!

Citrus Cod

Pan Fried Cod in a Citrus and Basil Butter Sauce

Servings 4

Ingredients
  

  • 1 pound cod
  • 3 oranges
  • 1 lemon
  • 1/2 cup olive oil divided
  • salt and pepper
  • 2 tablespoons butter
  • 1 teaspoon brown sugar
  • 1/4 cup basil

Instructions
 

  • Preheat the oven to 250 degrees F. Lay the cod in a shallow pan or baking dish. Combine the zest of 1 orange and 1 lemon, juice from the orange and lemon you just zested, and 1/4 cup of olive oil. Pour over the fish. Cover and let marinate for at least 30 minutes.
  • In a large oven safe skillet, heat the remaining 1/4 cup olive oil until hot. Carefully shake the excess marinade from the fish, saving it, and drop the fish into the pan. Season the fish with some salt and black pepper. Cook over medium heat for about 4 minutes, and then flip and repeat on the other side. Place the fish into the oven to keep warm while you make the sauce.
  • In another smaller pan, melt butter, and add the brown sugar and remaining leftover marinade from the fish. Slice the remaining orange in half and squeeze the juice into the pan. Bring to a boil, whisking regularly until the sauce has thickened slightly and reduced by almost half, about 7 minutes. The sauce should coat the spoon.
  • Add about 1/4 cup of finely shredded basil leaves to the sauce. Taste and add salt and pepper, if necessary. Bring the fish from the oven and place on your plate. Spoon some of the thickened sauce over it. Add more basil if desired.
Blog

Cantonese Steamed Fish

Jump to Recipe

We have a favorite Chinese restaurant in town called Fat’s that makes this amazing Cantonese steamed fish. I wanted to try making it at home. It’s a little out of my comfort zone because I don’t have much experience steaming anything, but how hard could it be? People steam stuff all the time. It’s not like I’m making a souffle or macarons. Actually, let’s not speak of the time I tried making macarons. They turned out chewy. Enough said.

Some people use bamboo steam baskets, but I decided to go with an old-fashioned metal steam basket like the kind my mom used to use to make that awful mushy steamed broccoli she’d serve for dinner. Let’s not speak of that either.

Let’s prep the ingredients. Grate some fresh ginger. Slice up some green onion. Rough chop the cilantro. Set aside a bit of green onion and cilantro for garnish. Measure out the soy sauce, salt, sugar, and vegetable oil. Grab some hot water.

Cantonese Steamed Fish

Mix together soy sauce, salt, sugar, and hot water. Set aside. Now comes the fun part. Grab a wok and add a couple inches of water. It doesn’t need to be precise, but the water level needs to be below your steamer. When you stick your steamer in the wok, if there’s water in the steamer, you’ve got too much water.

Salt and pepper your fish. I chose tilapia because it was on sale and I’m all about the sales. Once your water is boiling, place the fish in the steam basket.

Cantonese Steamed Fish

Cover and steam it until the fish is cooked. Mine looked like this and took about 9 minutes.

Cantonese Steamed Fish

Time to make the sauce. I poured out the water from the wok, wiped it dry, and heated it up with vegetable oil. Cooked the ginger, added the white parts of the green onion, cooked it some more, added the rest of the green onions and cilantro. Everything smells pretty good at this point.

Cantonese Steamed Fish

But wait! There’s more! Add the soy sauce mixture you made earlier. and bring it to a simmer. When everything looks a bit wilted, you’re done.

Cantonese Steamed Fish

Pour it over the fish and throw some green onions and cilantro on top to make it look pretty.

Cantonese Steamed Fish

It’s not fancy. It’s just good food. I love how the ginger made it spicy and the soy sauce made it salty. The touch of sugar made it a bit sweet and the fish was moist unlike when you roast it in the oven or fry it in a pan. Definitely a make again.

Cantonese Steamed Fish

Cantonese Steamed Fish

Ingredients
  

  • 2 tablespoons ginger
  • 4 green onions
  • 1/2 cup cilantro
  • 3 tablespoons light soy sauce
  • 1/4 teaspoon salt
  • 1/4 teaspoon sugar
  • 4 tablespoons hot water
  • 1 1/4 pounds white fish
  • 2 tablespoons vegetable oil

Instructions
 

  • Grate ginger. Slice green onions at an angle and separate the green and white parts. Rough chop cilantro. Save some green onion and cilantro for garnish, and then set the rest aside.
  • Combine the light soy sauce, salt, sugar, and hot water in a small bowl, and mix until the sugar and salt are dissolved. Set aside.
  • Prepare your steaming set up in a wok by filling the wok with 1-2 inches of water. Bring to a boil. Place a metal steam basket in the wok.
  • Rinse fish and then season with salt and pepper. Carefully place it on the steamer basket, and adjust the heat to medium. The water should be at a slow boil and generates a good amount of steam.
  • Depending on the size and thickness of the fish, cover and steam for 7-10 minutes until cooked through. Turn off heat and set aside.
  • To make the sauce, heat a wok or small saucepan to medium high heat, and add vegetable oil. Add ginger, and fry for 1 minute. Add the white parts of the green onion and cook for 30 seconds.Then add rest of the green onion and cilantro. The mixture should be sizzling.
  • Add the soy sauce mixture. Bring the mixture to a simmer, and cook until the scallions and cilantro are just wilted, about 30 seconds. Pour mixture over fish. Garnish with green onions and cilantro.
Blog

Crunchy Fish Tacos

Jump to Recipe

Tacos are amazing. It’s a perfect little meal with all the food groups. A crunchy corn shell or maybe a soft flour tortilla. Spicy chicken. Flavorful pork. Bold beef. Roasted peppers. Red salsa. Creamy guacamole. Cotija cheese. My mouth’s watering.

I’ve been wanting to try new taco recipes, but sometimes the endless number of ingredients are hard to find. The preparation takes hours and requires skills that I just don’t have. I nearly gave up until I found this amazing recipe for fish tacos. It was completely out of my comfort zone, but everyone needs to start somewhere. And I just read something about failing is part of the process of success so I’m going to go to my happy Zen place and make these tacos. It’s good for the soul.

Fish comes in all forms, shapes, and sizes. You have your traditional white fish, such as cod or mahi mahi, that works really well in tacos, but this recipe is more exotic. Instead, you use a rare small orange fish only found in the farmed waters of Pepperidge. I thought I would have to special order it because I couldn’t find it at my fish market, but I just wasn’t looking in the right place. It’s next to impossible to buy fresh so I purchased a well-sealed bag and made the best of it. I was skeptical, but pleased at the same time. The fish comes ready with seasonings such as salt, pepper, cheese, paprika, and onion powder. Preparation is easier when all the ingredients are already baked in. No poblanos to roast. No corn to mill. No special sauces to make from the tears of unicorns.

Fortunately, you can use any type of tortilla for this taco. I chose a crunchy white corn taco shell.

Oh, before I continue, you might not want to make this around small children who tend to sneak a piece of fish or two. They need to be patient and wait for dinner. Go feed them a cookie instead.

Open your taco shells. I like how they aren’t broken. Briefly heat them up in the microwave.

Crunchy Fish Tacos

Carefully open the bag and gently measure out 1/2 cup of fish, taking care not to break the fish or disrupt the seasonings.

Crunchy Fish Tacos

Next, place the fish into the taco shell, being mindful not to spill outside of the shell.

Crunchy Fish Tacos

That’s it. So simple! The crunchy texture with the salty cheese blends together beautifully with the crispy corn shell. I can’t believe I didn’t make this sooner. Enjoy! And don’t forget to follow me for more recipes!

Crunchy Fish Tacos

Crunchy Fish Tacos

Servings 4

Ingredients
  

  • 4 crunchy shells
  • 2 cups fish
  • Condiments to your liking

Instructions
 

  • Microwave your taco shells briefly, about 30 seconds.
  • Take a taco shell. Measure out 1/2 cup of fish. Pour into shell. Repeat until you've made 4 tacos.
  • Top with your favorite condiments. Enjoy!
Blog

Brazilian Fish Stew (Moqueca)

Jump to Recipe

In my attempts to make something other than chicken, I came across this Brazilian fish stew also known as moqueca, which is pronounced mo-KEH-kah. It’s amazingly easy to make and really affordable depending on the fish you use. I chose cod, which is a bargain these days, but you can use halibut, sea bass, or even shellfish. I did a little research to find out more about moqueca and was disappointed that not much turned up. It was originally cooked in clay pots, but today’s Dutch oven works well. There are many variations of it, but it’s typically a tomato-based broth with onions, peppers, garlic, and lime. The best write up I found about it is from Olivia’s Cuisine.

This recipe, from Little Ferraro Kitchen and adapted from Simply Recipes, is super simple and contains nothing unusual that requires you to go to an ethnic grocery store to purchase. Moqueca can be more complicated than the recipe I tried if you want a more authentic version. Regardless, this stew is both healthy and comforting, especially on a cold rainy day, and you can make this version in under an hour so it’s definitely a week night meal. I did make a couple changes, but nothing major.

Gather your ingredients. Chop up yellow and green onion, peppers, and garlic. Grab paprika, cayenne, coconut milk, fish and vegetable stock, and jasmine rice. Cut up your fish into 2-inch pieces, and season it with salt and pepper. Zest a lime and you’re ready to go.

Brazilian Fish Stew (Moqueca)

Start by sauteing your onions and peppers until they are slightly soft. There’s jalapeno in this recipe, but it really just adds flavor, not heat. Use the entire jalapeno if you’re looking for something spicier, but I removed the ribs and seeds.

Brazilian Fish Stew (Moqueca)

Add garlic, spices, and mix. Let it cook for a minute and until it smells delicious, if it doesn’t already. Add tomato and cook some more.

Brazilian Fish Stew (Moqueca)

Add fish, fish stock, and coconut milk. If you can’t find fish stock, vegetable stock works too. Add lime zest and add some more salt and pepper.

Brazilian Fish Stew (Moqueca)

Bring to a simmer and cook for 20 minutes. While that’s going on, make some extra fancy rice (anything other than white rice is fancy). Saute some onion and garlic in olive oil (that’s the fancy part). Add rice and mix it well. Pour in vegetable stock (more fanciness). Bring it to a boil and cook for 20 minutes.

When it’s all done, serve the stew over rice or side by side. Top with green onion. Some cilantro would have been nice too, but I was so ready to dig in I forgot. The chunks of fish were so tender and flavorful. The tomato was rich with a tiny hint of spice from the jalapenos and cayenne. The broth tasted like it had been cooking for hours. My husband loved it. My son had to surgically remove all the chopped up veggies so he was less of a fan. Regardless, it’s a perfect winter meal that makes great leftovers if you can manage not to eat it all.

Brazilian Fish Stew (Moqueca)

Brazilian Fish Stew (Moqueca)

Servings 4

Ingredients
  

Fish Stew

  • 2 tablespoons olive oil
  • 1/2 yellow onion chopped
  • 1 red bell pepper seeds removed and chopped
  • 1 yellow bell pepper seeds removed and chopped
  • 1 jalapeno seeds and ribs removed, and chopped
  • 2 cloves garlic chopped
  • 1 teaspoon paprika
  • pinch cayenne
  • 1 pound cod
  • 15 ounces chopped tomato
  • 2 cups fish stock
  • 1 can coconut milk full fat, not light
  • 1 lime zested
  • salt and pepper to taste
  • green onions for garnish

Rice

  • 1 tablespoon olive oil
  • 1/2 yellow onion chopped
  • 1 clove garlic chopped
  • 1 cup jasmine rice
  • 2 cups vegetable stock
  • salt and pepper to taste
  • cilantro rough chopped
  • green onions for garnish

Instructions
 

  • In a large pot, heat olive oil on medium heat for a minute, Saute chopped onion, bell peppers, and jalapeno until lightly soft, about 6 minutes. Add chopped garlic, paprika, and cayenne. Stir to combine, for another minute.
  • Add chopped tomatoes with their juice. Stir and cook for 2 minutes.
  • After cutting the fish in 2-inch chunks, dry the fish very well with a paper towel. Season with salt and pepper on both sides. Add the fish, fish stock, coconut milk, and lime zest. Season with salt and pepper. Cover and cook for about 20 minutes on medium-low heat or until the fish is fully cooked.
  • While stew is cooking, make the rice. In a small pot, saute chopped onion and garlic in olive oil until lightly caramelized. Add jasmine rice, and stir to coat so onion and olive oil are evenly distributed through the rice.
  • Add vegetable stock, and season with salt and pepper. Bring rice to a boil, lower heat to a simmer, cover, and continue cooking for about 20 minutes or until the liquid has evaporated.
  • Serve by spooning the stew over a bowl of rice, or serve the stew and rice side by side. Garnish with cilantro and chopped green onions.
Blog

Garlicky Lemon Baked Tilapia

Jump to Recipe

I love fish, but sometimes I don’t know what to do with it. Salt and pepper with a squeeze of lemon seems to be my fallback, but it’s not very exciting. I want something more memorable, but not overpower the fish. Let’s keep it simple.

I came across a recipe from Delish that seems to be the solution to my fish situation. Making this recipe is so easy and good that I want to try it with other white fish to compare. Tilapia is a good choice though. It’s still relatively inexpensive, doesn’t have any bones to pluck out, and is tasty. Picky eaters like tilapia because it’s mild, not fishy. You’ll especially love the recipe if you’re a fan of garlic. If not, you might want to skip this round.

Line a baking sheet with aluminum foil for easy cleanup. Plop your fish on the foil. Season with salt and pepper.

Garlicky Lemon Baked Tilapia

Combine melted butter, minced garlic, lemon juice and a little lemon zest. Pour this over your fish. Add some sliced lemon and bake until the fish gently falls apart when you stab it in the middle with a fork (no, I’m not violent, just accurate).

Garlicky Lemon Baked Tilapia

Done.

Garlicky Lemon Baked Tilapia

That’s it. Can you believe it? I did drizzle a bit of the sauce over the fish and served it with couscous for the boys. I made myself a side salad. I even made the time to sprinkle some pretty parsley leaves to make it look fancy. Everyone was happy. Despite the name, it wasn’t too garlicky. There was the perfect amount lemon tang and no shortage of buttery goodness. Make again.

Garlicky Lemon Baked Tilapia

Garlicky Lemon Baked Tilapia

Servings 4

Ingredients
  

  • 4 tilapia
  • kosher salt and freshly ground pepper
  • 5 tablespoons butter melted
  • 2 cloves garlic minced
  • juice and zest of a 1/2 of lemon
  • 1 lemon round slices
  • chopped fresh parsley for garnish

Instructions
 

  • Preheat oven to 400F. Season tilapia with salt and pepper. Place on an aluminum lined baking sheet.
  • Mix together melted butter, minced garlic, lemon juice, and lemon zest. Pour over tilapia. Top with lemon rounds.
  • Bake tilapia for 10 to 12 minutes. Garnish with fresh parsley.
Blog

Soy-Maple Salmon

Jump to Recipe

Seafood is so damn expensive.

We’ve been trying to cut our grocery bill because it seems what we spend is so outrageous for a family of three so I’ve been buying a lot of ground beef and chicken thighs. My family finally complained. I was sort of missing fish too so I broke down and bought three salmon fillets. I thought they were $7.99 a pound. Wow! What a great deal! After the seafood dude wrapped them up for me, I saw the real price and gasped. No, they were $7.99 each. Damn. I bought them anyway.

So at this price, I better not mess it up. Or I will cry.

When it comes to fish, simple is best. I went with a trusted recipe from the Food Network where you marinate the salmon in a few ingredients: soy sauce, real maple syrup, orange juice, garlic, and water. It has that salty, sweet thing going for it.

Soy-Maple Salmon

The key thing to learn here is that more is not better. Do not marinate your salmon for too long or the proteins start to break down. The results: a mushy piece of fish. Which would make me cry.

Let your salmon soak for about 20 minutes.

Soy-Maple Salmon

Twenty minutes later, pull it out of the marinade, season it with some salt and pepper, and bake it for about 10 minutes, depending on the thickness. That’s it!

I started checking on it after 8 minutes. The last thing you want is overcooked salmon. Take a fork and gently peek in the middle. It needs to flake a little and be slightly pink instead of deep pink. If it’s a little under cooked, it’s okay to pull it out of the oven and let it finish as it rests. It’s so much easier to stick it back in the oven if you have to. Once it’s overcooked, it’s all over. And that would make me cry. Notice a theme of sorrow?

Serve with bread or rice, and a salad or some fruit. The original recipe included directions to make a cauliflower side, which sounded good to me, but I knew my family would veto it. I decided to make one of my crazy salads instead where I combine every salad ingredient I can find in the fridge and top it with bacon. Because everything is better with bacon.

Soy-Maple Salmon
Soy-Maple Salmon

Soy-Maple Salmon

Servings 3

Ingredients
  

  • 2 tablespoons low-sodium soy sauce
  • 2 tablespoons real maple syrup
  • 1 tablespoon orange juice
  • 3 cloves garlic smashed
  • 3 5-ounce skinless center-cut salmon fillets

Instructions
 

  • Preheat the oven to 400F.
  • Mix everything together (except the salmon) with 2 tablespoons of water in a large bowl.
  • Add the salmon and turn to coat. Cover and refrigerate for 20 minutes.
  • Coat a rimmed baking sheet with cooking spray. Drain the salmon, season with salt and pepper, and place on the baking sheet.
  • Bake for about 8 to 10 minutes, until it's a slight pink in the middle.
Blog

Fish Tacos

Jump to Recipe

It’s been a difficult week and because of it, I’m posting only one recipe this weekend. Without going into the politics, PG&E cut power to over 700,000 households and we were one of them. Lucky us. So, yes, I could have cooked in the dark, pretended it was like camping, and roughed it. But frankly, I was not in the best mood so we went out to dinner instead. And again.

Two days later, the power was back on, but it took another two days to restore Internet and TV services. ARGH. In the meantime, I was busy throwing away half my fridge with all my food blog recipe ingredients. I have no idea how those off-the-grid people survive. Oh, wait, yes….they have a generator. We do not. Because we live in suburbs, not the country. Where the power should never go out for more than a few hours. Ok, calm down, Flora.

Enough of feeling sorry for myself. It’s time to treat myself to my favorite food: tacos.

Almost every Tuesday, we have tacos. I love tacos. No really. I’m not kidding when I say I love tacos. When I went to Houston in August, I ate tacos 4 days in a row. I still miss those tacos.

So as part of my recovery, I decided to make fish tacos. Yummy, slightly spicy, comforting tacos.

Here are the seasonings and breading. If you don’t like any crunch, use all flour instead of a panko blend. Later you’ll use an egg wash to get the breading to stick, but you can skip that too for a softer exterior. I wanted mine to have a slight crunch to mimic deep fried fish. This recipe is totally healthier than that.

I used cod, which is fairly reasonably priced compared to other fish, but you can use tilapia, which is a little cheaper, or upgrade to halibut. Any white fish will do.

To get the breading to stick, I like to use an egg wash, which is really just an egg whisked so the whites and yolks are mixed together. I also like to use tongs or a fork to dip the fish and then into the breading. It makes a lot less mess on your fingers. And if you have long nails, trust me when I say you do not want to use your hands.

The fish doesn’t need to be perfectly coated because they come out tasty no matter what, and you might want to break the fish apart in your taco anyway. Just make sure to shake off any excess breading. It’ll help prevent the breading from falling off your fish when you fry it.

If you haven’t already, buy yourself a cast-iron pan. You’ll use it over and over again for lots of recipes, like Cast Iron Pizza. Although non-stick pans and stainless steel serve their purpose, cast iron pans are durable, non-stick, and last forever. Just don’t drop it on your foot. They are incredibly heavy. Ouch.

Also invest in a fish spatula. It’s like your typical spatula but longer and curved, which makes it so much easier to flip stuff like fish, but it works on any meat, including chicken and beef. There’s nothing more frustrating than doing everything right, but not having the right equipment. It’s like using a bicycle when you really need a car. Or something like that.

When you heat up the olive oil, I like to put a timer on it. What seems like 3 minutes ends up being only 1 minute, and you really need to heat up the oil to the correct temperature so you don’t end up with soggy fish. I usually heat the oil on medium heat for about 3 minutes. Some say to look for a slight shimmering of the oil, but my eyes just don’t see that very well (no, I’m not old…just blind, apparently). Instead, I throw a bit of breading into the pan and if it sizzles, it’s ready.

Turn the temperature down slightly. I find that the pan continues to heat up, and I don’t want that or I’ll end up with burnt fish. Place one piece of fish in the pan. If it sizzles, the temperature is perfect. If it doesn’t wait another 30 seconds or so before adding the next piece.

When you add all your fish, make sure they aren’t touching. Overcrowding causes more moisture than you want so your fish ends up sauteing instead of frying. Resist the temptation to squeeze all your fish pieces into one pan. Just fry it in two batches instead.

Cook for about 3-5 minutes on each side. If it’s a steak or thicker cut, go for 4 or 5 minutes. If it’s a filet or thinner cut, go for 3 minutes. Whatever you do, do not poke and prod the fish. Let it cook. Flipping it over and over messes everything up. Trust me on this.

If you’ve followed these guidelines, your fish should not stick to the pan when you flip it. Carefully nudge your fish a little to check. If it’s stuck or doesn’t give freely, it’s not ready yet. Give it another 30 seconds to a minute. Those bread crumbs haven’t cooked enough to release from the pan. If you flip it too soon, you’ll end up with your breading stuck to the pan, not to your fish. When you flip it, the fish should look golden brown.

Place fish on tortillas and add your favorite toppings. Yum…happiness.

Fish Tacos

Fish Tacos

Servings 4

Ingredients
  

  • corn or flour tortillas your favorite size
  • 1 egg beaten
  • 1/4 cup all-purpose flour
  • 1/4 cup panko breadcrumbs
  • 2 teaspoons chili powder
  • 1 teaspoon kosher salt plus more for seasoning
  • 2 teaspoons ground black pepper plus more for seasoning
  • 1 pound skinless white fish such as cod, halibut, tilapia, etc.
  • 2 tablespoons olive oil
  • your favorite toppings: crema, sour cream, lime juice, red onions, shredded cabbage, cilantro, avocado, pico de gallo, salsa, hot sauce, etc.

Instructions
 

  • Whisk an egg in a small bowl. Set aside.
  • Stir together flour, panko, chili powder, salt, and pepper in a shallow bowl. Set aside.
  • Using tongs, a fork, or your fingers, dip fish into the egg wash and then coat with the flour mixture.
  • Heat the oil in a cast iron (or non-stick) pan over medium heat until the oil is shimmering. Add the fish to the pan without crowding the fish. Cook the fish for about 3 to 5 minutes until it's cooked halfway through the sides. The bottom should be golden brown and not stick to the pan. Wait another 30 seconds and check again before flipping.
  • Using a fish spatula, flip the fish over. Add more oil if the pan looks dry. Cook for another 3 to 5 minutes until it flakes.
  • Warm up the tortillas in a pan or microwave. Add fish to tortillas, breaking pieces apart if needed. Add toppings and serve.