Blog

Tuscan Tortellini Soup

Jump to Recipe

Fall is here! In northern California, the trees are still covered in green leaves and the temperature is in the 80s, but officially it’s fall. Halloween is just around the corner. Pumpkin-spiced <fill in the blank> is everywhere. I’m loving the candy at the grocery store. It’s one of my favorite times of year. And it’s soup weather. Then again, it’s soup weather year round to me!

This recipe is REALLY easy to make, but it feels like you’ve been working on it for hours. It’s especially tasty to those who love tortellini, like my family. It comes from delish, but I’ve added a few changes.

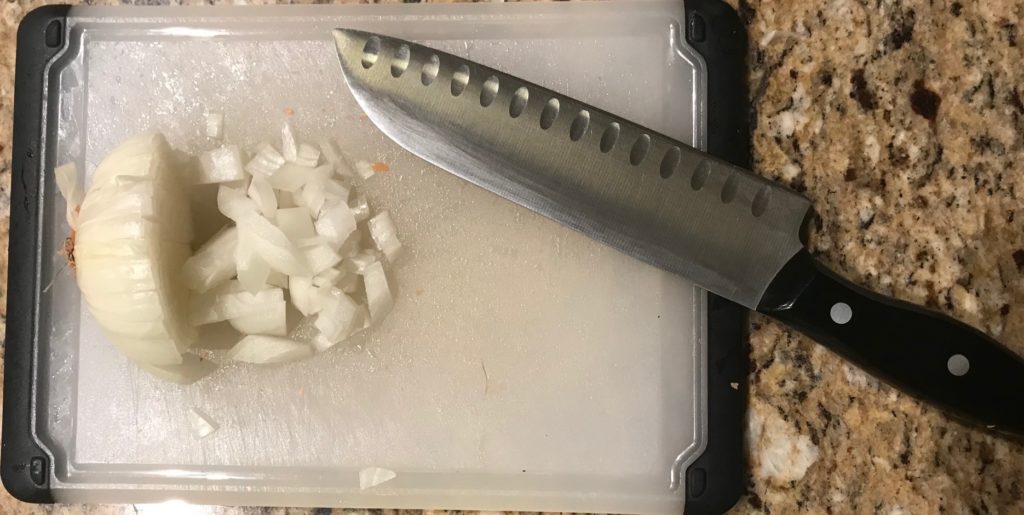
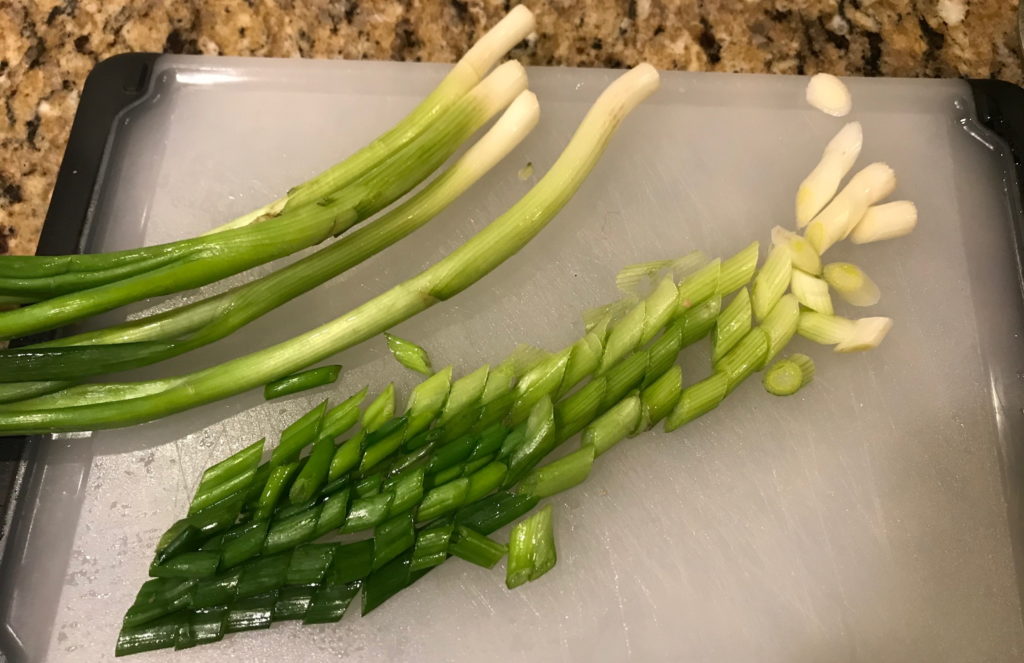
Time to prep! Chop up an onion. Slice up some cooked chicken sausages. You can really use any type of sausage you want so feel free to experiment. Mince a couple garlic cloves. Open a few cans: crushed tomatoes, chicken broth, and white beans. Having canned beans instead of dried makes this soup cook quickly. Measure out the red pepper flakes. Open packages of tortellini and spinach (see, you’ll get your veggies too!).

In a Dutch oven or large pot, heat some olive oil and start cooking! First, the onions. Then the sausage.

Tuscan Tortellini Soup

Add your garlic next and don’t let it burn. Stir in the tomatoes, broth, and red pepper flakes. Throw in some salt and pepper to your heart’s content. Are you seeing how easy this is?

Boil it and then throw in the tortellini.

Tuscan Tortellini Soup

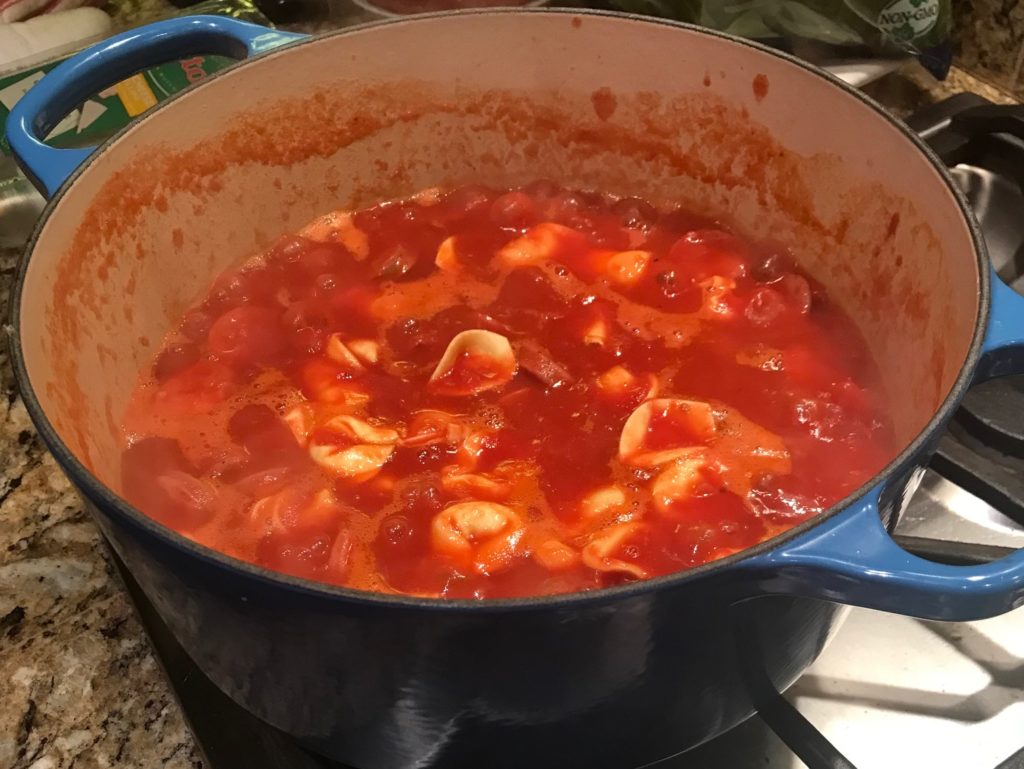
Turn the heat down to medium-low and cook for about 5 minutes. The original recipe said 18-20 minutes, but that’s crazy. Your tortellini will be mush by then.

Add the beans and spinach and cook until the spinach is just wilted.

Tuscan Tortellini Soup

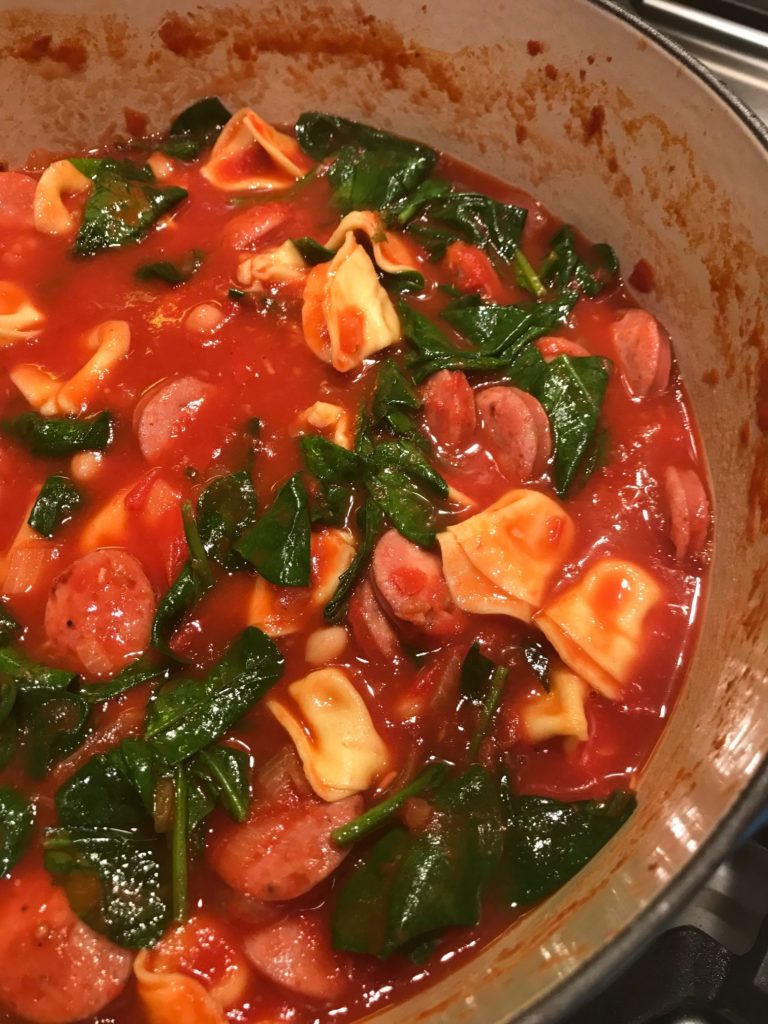
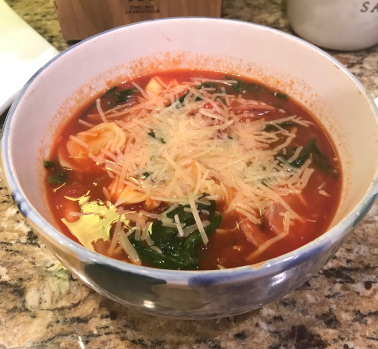
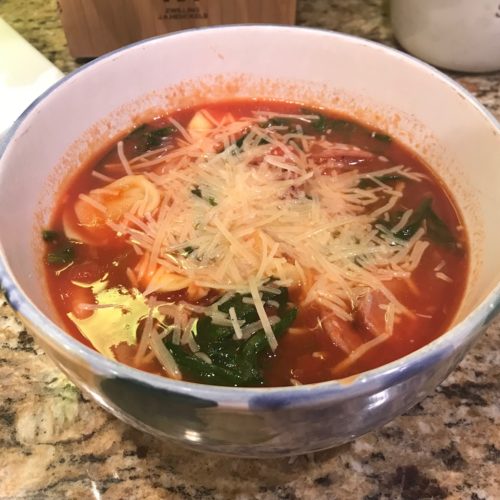
Scoop into bowls and sprinkle some Parmesan cheese on top. That’s it. Seriously.

Tuscan Tortellini Soup

I don’t think it can get any easier than that and it takes so much better than anything from a can. Serve with slices of warm bread and pretend you’ve worked all afternoon on dinner. The only downsize is that it doesn’t make very good leftovers so if you can’t finish it all (what?!), scoop out the tortellini and save in a separate container. Add it back in when you heat it up again. But never mind that. It’s so delicious you’ll not have any leftovers.

Tuscan Tortellini Soup

Tuscan Tortellini Soup

Servings 4

Ingredients
  

  • 1 tablespoon extra-virgin olive oil
  • 1/2 medium yellow onion chopped
  • 12 ounces cooked chicken sausage links sliced into 1/2-inch rounds
  • 2 cloves garlic minced
  • 28 ounces canned crushed tomatoes
  • 4 cups chicken broth
  • 1/2 teaspoon crushed red pepper flakes
  • 9 ounce refrigerated cheese tortellini
  • 15 ounce canned white beans drained
  • 5 ounces baby spinach
  • freshly shredded Parmesan cheese for serving

Instructions
 

  • In a Dutch oven or large pot over medium heat, heat oil. Add onion and cook, stirring, until soft, about 5 minutes. Add chicken sausage and cook until golden, about 4 minutes. Add garlic and cook until fragrant, 1 minute more. Stir in crushed tomatoes, broth, and red pepper flakes, and season generously with salt and pepper.
  • Bring to a boil and add tortellini. Reduce heat to medium-low and simmer until tortellini is cooked, about 5 minutes.
  • Stir in white beans and spinach and cook until spinach has wilted, 2 minutes more.
  • Serve with Parmesan cheese.
Blog

Lora’s Pressure-Cooker Red Beans and Rice

Jump to Recipe

No, it’s not a typo. This is is Lora’s recipe, not Flora’s. It’s also the last dish I made to finish off the Christmas ham. You’ll find this recipe to be super tasty and easy to make plus there are tons of leftovers that are good to freeze. The hardest part is to remember to soak the beans the night before. Make yourself a little reminder so you don’t forget.

Before you start prepping your ingredients, make some rice. I use my Instant Pot as rice cooker, which is what I did, but you can obviously make it over the stove. I just recommend getting this out of the way before you make the rest of the meal.

While your rice is cooking, start on your chopping. There’s a lot of chopping, but that’s ok. You’ve got this. For instance, chop up an onion by using this little trick of cutting the onion in half, leave the root attached, slice into strips up to the root, and then across. You’ll end up with perfectly chopped onion pieces.

Red Beans and Rice

After you’ve chopped your ham and veggies into bit-sized pieces, start adding everything to your Instant Pot.

Red Beans and Rice

The only changes I made was to use Italian-style sausage instead of andouille and the only hot pepper sauce I could find in my fridge was sriracha.

Toss everything in the Instant Pot pot except your rice, which should be done by now. I keep two stainless steels pots so I can switch them out for this very purpose. Pull the rice pot out and put the beans pot in. Seal it up and cook on high for 30 minutes. Quick release and you’re done. Seriously that easy.

Maybe this is a preference, I did find a lot more liquid than I would have liked so I used a slotted spoon to scoop out the bean mixture before serving it over rice. If I made this again, I’d experiment with 2 cups of water instead of 4.

Red Beans and Rice

This recipe makes 10 servings so you should have plenty to freeze for another time. I froze a couple containers without the recipe so I can make fresh rice next time.

Red Beans and Rice

Lora’s Pressure-Cooker Red Beans and Rice

Servings 10

Ingredients
  

  • 16 ounces dried kidney beans
  • 2 cups cooked ham cubed
  • 12 ounces Italian-style chicken sausage or other sausage sliced
  • 1 medium green pepper chopped
  • 1 medium onion chopped
  • 2 celery stalks chopped
  • 1 teaspoon sriracha or other hot sauce
  • 2 garlic cloves minced
  • 1 teaspoon salt
  • 4 cups water
  • hot cooked rice

Instructions
 

  • Rinse and sort beans. Soak overnight according to package directions. Drain, discarding water, and rinse with cool water.
  • Prepare rice ahead of time and set aside.
  • In a 6-qt. Instant Pot (or other electric pressure cooker), combine beans, ham, sausage, vegetables, sriracha, garlic, salt, and water.
  • Lock lid and close pressure-release valve. Pressure cook on high for 30 minutes. Quick-release pressure. Serve over hot cooked rice.
Blog

Slow Cooker Barbecue Beans and Sausage

I made this really delicious slow cooker recipe from The Food Network a few weeks ago when the weather started getting a little chilly. Hey, it’s slow cooker season! Then again, when is it not slow cooker season? Regardless, we are in pandemic mode, working and studying at home. Having the awesome smells coming the kitchen was an extra treat while plugging away. The end results were delicious plus it was super simple to make.

I didn’t change a thing. Not much more to say about that. Sometimes a recipe is just right.

I gathered my ingredients, but put aside the cider vinegar and Worcestershire sauce. You’ll add that later at the end. There were a lot of ingredients, but nothing too exotic.

Slow Cooker Barbecue Beans and Sausage

Slice an onion in half and stick a clove in each half. Ok, that’s a little strange, but it turned out not to be weird after all. The clove gave it a hint of spice that I wouldn’t have thought of. Next, slice the apple chicken sausages in half lengthwise. Throw everything in the slow cooker (well, measure first, of course) and mix, making sure the onion, sausage, and beans are all nestled in together. Cook on high for 6-7 hours until the beans are tender.

Remove the onions. They were there only to add flavor. Stir in vinegar and Worcestershire sauce. Then let it sit for at least 15 minutes. This last addition really gives it a tang.

And that’s it. Seriously. The hardest part was waiting. The apple sausage gave the dish a sweet taste that complemented the honey mustard and molasses. The dish was a perfect blend of tangy sweet and completely comforting. With the soft texture of the beans, everything felt like it was melting in your mouth.

Slow Cooker Barbecue Beans and Sausage

I will definitely make this again. We managed to eat most of the sausages in one sitting, but there were plenty of beans leftover, which we enjoyed as sides until they were gone.

Slow Cooker Barbecue Beans and Sausage

Slow Cooker Barbecue Beans and Sausage

Servings 6

Ingredients
  

  • 3 cups low-sodium chicken broth
  • 3 cups water
  • 1/3 cup tomato paste
  • 1/3 cup light brown sugar packed
  • 3 tablespoons molasses
  • 3 tablespoons honey mustard
  • 2 tablespoons barbecue seasoning blend
  • 4 garlic cloves chopped
  • 1 pound dry navy beans rinsed and picked over
  • 2 whole cloves
  • 1 small onion halved
  • 1 1/2 pounds chicken apple sausages halved lengthwise
  • 2 tablespoons cider vinegar
  • 1 tablespoon Worcestershire sauce

Instructions
 

  • Whisk the broth, water, tomato paste, brown sugar, molasses, mustard, barbecue seasoning and garlic in a slow cooker. Add the beans. Push a clove into each onion half. Tuck the onions and sausages into the beans in the slow cooker. Cover and cook on high until the beans are tender, about 6-7 hours.
  • Discard the onion halves. Stir in the vinegar and Worcestershire sauce. Let the mixture sit, uncovered, for at least 15 minutes. (The longer the beans sit, the more flavorful they will be.)
Blog

Beef and Italian Sausage Meatloaf

Jump to Recipe

I’m always on the hunt for the world’s best meatloaf recipe. It’s a home-style classic that is making a comeback, but it’s different now. We will no longer settle for the dense, dry loaf of our youth. Meatloaf can be delicious!

The secret lies with a few tricks.

Meat. You cannot use lean ground beef alone. It’ll come out dry because there’s no fat in it. When it comes to meatloaf, fat is your friend. If you want to make a leaner meatloaf, try a combination of lean and not so lean meats. For example, use lean beef or ground chicken with ground sausage (like in the recipe I’m going to share with you).

Breadcrumbs. Your best meatloaf might not be Keto or low-carb friendly. Sorry, but someone needs to discuss these truths. I’m sure there are bread substitutes (like almond flour) you can try, but that’s not this recipe. Straight up breadcrumbs make meatloaf less dense and help to hold in the juices. Remember, you are making meatloaf, not a meatbrick. If you are watching your carbs, just eat less meatloaf and more salad.

Vegetables. Shhhh! Meatloaf is a great way to hide those veggies your picky eaters won’t touch with a 10-foot pole. It also adds a bunch of moisture when the veggies break down and cook. The key is to chop them really finely so no one notices them. They’ll make your meatloaf tasty. The breadcrumbs will capture the juices and do its thing.

Do not over mix. I actually have a difficult time following this one. My OCD comes out. I have a tendency to mix everything together a lot because I want it well blended. But over mixing messes with the texture and leaves you with tough, dry meatloaf. You should barely mix it. You’ll end up mixing it a little more when you add the vegetables and then again when you put it in the pan. Whatever you do, do not compress it in the loaf pan. Smooshing (a real word) makes it dense, which is exactly what you are trying to avoid.

I’m a fan of several meatloaf recipes. Let me count the ways. Ina Garten’s Meat Loaf, BA’s Meat Loaf with Barbecue Sauce, and The Pioneer Woman’s Meatloaf are good choices, although I’m not a fan of ketchup on meatloaf. I’d like to try BA’s Best Beef-and-Bacon Meatloaf, but I’m skeptical because bacon on meatloaf never seems to crisp up for me. If you want to try a leaner one with turkey, go for Giada’s Turkey Meatloaf with Feta and Sun-Dried Tomatoes. I was impressed with the short cooking time of Sheet-Pan Glazed Meat Loaf and Blue Cheese Spinach Meat Loaf Muffins.

This recipe was inspired by The Spruce Eat. I needed to use up the leftover sausage from the Christmas dressing I made and this seemed like a perfectly good recipe to try out. I changed up the type of sausage to use and added a few tips for you. I was also surprised that they want you to pack the meat into a loaf pan, which is a big NO in my book.

Barely combine the meats, egg, and breadcrumbs. Remember, you’ll be mixing it again. Pulverize your canned tomatoes. I like to use a NutriBullet, but you can use a food processor or even chop it up with a knife. Chop up onion, garlic, and bell pepper into tiny pieces. Add these to a bowl along with your seasonings and cheese.

Beef and Italian Sausage Meatloaf

Mix it up with half of the tomatoes and meat mixture. Lightly press into a loaf pan.

Beef and Italian Sausage Meatloaf

Go find something fun to do while it bakes. Like make a bundt cake while watching HGTV. I know. I’m weird.

After an hour, spread the rest of the tomato mixture over the top of the meatloaf. I like it better than ketchup. There’s something not right about warm ketchup.

About 15 minutes later, pull it out of the oven and let it rest a bit like you would a steak. This helps keep the juices in. I did expect the tomato to brown a little, but it didn’t. and that’s okay.

Not your mom’s meatloaf. Better. But don’t tell her.

Beef and Italian Sausage Meatloaf

Beef and Italian Sausage Meatloaf

Servings 6

Ingredients
  

  • 1 pound lean ground beef
  • 1/2 pound ground Italian sausage
  • 1 large egg slightly beaten
  • 3/4 cup breadcrumbs
  • 14.5 ounces diced tomatoes divided
  • 1/2 onion finely chopped
  • 2 cloves garlic minced
  • 1/2 bell pepper any color, finely chopped
  • 1 1/2 tablespoons dried basil
  • 1 teaspoon dried oregano
  • 1 teaspoon salt
  • 1/4 teaspoon ground black pepper
  • 3/4 cup Parmesan cheese freshly shredded

Instructions
 

  • Spray cooking oil in a 9 x 5 x 3-inch loaf pan. Preheat the oven to 375F.
  • In a large bowl, combine meats, egg, and breadcrumbs until barely blended.
  • Puree tomatoes in a food processor.
  • Add half of the tomatoes to the meat mixture. Then, add diced onion, minced garlic, diced pepper, basil, oregano, salt, pepper, and shredded cheese to the meat mixture. Mix until barely blended.
  • Put meat mixture into the loaf pan. Bake for 1 hour.
  • Top with remaining tomatoes. Bake for another 15-20 minutes, or until the internal temperature is about 155F.
  • Allow the meatloaf to rest for about 5 minutes, slice, and serve.
Blog

Kielbasa Fried Rice

Jump to Recipe

Fried rice is yummy and convenient. It’s one of those things you can usually make with your spare ingredients. All you need is some meat, veggies, rice, and eggs. Some soy sauce and garlic helps too.

So why don’t I make fried rice very often? Because I’m on this low carb deal and I’d have to make two sets of fried rice, one with actual rice and the other with riced cauliflower. I should try that sometime, but now is not this time. Instead, I’m going to run through this two-thumbs up fried rice I made the other night. I found the recipe on Bon Appétit, but it wasn’t in a recipe format so providing you with a recipe is my value add here. That and I’ll explain a few things because I have opinions and you’re reading this so I might as well share them with you.

The nice thing about this recipe is that you can use fresh rice. Most fried rice uses leftover rice, which you can still use, but I rarely have cooked rice around so I made some in my Instant Pot before I started.

Although this recipe uses kielbasa, you can use any protein like chicken, pork, tofu, or even a combination. Whatever you have should work. I purchased kielbasa because I wanted to follow the recipe exactly and I was not disappointed.

I sliced up the kielbasa and then the green onions at an angle (other than it looks fancier, I have no idea why recipes suggest this) and garlic. Again, you can probably use any type of onion. I was a little wary of not mincing my garlic, but it all worked out fine.

Kielbasa Fried Rice

Throw the kielbasa in the pan. Then, don’t touch it! When you brown the kielbasa, be sure not to constantly stir it around. If you do, you’ll end up with warmed up, bland meat. Blah. Searing the meat is key. You want to let it sear on one side before moving it around so it creates a nice, golden caramelization that adds a bunch of flavor to your dish.

Add your onions, garlic, and a pinch of salt, and then flip the meat over to cook the other side.

Kielbasa Fried Rice

Cook it until the onions are slightly soft. Add your rice, another pinch of salt (remember you are adding layers of flavors instead of dumping all your salt at the end like your mom probably taught you, if she even let me add salt, but that’s another story), a few splashes of soy sauce, and a pinch or two of sugar to add a bit of sweetness. Salty sweet. Mmmm… Mix it around.

Kielbasa Fried Rice

Now the fun begins! Egg time. Whisk up 3 eggs with a pinch of salt. Make a wall of rice mixture on each side of the pan and pour your eggs down the middle.

Kielbasa Fried Rice

Let the eggs sit for a minute or two to let them cook a little and then scramble them a bit. When they are cooked, mix the rice and goodies with the scrambled egg. Throw it in a bowl, squeeze some lime over it for acidity, and eat! Nothing’s easier than this for a delicious weeknight meal. So many flavors…salty, sweet, umami (a fancy way of saying savory) with that soft, sticky rice mixed with scrambled eggs…ok, I really need to take a bite to make sure it’s ok. Mmmm… Damn carbs.

Kielbasa Fried Rice
Kielbasa Fried Rice

Kielbasa Fried Rice

Servings 4

Ingredients
  

  • 1 1/2 cups cooked rice
  • 14-16 ounces Polish style kielbasa sliced 1/4-in thick, at an angle
  • 8 green onions thinly sliced, at an angle
  • 2 cloves garlic thinly sliced
  • 2 tablespoons vegetable oil
  • 3-4 pinches kosher salt
  • 2-3 splashes soy sauce
  • 1-2 pinches white sugar
  • 3 eggs whisked
  • lime quartered

Instructions
 

  • Make rice. While it's steaming, slice the Polish style kielbasa at an angle and about 1/4" thick. Thinly slice green onions on an angle. Thinly slice garlic.
  • Heat vegetable oil in a large nonstick skillet or wok over medium-high heat. Add the sliced kielbasa in the pan and let it cook without stirring for about 3 minutes until the underside is a deep brown color.
  • Add the sliced green onions and garlic to the pan. Add a pinch of salt. Flip most of the kielbasa to the other side and stir. Continue to cook for another couple minutes, until the green onions begin to soften.
  • Add the steamed rice into the skillet, a 1-2 pinches of salt, a 2-3 splashes of soy sauce, and 1-2 pinches of white sugar. Stir everything together so the green onions, garlic, and kielbasa are evenly distributed.
  • In a small bowl, whisk 3 large eggs and a pinch of salt.
  • Split your rice mixture in half and push each half to each side of the skillet so that a strip of pan with nothing in it runs down the middle. No rice should be in the middle.
  • Pour the eggs into the middle section of the skillet. Let the eggs cook for 1–2 minutes without stirring. Then, scramble quickly, scraping along the bottom of the skillet. When the eggs have cooked through, combine the egg into the rice mixture to distribute the eggs throughout the rice evenly.
  • Pour into bowls and squeeze a quarter of lime over each bowl.