Blog

Campfire Stew

Jump to Recipe

This summer has been a strange one so when our annual camping trip came around, I was both nervous and excited. Nervous…the virus…need I say more? And excited…I really needed to get out of the house before I lost my mind.

If you do have the opportunity to go camping this summer, go for it. Easy to physical distance and just wear a mask if you do come in contact with others, which wasn’t very often. Camping cleared my mind and gave it a rest from the sensory overload that is my life. I spent a week without news, emails, social media, and work, and gained a week of books, floats on the river, and s’mores, which leads me to the point of this blog. Cooking!

Cooking at camp has been a love/hate relationship for me. I want to try all these fancy meals (oh someday I’ll make a dutch oven cake!), but there are a few complications. The dust. The wind. The bees. Oh, the bees! My nemeses while cooking. Plus our camp stove takes forever to heat up anything. What’s this girl to do?

My strategy is to make our dinners at home and heat them up on the stove. I found the perfect recipe for such a situation: Campfire Stew. I made it for this past camping trip for the first time and it was delicious. I just wish I had remembered to take pictures of me heating it up on our old-school Coleman camp stove, but I was distracted by the dust, wind, and bees. “Damn you bees!” as I shake my fist at them.

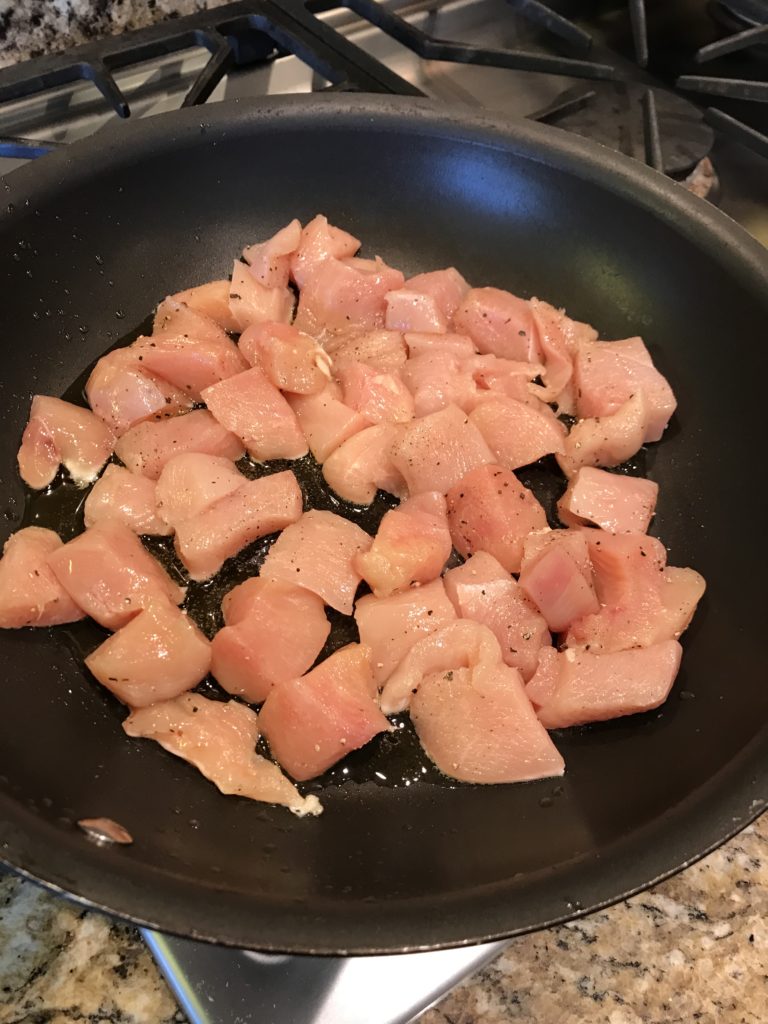
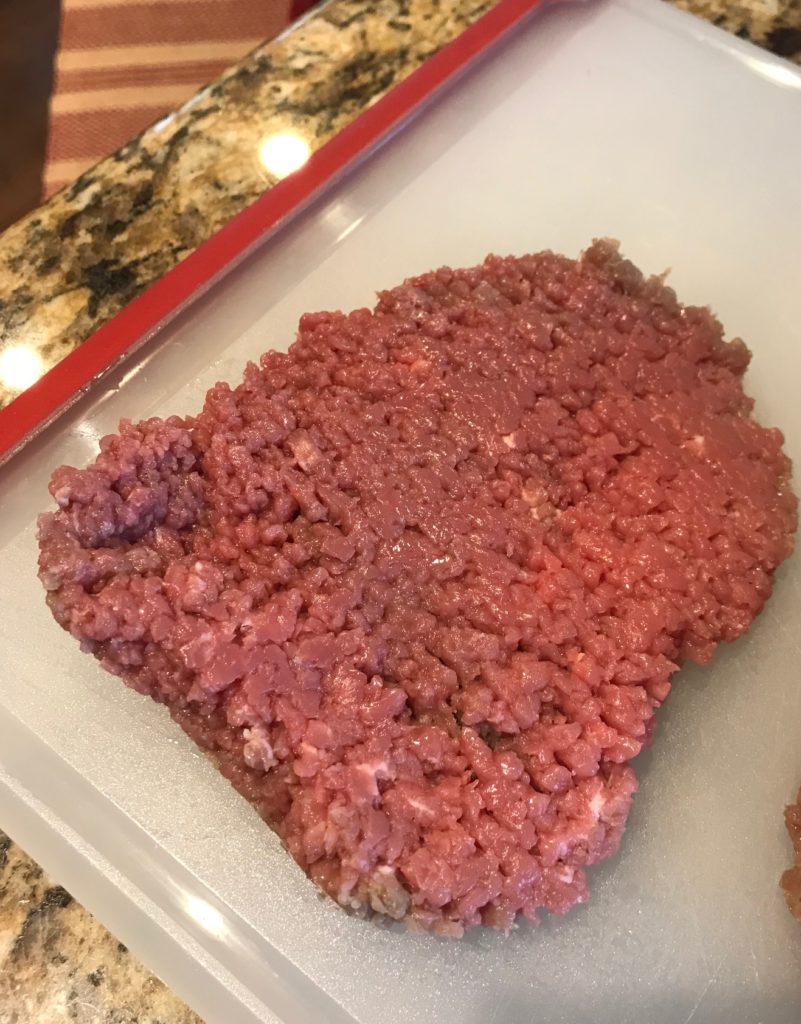
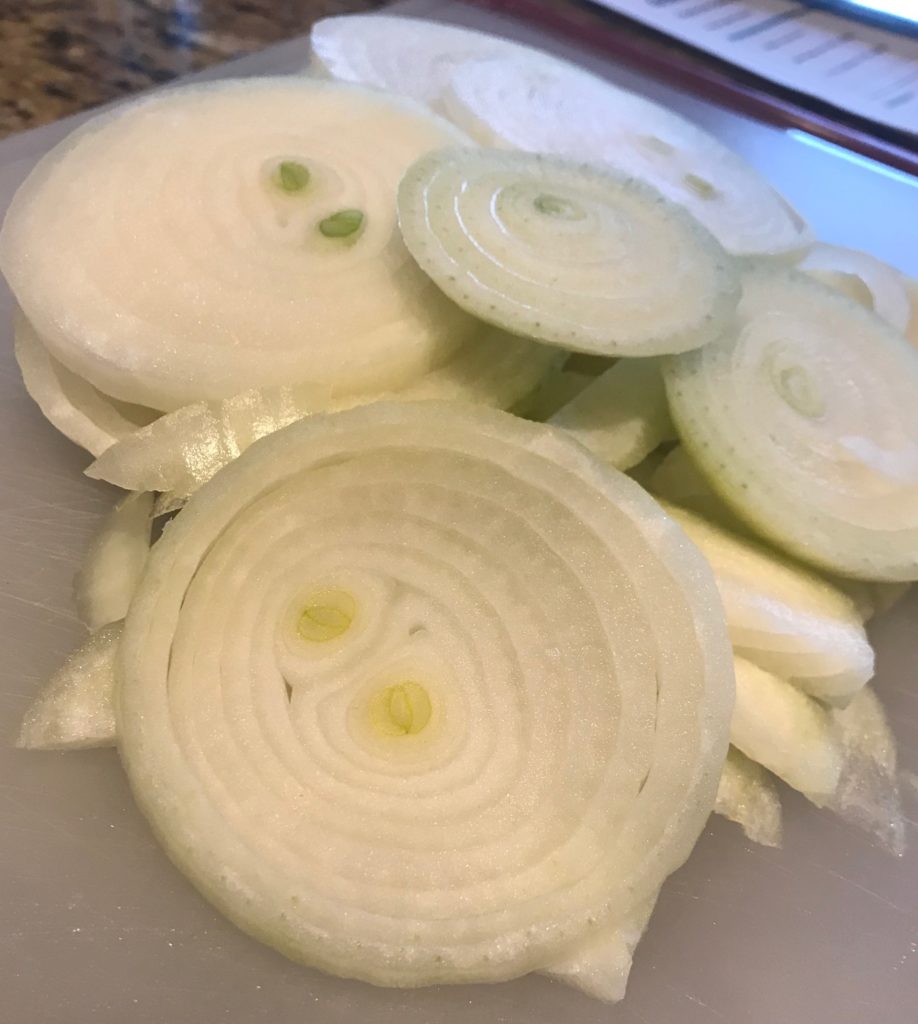
Start out by cooking whole chicken thighs seasoned with salt and pepper for about 7 minutes until there’s a nice golden brown sear on them. Flip and throw in some chopped onions and minced garlic.

Campfire Stew

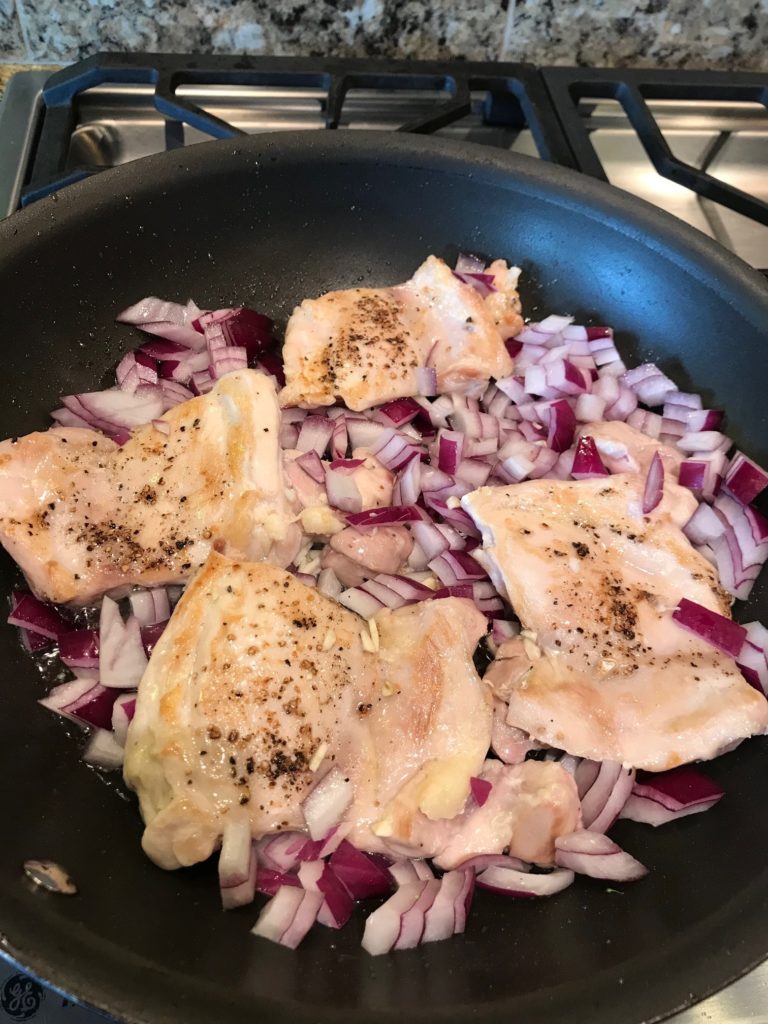
Cook for another 7 minutes until the thighs are cooked through. You will be cooking them a little more, but they shouldn’t be raw. BTW, thighs are really forgiving, especially compared to breasts, which dry up if you cook them just a tiny bit too long.

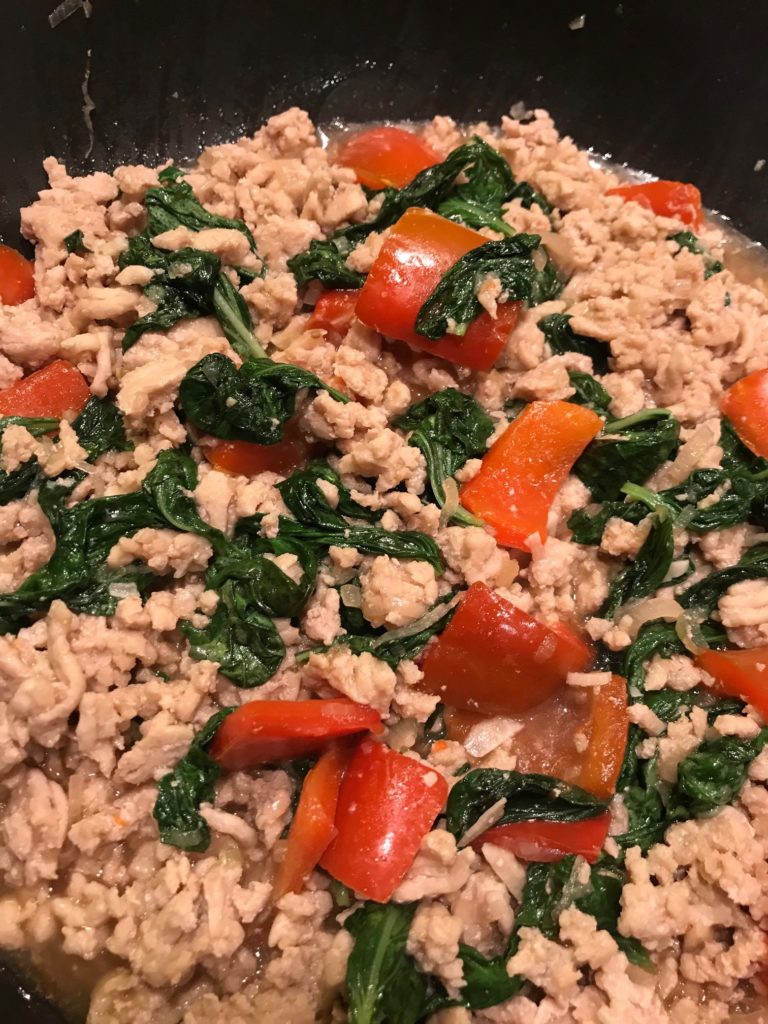
When the chicken is cooked, chop it up into large chunks. At this point, I let it cool and put it in a Ziploc bag. At camp, I will heat up the chicken, add the rest of the ingredients, dodge the bees, and serve. You could do this at home, which for purposes of this blog, I’ll show you what comes next.

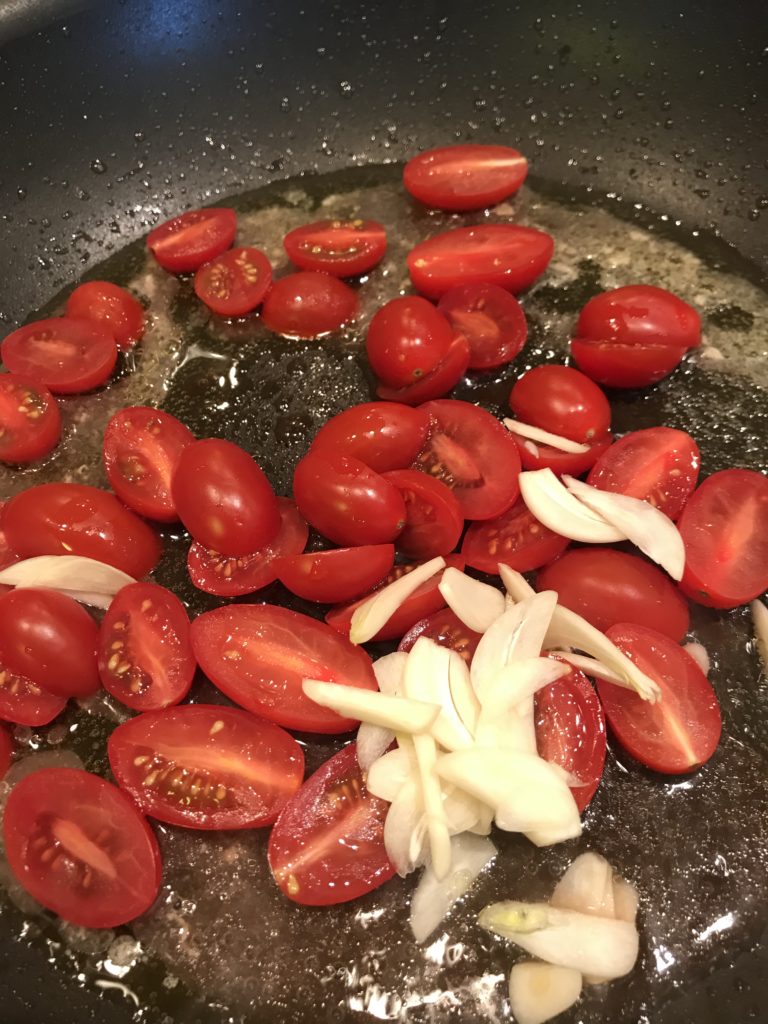
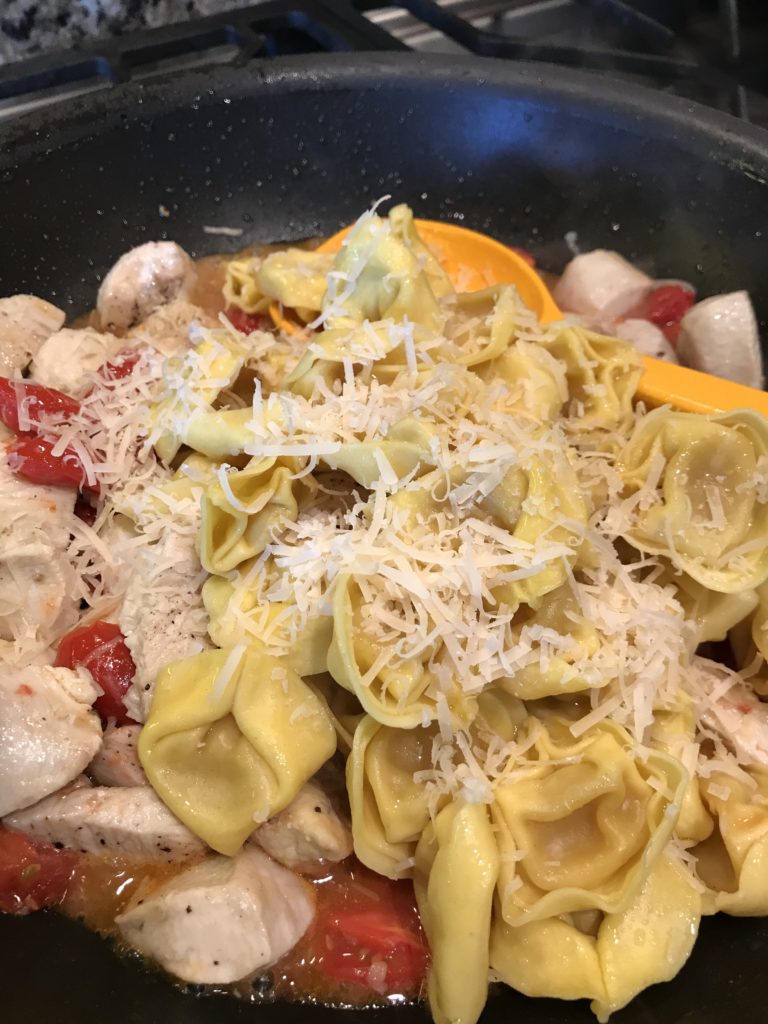
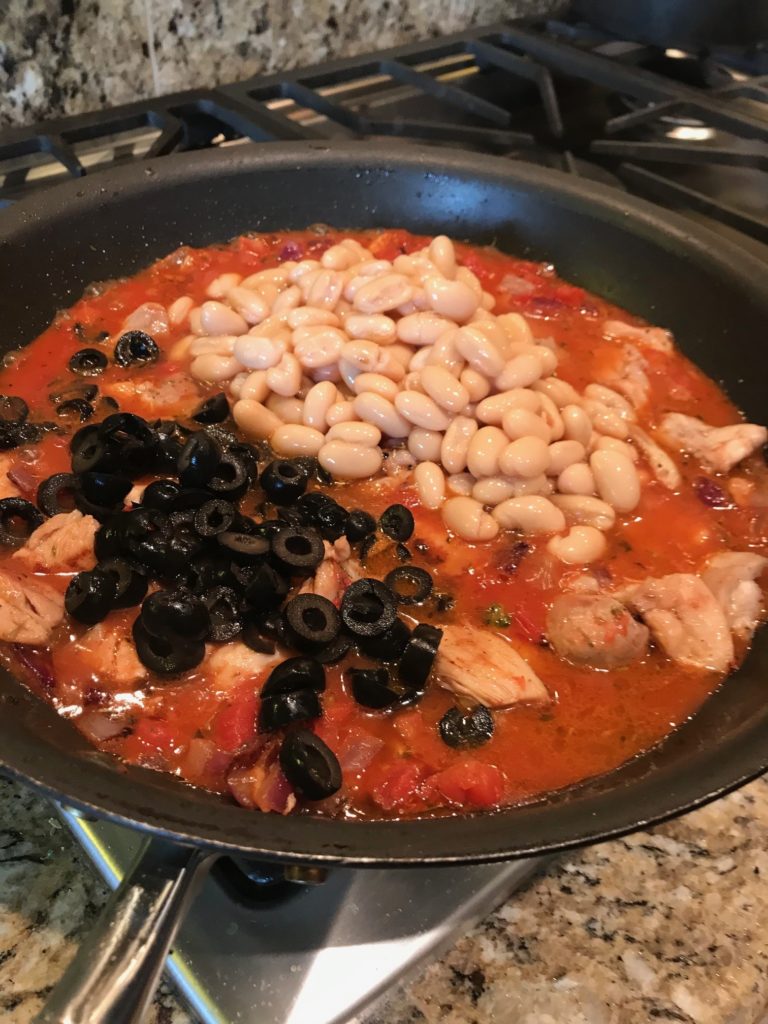
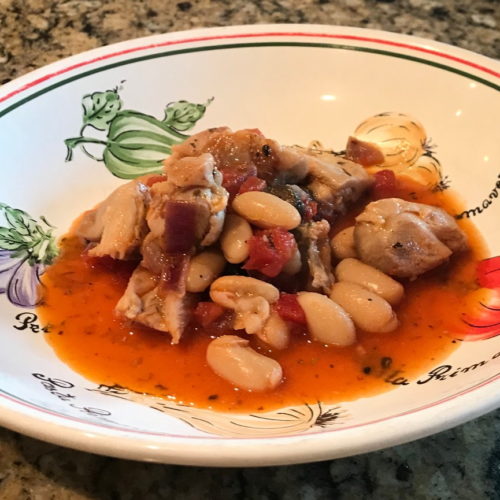
Place the chicken back in the skillet, and add seasonings and canned tomatoes. Stir. Add sliced olives and beans.

Campfire Stew

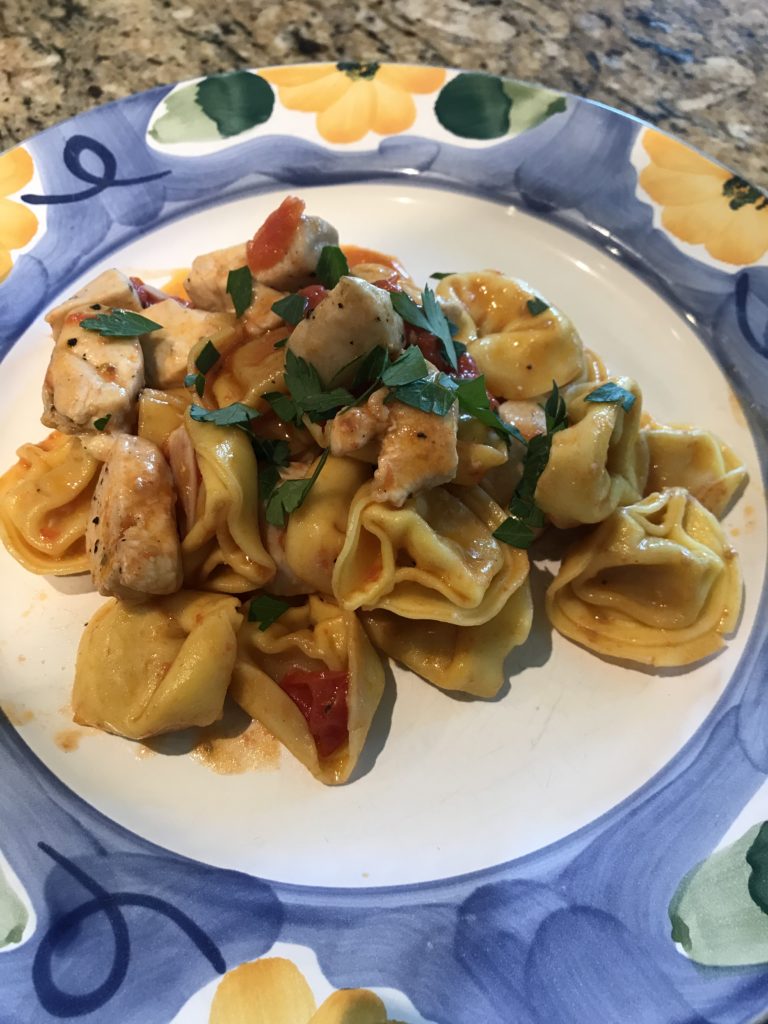
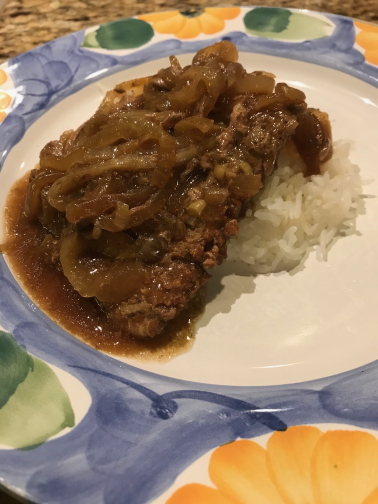
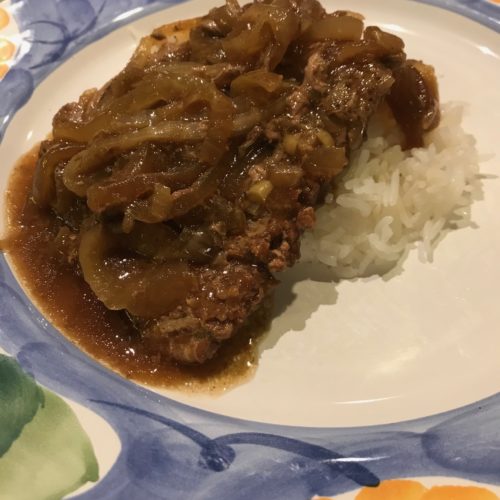
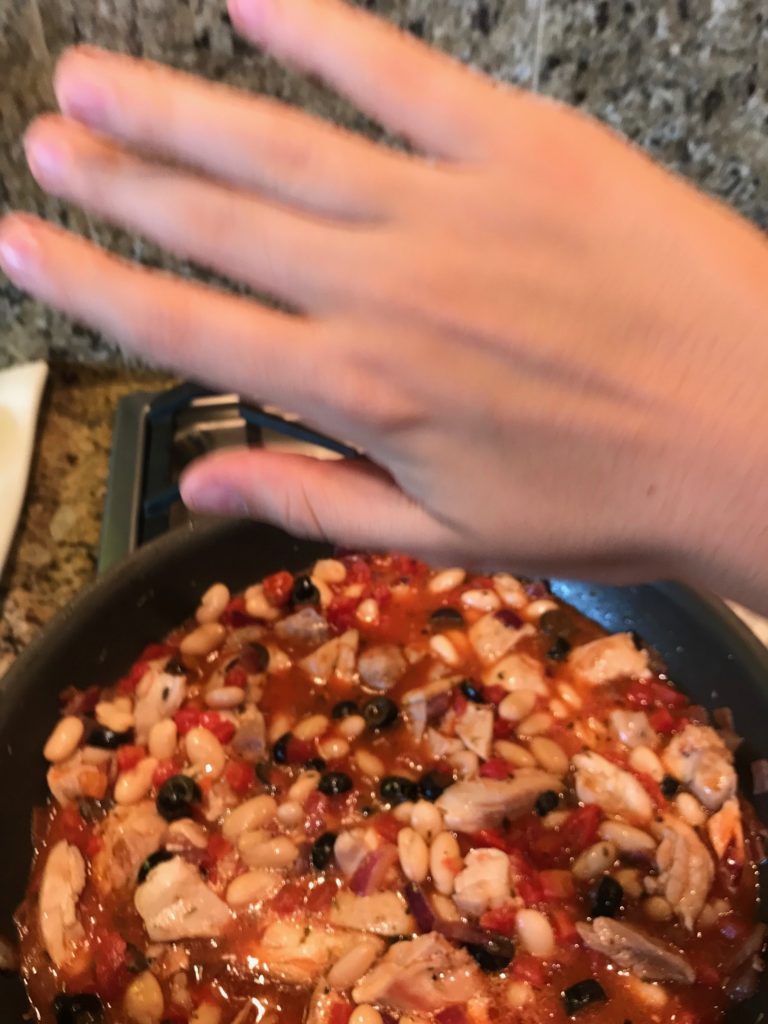
Stir again and simmer until it’s heated through. Take a picture. Ignore that your kid photo-bombed your photo. The food still tastes good.

Campfire Stew

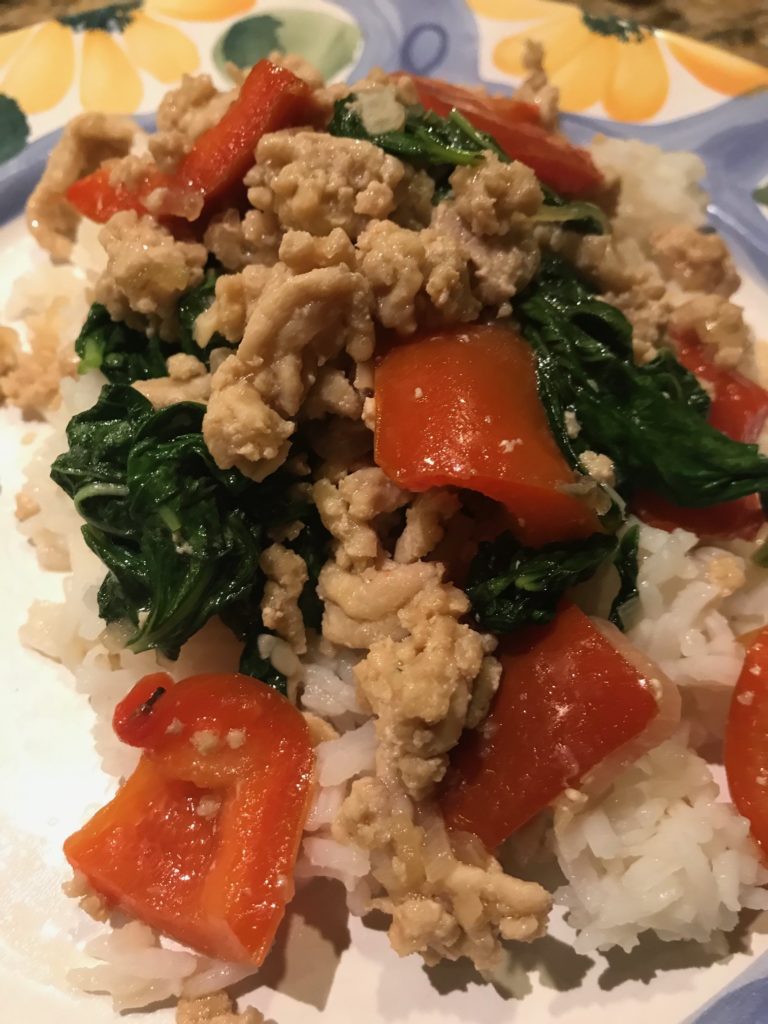
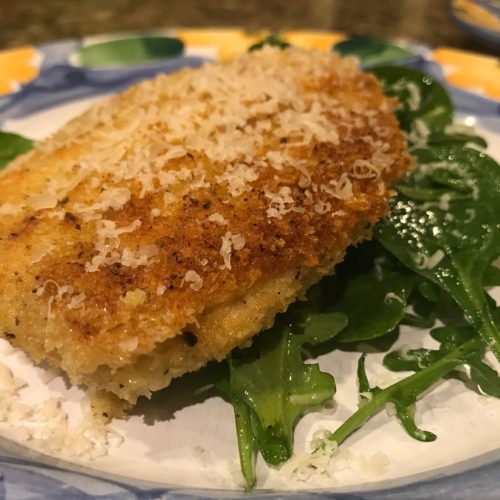
For camp cooking, some might say this looks fancy (work with me here…it looks fancy when served in a disposable plastic bowl along with the finest white plastic cutlery).

Campfire Stew

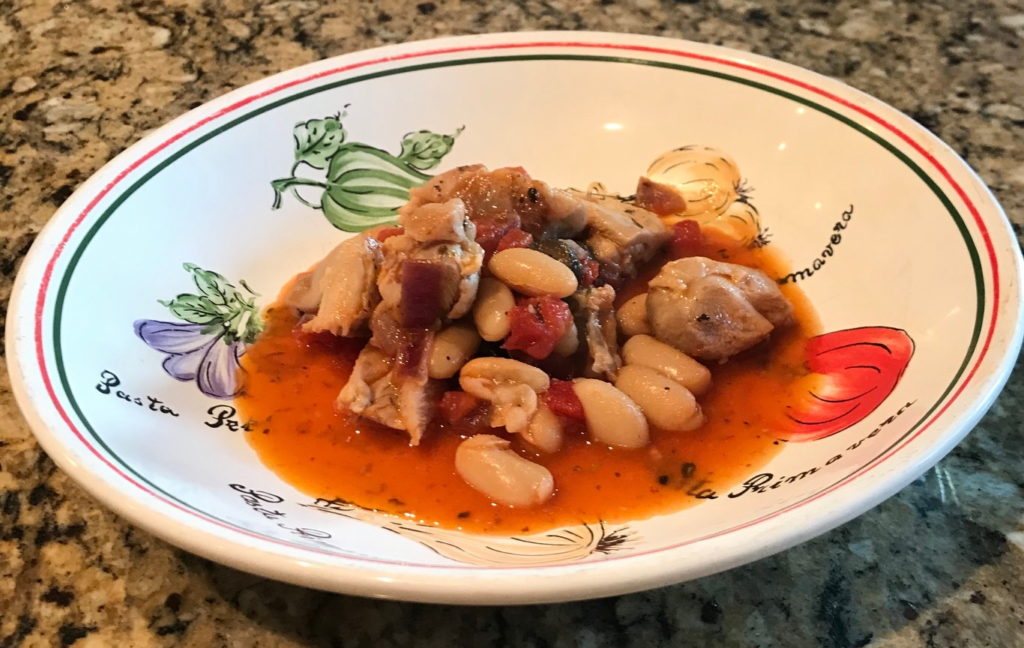
It’s not the same as grilling a hot dog on a stick (which is amazing in its own right), but this stew is very tasty without a lot of work. I’m impressed at how the flavors meld together without a lot of cooking time. Just a few basic ingredients becomes a quick, delicious meal. Now I have more time to float in the river.

Campfire Stew

Campfire Stew

Ingredients
  

  • 4 skinless, boneless chicken thighs
  • salt and pepper
  • 1 tablespoon vegetable oil
  • 1/2 large onion diced
  • 1 garlic clove minced
  • 1/2 teaspoon dried thyme
  • 1/2 teaspoon dried mint
  • 1/2 teaspoon dried oregano
  • 15 ounces diced canned tomatoes
  • 2 1/4 ounces canned sliced olives well drained
  • 15 ounces canned cannellini beans do not drain

Instructions
 

  • Heat oil in a skillet. Salt and pepper the chicken. Cook chicken for about 7 minutes. Flip and add onionis and garlic. When chicken is cooked through and the onions are slightly softened, remove chicken from skillet and cut into large chunks.
  • Add the chicken back in the skillet. Add thyme, mint, oregano, and tomatoes. Stir. Add olives and beans. Stir. Simmer until heated through.
Blog

Instant Pot Chicken and Rice Burrito Bowls

Jump to Recipe

These chicken and rice bowls are amazing. Flat out amazing. There are a lot of ingredients and you need an Instant Pot (go out and buy one already! here’s another reason why!), but it’s totally, completely worth it. Thank you kitchn!

First, do your prep. The kitchn says to do it as you go, but I disagree. Because there are a lot of ingredients, I would rather be prepared than frantically chopping chicken and opening cans. So…dice up an onion. Mince a couple cloves of garlic (lately I’ve been using a microplane/zester and finding it faster). Measure out some chili powder and cumin. Open your cans of broth and black beans. Cut chicken thighs into 1-inch chunks, and season with salt and pepper. Grab the frozen corn, a jar of salsa, and rice. Shred some cheese and chop up fresh cilantro. Whew. Ok, take a break. Admire your work.

Instant Pot Chicken and Rice Burrito Bowls

In your Instant Pot, heat some oil until shimmering, which means there are little ripples rolling in it. Or you can just time it to about 2 minutes or so. Throw in the onion and garlic, and cook until the onion is soft. Be sure to stir it occasionally so the garlic doesn’t burn. Stir in your seasonings and cook until it smells really good, which is really only about a half a minute. I mean it’ll continue smelling good, but don’t get distracted. Add some chicken broth, scrap the bits from the bottom, and simmer for a minute.

Add chicken, beans, corn, and salsa. Stir. Now the technical part: pour the rice over this. Do NOT stir. You might feel compelled to submerge the rain. Just leave it be. Trust me on this one. You’ll then pour some more broth over it, but again, don’t stir.

Set the pressure to high for 10 minutes and let it do its thing. Go watch the news. Actually, don’t watch the news. It’s super depressing these days. Go make a salad instead. It’s better for you than the news.

It’ll take about 10-12 minutes to come to pressure, and I have to say, I love it when Instant Pot recipes tell you this. Yes, it’s faster to cook in an Instant Pot, but when the recipe tells you to cook it for 10 minutes, it’s really at least double than that.

After the Instant Pot beeps, quick release the pressure and then carefully open the lid. Don’t panic when you see the rice sitting on top looking raw. I promise you it’s fully cooked. Just stir everything together, scoop some into a bowl, and top with shredded cheese and chopped cilantro.

Instant Pot Chicken and Rice Burrito Bowls

The cheese is all gooey. The beans are all soft. The rice is all tender. Oh, deliciousness! What’s not to love? This one is a make again.

Instant Pot Chicken and Rice Burrito Bowls

Instant Pot Chicken and Rice Burrito Bowls

Servings 6

Ingredients
  

  • 1 1/2 tablespoons canola oil
  • 1 medium onion diced
  • 2 cloves garlic minced
  • 1 tablespoon chili powder
  • 1 1/2 teaspoons ground cumin
  • 1 cup low-sodium chicken broth divided
  • 1 1/2 pounds boneless, skinless chicken thighs cut into 1-inch pieces
  • Kosher salt and freshly ground pepper
  • 15 ounces canned black beans drained and rinsed
  • 1 cup frozen corn kernels
  • 16 ounces salsa
  • 1 cup long-grain white rice
  • 1/2 cup shredded cheese (cheddar, jack, or a blend)
  • 1/4 cup fresh cilantro coarsely chopped

Instructions
 

  • Add the oil to the Instant Pot, turn on saute setting. Heat until shimmering.
  • Add the onion and garlic. Cook, stirring occasionally, until softened, about 4 minutes.
  • Stir in the chili powder and cumin. Cook until fragrant, about 30 seconds.
  • Add 1/4 cup of the chicken broth. Cook, gently scraping the bottom of the pot with a wooden spoon to loosen any stuck-on bits, and simmer for 1 minute.
  • Season the chicken with the salt and pepper. Add the chicken, beans, corn, salsa, and stir to combine.
  • Sprinkle the rice over the top. Pour the remaining 3/4 cup broth over the rice, but do not stir.
  • Using the manual setting, set the pressure to HIGH for 10 minutes. Close and lock the lid. It should take the pressure cooker about 10 to 12 minutes to come to pressure and begin the 10 minute countdown. When the cooking time is complete, do a quick release of the pressure.
  • Gently stir everything together. Divide between bowls and top with the cheese and cilantro.
Blog

SpaghettiOs

Jump to Recipe

Like Sloppy Joes, here’s another nostalgic dish from my GenX childhood. A few years ago I bought a can to remind myself how amazing it tastes. Ugh. It was awful. Mushy pasta. Flavorless sauce. What kind of meat are in those meatballs? How could it be so bad, so not what I remembered? No wonder my parents didn’t want to waste their money on it, and would make plain spaghetti instead. But I felt like I was missing out.

When I came across this recipe, I just smiled. It has all the good memories of SpaghettOs with the deliciousness that the canned stuff didn’t have. This recipe comes from BA with a few tweets of my own. I split the sauce recipe. I had a few items I needed to use up and I wanted more meatballs. One could never have too many meatballs.

Warning. I didn’t take very many pictures. No gorgeous vegetables. No exotic spices. None of that. We’re down to basics here. Tomato. Pasta. Meat. Grunt.

Make your meatballs. Mix together panko, cheese, seasonings, egg, cream, and beef. Form into little balls. You’ve got yourself meatballs. I wasn’t sure if I’d use them all in the pasta, but they make really good leftovers. Like a meatball sandwich. Or on toothpicks, if we’re going old school.

SpaghettiOs

Time to cook these guys. I grabbed my gorgeous Le Creuset dutch oven. I love this thing. It’s expensive, but you only need one and it’s so durable that I’ll probably pass it on to my son. Hopefully, he’ll cook for himself by then. Right now we’re in the cheese and crackers phase. Another classic not to be overrated.

So, I have a love/hate relationship with meatballs. Mine NEVER stay together when I cook them. Maybe the mixture is too soft? Maybe I’m flipping them over too soon (but I don’t think so)? I honestly don’t know. If I had to do this over again, I’d make my favorite meatballs instead: Ina Garten’s Roasted Italian Meatballs. These never fall apart and are super easy to make.

Cook them up.

SpaghettiOs

Move them to a separate plate when they are cooked. Try not to obsess they aren’t perfect. know that they will taste fantastic.

Now it’s time to make your sauce. In the same pot, you’ll start layering your flavors. Cook up some chopped onion and minced garlic. Add tomato paste and cook. Throw in some spices, a little sugar (yes, sugar….it makes the tomatoes taste better…it’s science…something to do with bringing out the sweetness by toning down the acidity to unripe tomatoes), fresh basil (I’m sure the original SpaghettiOs didn’t use this), and ground tomato sauce. Cook it for at least 20 minutes. If you can cook it longer, you should because it’ll just taste better. It was time to get dinner on the table so after 20 minutes, I gently added my meatballs and meatball pieces, and cooked that for another 10 minutes.

While all this simmering is going on, cook the pasta. You want to use any pasta that looks like rings or is a short tube, like ditalini, which is what I had on hand. Anelleti looks more like rings (I looked it up…I don’t know what all these shapes look like), but I had made macaroni salad a while ago and had a bunch of ditalini leftover. I was tired of it staring at me every time I opened my pantry door.

When the sauce is done simmering and the pasta is cooked al dente. Gently mix together. To preserve what was left of the integrity of my meatballs, I spooned some sauce into the pasta, spooned some on a plate, added a few meatballs, spooned more pasta on top, added another meatball or two, grated some fresh Parmesan cheese, and called it good.

SpaghettiOs

The results were pretty good. Two thumbs up from the boys. The older “boy” laughed at the name. The younger boy thought we were crazy like usual.

SpaghettiOs

SpaghettiOs

Ingredients
  

  • 1/4 cup panko (Japanese breadcrumbs)
  • 1 tablespoon coarsely grated Parmesan plus more for serving
  • 1/2 teaspoon dried oregano
  • 1/4 teaspoon garlic powder
  • Kosher salt
  • 1 large egg beaten
  • 5 tablespoons heavy cream
  • 1 pound ground beef chuck 20% fat
  • 2 tablespoons olive oil
  • 1/2 medium onion finely chopped
  • 1 large garlic clove minced
  • freshly ground pepper
  • 1 tablespoon tomato paste
  • 1 teaspoon paprika
  • 1/4 teaspoon crushed red pepper flakes
  • 1/2 tablespoon sugar
  • 2 large basil sprigs
  • 28 ounces ground tomatoes
  • 6 ounces anelletti, ditalini, or other short tubular pasta

Instructions
 

  • Whisk panko, cheese, oregano, garlic powder, and 1 1/2 teaspoons salt in a medium bowl. Whisk in egg and cream. Add beef. Mix with your hands until just combined, being careful not to overwork (if packed too firmly, meatballs will be dense). Form into 1"-diameter balls, about 24. Transfer to a plate.
  • Heat oil in a large skillet or dutch oven, preferably cast iron, over medium-high. Cook meatballs, turning occasionally, until lightly browned on all sides but not fully cooked through, about 5 minutes. Transfer to another plate.
  • Cook onion and garlic in same skillet, stirring occasionally, until onion is translucent and begins to soften, about 5 minutes. Season with salt and pepper. Add tomato paste and cook until brick red, about 1 minute. Add paprika and red pepper flakes. Cook until fragrant, about 1 minute. Add sugar, basil, and ground tomatoes.
  • Reduce heat and simmer until sauce is slightly reduced and flavors have melded, about 20 minutes. Add meatballs and any accumulated juices.Continue to cook until meatballs are cooked through, 5–10 minutes.
  • Meanwhile, cook pasta in a large pot of boiling salted water, stirring occasionally, until al dente. Drain and return to pasta pot. Pour sauce and meatballs over pasta and stir to combine. Transfer to a platter and top with cheese.
Blog

Skillet Chicken and Tortellini

Jump to Recipe

This is super simple and quarantine friendly. All you need is chicken (oh please tell me you can still buy that), cherry tomatoes, and pasta. The original recipe (from The Food Network) calls for ravioli, but the hoarders took it all so I settled for tortellini, which frankly, worked out better in my opinion. We skipped the mushrooms because the boys detest them. The younger boy just had to deal with the tomatoes. Life is rough.

Boil your tortellini. You really can use any type of pasta. The shelves are bare of most pasta except spaghetti, which you can easily use here if that’s all you have. Be sure to salt you water (I just pour a bunch until it’s almost like the sea). When they are cooked (al dente!), drain and drizzle with a little olive oil so the pasta doesn’t stick while you work on the rest of the stuff.

Cut your chicken breasts into chunks, and then season with salt and pepper. I used what the recipe calls for, 1.25 pounds of chicken, but next time I’m using just a pound. That’s plenty. Gather the rest of your ingredients together.

Skillet Chicken and Tortellini

If your store is out of chicken breasts, you can substitute with thighs. In a pinch, you can probably use chicken sausage or rotisserie chicken. Heat up a pan with olive oil and cook until browned, but not cooked all the way through. If you are using rotisserie chicken, don’t season the meat and skip this step. Once cooked, transfer to a plate and set aside.

Skillet Chicken and Tortellini

In the same pan, saute tomatoes, garlic, and vinegar. I love the colors here. Cook a bit until the tomatoes are soft.

Skillet Chicken and Tortellini

Return the chicken to the skillet and then add your pasta, broth, and Parmesan cheese. I was a bit heavy handed with the cheese. You can never have too much cheese. Or bacon. Mmmm…now I wish I had thrown in some diced cooked bacon into this. That would have been good. Next time.

Skillet Chicken and Tortellini

Cook all this until the chicken is cooked through. That’s it. I told you it was easy.

Skillet Chicken and Tortellini

My biggest fear was that it was too simple and would be bland. Definitely not. The boys dug in and I barely had any leftovers. The garlic and tomatoes added most of the flavor while not making it heavy at all. I would call this pretty healthy if you’re not watching your carbs. If you are, there’s a lot of chicken here so it is protein forward.

Skillet Chicken and Tortellini

Skillet Chicken and Tortellini

Servings 4

Ingredients
  

  • Kosher salt
  • 9 ounces tortellini
  • 1 tablespoon olive oil plus more for drizzling
  • 1 pound skinless, boneless chicken breasts cut into chunks
  • freshly ground pepper
  • 1 cup cherry tomatoes halved
  • 2 cloves garlic thinly sliced
  • 2 tablespoons red wine vinegar
  • 1/3 cup low sodium chicken broth
  • 3 tablespoons Parmesan cheese grated
  • fresh parsley for garnish

Instructions
 

  • Bring a pot to a boil. Salt water. Add tortellini and cook al dente. Drain. Drizzle and toss with olive oil.
  • Meanwhile, season the chicken with salt and pepper. Heat olive oil in a large nonstick skillet over medium-high heat. Add the chicken. Cook, undisturbed, until beginning to brown, about 2 minutes. Continue to cook, stirring, 1 more minute. Transfer to a plate.
  • In the same skillet, add tomatoes, garlic, and vinegar. Cook until the tomatoes begin to soften, about 2 minutes. Return the chicken to the skillet and add the tortellini, broth, and Parmesan. Cook, stirring occasionally, until the chicken is cooked through, about 4 minutes. Garnish with the parsley.
Blog

Slow Cooker Cube Steak

Jump to Recipe

I haven’t been cooking anything new lately. With all the uncertainty of the world lately, I just want what’s familiar. Spaghetti and meat sauce. Stroganoff. Tacos with carnitas or ground beef. (Yes, with the little taco mix seasoning packet. Don’t judge. It’s not authentic, but it’s tasty. You know you love it too.) I also bought plenty of chicken thighs, which I’ve been marinating and grilling. We ate a sugar glazed ham for Easter, which I heated up in the slow cooker. But I haven’t made a single new dish. I’ve been stress baking cookies and bundt cakes lately too.

A few million days ago (ok, March, but it seems like forever ago), I made something completely new that I ended up loving. I want to make it again, but that would require me to go to the grocery store, which I’ve been avoiding like the plague. Pun intended. I found the recipe on Delish: Cube Steak.

Now, I don’t know about you, but I’ve never had cube steak before. For those of you who are familiar with it and maybe eat it all the time, you have my permission to laugh. I’ve seen it, but didn’t know what to do with it. Or even what it is. But in a particularly brave moment, I decided to buy some and learn what it is.

News flash. It’s just a round or top sirloin steak that has been through a tenderizing that puts these cube shaped indents in it. It’s commonly used for chicken fried steak, which I love so I’m a little embarrassed I didn’t know that until now. Duh.

This recipe is really simple. Take a few steaks and season them with salt and pepper.

Slow Cooker Cube Steak

Throw them into a slow cooker. Slice up some onions.

Slow Cooker Cube Steak

Add garlic powder, onion soup mix (yep…this is home cooking, folks), and beef broth. Set it to low for 8 hours. About an hour before it’s done, mix water and cornstarch, and add it to the slow cooker, which magically turns the liquid to gravy. Sever over buttered egg noodles or rice, which is what I did.

Slow Cooker Cube Steak

Not only is it super easy, it’s both tasty and comforting. Maybe I should don on my face mask and brave the grocery store.

Slow Cooker Cube Steak

Slow Cooker Cube Steak

Servings 4

Ingredients
  

  • 2 pounds cube steak about 4 pieces
  • 2 teaspoons kosher salt
  • 1 1/2 teaspoons black pepper
  • 2 large onions sliced into 1/4" rings
  • 2 teaspoons garlic powder
  • 2 ounce onion soup mix packet
  • 1 cup low-sodium beef broth
  • 1/4 cup cold water
  • 2 tablespoons cornstarch
  • buttered egg noodles or rice for serving

Instructions
 

  • Season steaks with salt and pepper. Add to slow cooker. Slice onions and add to slow cooker. Then, add garlic powder, onion soup mix, and beef broth. 
  • Set slow cooker to low for 8 hours.
  • One hour before you’re ready to serve, mix cold water and cornstarch in a small bowl. Stir into slow cooker. Cook on high until gravy has thickened, stirring periodically. Serve over buttered egg noodles or rice.
Blog

Jambalaya with Shrimp and Ham

Jump to Recipe

Hello COVID-19. You are an interesting creature.

I’ve been hiding out in my house, working from home, making sure my husband (also working from home) understands that it’s not cool to blast rock music while coding, and reminding my son that PE homework should be done outside, not upstairs. These are unusual times to say the least.

The only time I have gone out is to grocery shop (and a couple walks where I socially distanced myself from everyone else), which is an adventure in itself. I’m very organized or try to be. Chaos is not my friend. I’m a list maker so of course I make grocery lists. I plan out our meals for the week, add the ingredients to the list, and follow the list religiously at the grocery.

So imagine a world where I have no idea if my ingredients are actually at the store. Oh, first world problems! But I’ve adapted. No dried lentils so I bought canned, which goes into the soup at the last minute instead at the beginning. Easy peasy. I’m not sure how your grocery store is, but I’ve been fortunate enough to buy meat, eggs, and milk. Except for bread and dried beans, food staples have been plentiful (let’s not speak of toilet paper). I thought about making some bread, but all the flour was gone. Then there were no SunChips. Really people?! Just leave me some coffee and everything will be okay.

I’ve been reading a variety of articles about substituting ingredients. Today I want to share a recipe with you that hopefully you can make without any substitutes, but it’s easy enough to sub out stuff.

I love jambalaya because it’s so uniquely Louisianan with its mesh of French, Spanish, and West African influences. This regional dish reminds me of what makes Louisiana magical. A blend of flavors, architecture, celebration, history, mystery, and nature. New Orleans. French Quarter. Shot gun houses. The deep South. Cajuns. Creoles. Mardi Gras. Bayous. I’m not doing it justice. It’s just so different from my California home that it fascinates me.

Although there are different types of jambalaya, we can mainly agree that it consists of rice with sausage or smoked meat with chicken or shrimp. The dish came out of a need to substitute what the French, Spanish, and Africans immigrants could not find in their new home, and instead, to use what they did have. Sort of like us right now. The Creoles in New Orleans had access to tomatoes so their version of jambalaya is tomato-based to make up for the lack of saffron. The Cajuns, who lived in the rural country near the bayou had access to shrimp, crawfish, duck, and many other critters we might not eat (ummm…alligator…tastes like chicken?), used whatever meats they had on hand.

This recipe from the Food Network is more Creole than Cajun because it uses tomatoes, and consists of a combination of ham and shrimp. If you can’t find those meats because your town is full of ham and shrimp hoarders, use chicken, sausage, turkey, ground beef, pork, really anything you like and can find. As far as vegetables, the base contains onions and peppers, but you can sub out with carrots or celery. You can even get creative and try leeks, shallots, asparagus, etc.

Chop up your vegetables. I like to make lengthwise cuts to nearly the end of the pepper and then slice across for even squares.

Jambalaya with Shrimp and Ham

Heat up some oil in a Dutch oven or large pot, and throw in your veggies along with some garlic. I love the colors.

Jambalaya with Shrimp and Ham

If your grocery store was pillaged of ham, and you are substituting raw meat, except for shrimp, brown it with the veggies.

Next, toss in everything else except the rice and shrimp. Seasonings, tomatoes, ham, and broth. See how easy this is?

Jambalaya with Shrimp and Ham

I made this jambalaya tame with just an 1/8 of a teaspoon, but feel free to throw more cayenne pepper. The original recipe calls for 1/4 teaspoon. If you’re feeling cautious now, you can add hot sauce at the end.

After bringing it to a boil, add rice. When the rice is done, throw in your shrimp. Shrimp cooks very quickly so no need to pre-cook.

Jambalaya with Shrimp and Ham

Season with salt, pepper, and hot sauce.

Jambalaya with Shrimp and Ham

Your apocalyptic meal is complete.

Jambalaya with Shrimp and Ham

Jambalaya with Shrimp and Ham

Servings 4

Ingredients
  

  • 1 tablespoon olive oil
  • 1 large onion diced
  • 1 red bell pepper diced
  • 1 green bell pepper diced
  • 2 cloves garlic minced
  • 1/2 teaspoon salt plus more, to taste
  • 1/4 teaspoon ground black pepper plus more, to taste
  • 1 teaspoon paprika
  • 1/2 teaspoon dried oregano
  • 1/2 teaspoon dried thyme
  • 1 bay leaf
  • 1/8 teaspoon cayenne pepper up to 1/4 teaspoon
  • 1 tablespoon tomato paste
  • 6 ounces smoked ham diced
  • 2 1/2 cups low sodium chicken broth
  • 14 1/2 ounces no-salt added diced tomatoes
  • 1 cup uncooked long-grain white rice
  • 1 pound peeled and deveined medium shrimp
  • hot pepper sauce

Instructions
 

  • Heat olive oil in a large Dutch oven or pot over a medium heat. Add the onion, peppers, and garlic. Saute until they begin to soften, about 10 minutes. If you are using raw meat instead of ham, saute meat with vegetables until cooked.
  • Mix in the next 11 ingredients, salt through the diced tomatoes. Bring to a boil. Stir in the rice, cover, reduce heat, and simmer for about 20 minutes, or until rice is done and most of the liquid is absorbed.
  • Add the shrimp and cook, covered, for 5 minutes more, or until shrimp is cooked through. Season with salt and pepper, to taste. Serve with hot pepper sauce.
Blog

Thai Basil Chicken

Jump to Recipe

I wanted to show you a recipe that consists of common pantry staples in case you wanted to skip going to the grocery store due to the coronavirus (don’t get me started), but this is not that recipe. Unless you happen to have oyster and fish sauces hiding about, you will need to pick up a few items, but it’s worth it. If you want to practice social distancing and hide out, I recommend making a huge vat of spaghetti sauce and call it good.

This recipe is super easy. Chop up a red bell pepper into large pieces, and then thinly slice shallots and garlic. Heat up some oil and cook it up over high heat for a couple of minutes.

Thai Basil Chicken

Add ground chicken and cook that through. The original recipe from Delish claims it’ll take you 3 minutes, but that’s a lie. Cook it until the chicken is no longer raw, which is way more than 3 minutes.

Now the recipe takes a turn. It calls for another common pantry item (note sarcasm), Thai bird’s eye chilis. These spicy chilis make the recipe more authentic, but I couldn’t find them at my upscale grocery store so I’m guessing you have to hit the Asian markets. I decided to substitute them with the less spicy jalapeno, which somehow made it into my cart, but never home. They went MIA. Argh! So when you make this and you want a little spice, you can use your favorite chili or nothing at all, in my case.

Pour in your broth, oyster and fish sauces, and sugar, and stir until thickened. At the last minute, add basil and mix it up until the basil is wilted. I couldn’t find Thai basil (I need to reconsider this upscale grocery store), so I used regular basil, which turned out great.

Thai Basil Chicken

That’s it. Serve it over rice or if you are low carbing it, make it a lettuce cup. It doesn’t get much easier than that. Except for locating the ingredients, with a few substitutes, you’ll end up with a tasty dish everyone will enjoy.

Thai Basil Chicken

Even your picky eater who won’t eat anything green (except for the single obliging piece of basil) or touching will love it.

Thai Basil Chicken
Thai Basil Chicken

Thai Basil Chicken

Servings 4

Ingredients
  

  • 3 tablespoons canola oil
  • 1 red bell pepper chopped into large chunks
  • 3 shallots thinly sliced
  • 5 cloves garlic thinly sliced
  • 2 pounds ground chicken
  • 1 Thai bird's eye chilis or other favorite chili thinly sliced
  • 1/3 cup low-sodium chicken broth
  • 1/4 cup oyster sauce
  • 1 teaspoon fish sauce
  • 2 teaspoons granulated white sugar
  • 2 cups Thai basil leaves or regular basil leaves stems picked off, packed

Instructions
 

  • Prep your ingredients. Stem, seed and chop red bell pepper into large pieces. Thinly slice shallots, garlic, and chili. Remove the stems from the basil leaves.
  • In a wok or large cast iron skillet over high heat, heat oil. Add bell pepper, shallots, and garlic. Cook, stirring frequently, until golden, about 2 minutes.
  • Add chicken and cook, breaking up the chicken into small bits, until cooked through. Add chilis and toss to combine.
  • Pour chicken broth, oyster sauce, fish sauce, and sugar into the wok. Cook, stirring, until thickened. Add basil and toss until wilted.
  • Serve over rice or in a lettuce cup.
Blog

Beef and Ginger Stir-Fry

Jump to Recipe

I made this seemingly simple meal a few weeks ago, but mixed up the beef packages so instead of using one pound of skirt steak, I used two pounds of flank steak meant for the Bulgogi. The good news is that my Bulgogi turned out amazing with just one pound of skirt steak. I’ll never use flank steak for that recipe. The bad news is that my stir-fry turned into stir-steamed. The taste was good, but the color and texture was not what the recipe promised. A few nights ago, I made it again, but this time with the correct amount and type of steak. I expected amazing results. Well, let’s just say this blog is a personal one where I show my wins and my losses. Sometimes you think you end up with loss, but sometimes a loss is just something new, something you didn’t expect, and not a loss at all.

First, slice up your ingredients. Pat your meat dry and slice against the grain.

Beef and Ginger Stir-Fry

Now that you’ve sliced the meat, combine sugar, sesame oil, soy sauce, and salt to create a marinade. Let the steak sit in that for 20 minutes.

Meanwhile, slice up a red onion into rings using a very sharp knife. If you use a dull knife, the onion might slip and that’s how you cut yourself. If you are still a bit nervous because your knife isn’t all that sharp or you just don’t like the idea of slicing a rolling object (I get that!), cut the onion in half and cut the onion in half slices, flat side down. For me, I was brave, but mainly because I just had my butcher sharpen my knives. BTW, if you need to sharpen your knives and you don’t know how, check to see if your supermarket’s butcher will do it for you for free or a small fee. It’s completely worth it.

And before I forget, be sure you are holding that onion with a clawed grip, knuckles slightly out. Your knuckles will prevent the sharp blade from reaching your fingers.

Beef and Ginger Stir-Fry

Finally, I peeled and sliced some ginger. If you ever wondered how to peel ginger, I learned a cool trick. No need for a vegetable peeler or knife. Use the edge of a spoon and scrape the peel off. It’s as simple as that!

To thinly slice the ginger, I pulled out my trusty mandolin because I wanted very thin slices that I knew I wasn’t skilled enough to do with a knife, no mater how sharp it is. Be sure to use the guard so you don’t slice your fingers. Ouch. If you don’t have a mandolin, consider buying one. I use mine all the time to slice carrots, cucumbers, onions, potatoes, and pretty much any veggie that you want thinly sliced. The alternative is to use your knife and slice as thinly as possible. It’s not the end of the world.

Beef and Ginger Stir-Fry

Heat a tablespoon of vegetable oil in a large skillet until it’s so hot that the soil is shimmering and there are wisps of smoke. I swear I did this, but apparently it was still not hot enough. When I added the meat to the hot pan, the temperature of my pan shot down and the meat steamed instead of browned. ARGH. I think I should have used a cast iron pan instead of a skillet. It probably wouldn’t have hurt turning up the heat to counter balance the temperature change. As I was standing there, swearing to myself, wishing for a do-over, I realized I could continue to make a trucker blush with my language or just go with it. I chose the latter. There’s no point of crying over spilled milk. Or steamed steak.

After a couple minutes, add your onion, ginger, lots of pepper, and a little water.

Beef and Ginger Stir-Fry

Cook, stirring often, until the onion is barely tender and the ginger is soft.

Now the secret ingredients. Call me crazy, but I would have never thought to add BUTTER to the pan. Really. Move over 90s, this is not a low-fat meal! Remove that pan from the heat, and add 3 tablespoons of butter (that’s almost a half a stick, people!), lemon juice (for acidity), and the rest of the soy sauce. Toss until the steak is coated with melted butter. Serve over rice.

Beef and Ginger Stir-Fry

Although the beef looks nothing like the glossy picture on BA, the beef was super tender and flavorful. The onions were not caramelized, but perfectly respectable. The ginger was not seen, but definitely heard. The boys gobbled it up and asked for seconds. Maybe a loss is sometimes a win. In this case, it’s not only a win, but a new dish.

Beef and Ginger Stir-Fry

Beef and Ginger Stir-Fry

Servings 4

Ingredients
  

  • 1 pound skirt steak trimmed of fat, sliced against the grain into 1/4-inch strips, patted dry
  • 1 teaspoon sugar
  • 1 teaspoon toasted sesame oil
  • 1 teaspoon soy sauce
  • 1 teaspoon kosher salt plus more
  • 1 medium red onion sliced into 1/2-inch thick rounds
  • 3 inch ginger peeled and sliced very thinly
  • 1 tablespoon vegetable oil
  • freshly ground black pepper
  • 3 tablespoons butter cut into pieces
  • 1 tablespoon fresh lemon juice
  • 1 tablespoon soy sauce
  • cooked rice for serving

Instructions
 

  • Trim the steak of any excess fat. Slice steak into 1/4-inch strips and pat dry with a paper towel.
  • In a medium bowl, combine sugar, sesame oil, 1 tsp. soy sauce, and 1 tsp. salt. Add sliced steak strips, stir to coat, and let it sit for 20 minutes.
  • Slice onions into rounds with a sharp knife, and peel and thinly slice ginger using a manxdolin or sharp knife.
  • Place a large skillet over high heat. Pour in vegetable oil and swirl to coat bottom of pan. The oil should be shimmering and you should see some wisps of smoke. If the pan is not hot enough, the meat will steam instead of getting deeply browned.
  • Add the steak to the skillet in an even layer. It’s okay to crowd it a bit. Cook, undisturbed, until brown around the edges, about 2 minutes. Turn steak over and add onion, ginger, lots of pepper, and 1/3 cup water. Cook, tossing often, until onion is just tender and ginger is softened, about 2 minutes.
  • Remove skillet from heat and add butter, lemon juice, and remaining 1 tablespoon of soy sauce. Toss until butter is melted and coats steak. Taste and season with more salt if needed.
  • Serve over cooked rice.
Blog

Cheesy Taco Pasta

Jump to Recipe

Last week, I combined two wonderful foods: taco and soup. Today, I’m sharing a taco + pasta recipe from Delish. I’m starting to see a theme here. Maybe next week I’ll invent taco ice cream. Kidding. That sounds awful.

At first I thought this was a mac n cheese recipe with taco meat, but far from it. It’s definitely cheesy, but the main star is still the pasta sauce, which happens to have a lot of cheese in it. Better yet, it’s absolutely delicious and super easy to make. You seriously can whip this up in 30 minutes on a weeknight and everyone will love it. What’s not to love? There’s cheese. There’s taco-ness. There’s pasta. Win-win.

First, boil some pasta until al dente, and it’s really important not to overcook your pasta because you’ll cook the pasta some more in the sauce later. When you drain the pasta, be sure to save some of the pasta water too. You can use any type of pasta. The original recipe uses macaroni, but lately, I’ve been using pasta shells because it has pockets to trap the sauce inside and I like that.

Now for a little lesson on chopping an onion. If you know about this trick, skip ahead. Otherwise, this will be life changing for you. I don’t know what I used to do before other than nick my fingers and end up with unequal pieces of stuff. Unfortunately, the onion will still make you cry, but let’s just pretend they are tears of joy.

Cut off the non-root end of the onion and then peel the skin off. Next, cut it in half through the root. Flat side down, cut in half towards the root.

Cheesy Taco Pasta

Now, slice the onion lengthwise.

Cheesy Taco Pasta

Finally, cut across and admire your handiwork.

Cheesy Taco Pasta

After you’re done patting yourself on the back for you perfectly chopped onion pieces, you can apply your new trick to a jalapeño. If you want a spicier dish, include the membranes when you chop up the pepper.

Gather the rest of the ingredients and arrange them next to the stove you can dump them in the pan as you go.

Cheesy Taco Pasta

Saute the onion and jalapeño. Add your ground beef. When that’s cooked, throw in your taco seasonings. Next, add the canned tomatoes. Fire-roasted are best, but you can use any type of canned diced tomatoes. Hopefully your pasta is done by now because you need some of that reserved pasta water too.

Cheesy Taco Pasta

Drop in the grated cheese and let it melt. Stir.

Cheesy Taco Pasta

Dump the cooked pasta in.

Cheesy Taco Pasta

Stir it all up until the pasta is well coated and combined with the sauce. Dish it out, garnish with cilantro, and eat!

Cheesy Taco Pasta

As you can see, it’s not mac and cheese, but your familiar and comforting pasta and meat sauce, enhanced with a bunch of cheese and taco seasonings. It makes great leftovers, but you might not have any. Instead, you’ll breakdown, have seconds, and soon it’ll be all gone.

Cheesy Taco Pasta

Cheesy Taco Pasta

Servings 6

Ingredients
  

  • olive oil
  • 12 ounces pasta shells
  • 1/2 large white onion chopped
  • kosher salt
  • 1/2 jalepeno chopped
  • 1 pound ground beef
  • 2 tablespoons taco seasoning
  • 15 ounces diced fire-roasted canned tomatoes
  • 1 1/2 cups shredded jack cheese
  • fresh cilantro chopped, for garnish

Instructions
 

  • Boil a large pot of water. Salt the water and then add the pasta. Cook according to package directions until al dente. Drain, saving at least 1/4 cup of the pasta water. Return pasta to the pot.
  • In a large skillet over medium heat, heat olive oil. Add onion and season with salt. Cook until tender, 5 minutes.
  • Add jalapeño. Cook 2 minutes more.
  • Add ground beef and cook until no longer pink, 6 minutes. Add taco seasoning. Drain fat.
  • Add canned tomatoes and 1/4 cup reserved pasta water. Stir.
  • Add cheese. Let it melt in while stirring occasionally for about 2 minutes.
  • Add cooked pasta and toss until completely combined.
  • Garnish with cilantro and serve.
Blog

Parmesan Chicken

Jump to Recipe

I love Parmesan chicken. It’s one of my favorites, but one that I’ve never made well. I usually end up ordering it at restaurants, wishing I could replicate it at home. I think I figured out the problem. I had the wrong recipe.

The two biggest flaws: breading is soggy and doesn’t stick. Other recipes have you dip the chicken in a wash of egg or milk, roll it around in bread crumbs with Parmesan cheese, and then hope all would go well. Wrong. There’s a lot of science behind this recipe, but if followed, you’re guaranteed to make perfectly breaded, crispy chicken with cheesy goodness on the outside, and moist chicken on the inside.

First, let’s thank Ina Garten, the Barefoot Contessa, for this recipe. She makes the best food. Fancy yet comforting. Her recipes are solid and reliable. BTW, I split the recipe because it’s just the three of us, and find that reheating the leftovers isn’t that successful. You lose the crunchiness that makes it so good.

Purchase thin chicken breasts or pound them yourself to about 1/4-inch thick. I like to cover the chicken with wax paper and pound it with a mallet. The wax paper protects the chicken from tearing., but frankly, if I can find chicken already sliced thin, I buy that instead.

You’ll need three dishes to coat the chicken. One reason why the breading falls off is because most recipes skip the important flour dredge. This is a mixture of flour, salt, and pepper. I think it helps the egg wash, which you dip the chicken into after the flour, stick to the chicken, which you absolutely need for the last layer, a mixture of dry bread crumbs and cheese. Each layer builds on each other. When you are done coating your chicken, everything should stick to the chicken rather than slide off. This method is fool-proof, and I mean that in the best possible way. I would be the first to screw it up. And with other recipes, I have. Many times over.

Parmesan Chicken

When you cook it, you don’t need a super hot pan. Heat up the pan with butter and olive oil to medium-low heat. The lower heat setting helps the chicken brown nicely while not drying it out. Cook on each side for about 2-3 minutes. Carefully, try lifting a corner of the chicken. If the chicken sticks to the pan, do not flip it over! Wait another 30 seconds and try again. Be patient and gentle. When it looks like the chicken is not glued to the pan, slip the spatula under the chicken and flip it in one motion. Sometimes I use my fingers to guide and balance it to the correct side. Now would be a good time to show you a video of this. If only I had such technology. Just try to imagine it instead. If you can’t, just flip it. It’s all good.

When it’s all toasty brown on one side, it should look gorgeous like this.

Parmesan Chicken

I’m pretty proud of myself here. It’ll be this way for you too.

Meanwhile, make the lemon vinaigrette for the mixed green salad. I don’t think a salad is really necessary and found the dressing to be a bit too acidic for my taste, but my husband loved it. It does compliment the richness of the cheese, but I’m a ranch girl. I would put ranch on everything if I could.

When the chicken is golden on both sides, it’s ready. I placed the chicken over the greens, but the recipe instructs you to place the greens on the chicken. Either way. I wanted my greens a little wilted so under the chicken they went. I shredded plenty of extra Parmesan cheese on top. Like ranch, one cannot have too much cheese.

This makes a super impressive, fancy looking dinner that really didn’t take much time at all.

Parmesan Chicken
Parmesan Chicken

Parmesan Chicken

Servings 6

Ingredients
  

  • 6 boneless, skinless chicken breasts
  • 1 cup all-purpose flour
  • 1 teaspoon kosher salt
  • 1/2 teaspoon black pepper
  • 2 large eggs
  • 1 1/4 cup seasoned dry bread crumbs
  • 1/2 cup freshly shredded Parmesan cheese plus extra for serving
  • 2 tablespoon butter
  • 2 tablespoon olive oil
  • salad greens for 6 washed and spun dry

Lemon Vinaigrette

  • 1/4 cup freshly squeezed lemon juice
  • 1/2 cup olive oil
  • 1/2 teaspoon kosher salt
  • 1/4 teaspoon black pepper

Instructions
 

  • Using a meat mallet, pound the chicken breasts until they are 1/4 inch thick.
  • Combine the flour, salt, and pepper on a dinner plate. On a second plate, beat the eggs with 1 tablespoon of water. On a third plate, combine the bread crumbs and 1/2 cup grated Parmesan cheese. Coat the chicken breasts on both sides with the flour mixture, then dip both sides into the egg mixture, and dredge both sides in the bread-crumb mixture, pressing lightly.
  • Heat 1 tablespoon of butter and 1 tablespoon of olive oil in a large sauté pan. Cook 3 chicken breasts on medium-low heat for 2 to 3 minutes on each side, until cooked through and golden. Remove from pan and set aside, covered to keep them warm. Add more butter and oil to the pan, and cook the rest of the chicken breasts.
  • Make the vinaigrette in a small bowl by whisking together the juice, olive oil, salt, and pepper. Toss the salad greens with vinaigrette.
  • To serve, place a mound of salad on each plate and then place a chicken breasts on each salad. Shredded additional Parmesan cheese on top.