Blog

Taco Soup

Jump to Recipe

You know I love a good taco (mmmm…carnitas), but I also love a good soup, especially when it’s cold outside. So what happens when you can’t decide between two radically different meals? You combine them, of course! Meet taco soup!

The beauty of this recipe is that you just dump a bunch of cans into a slow cooker, let it do its thing all day, and then you eat loads of taco goodness. If you don’t have 6-8 hours to slow cook this soup, you can also simmer it in a pot on the stove for about an hour.

The original recipe comes from Paula Deen. I’ve made it so many times, but I’ve made a couple substitutions and clarifications. I’ll explain along the way.

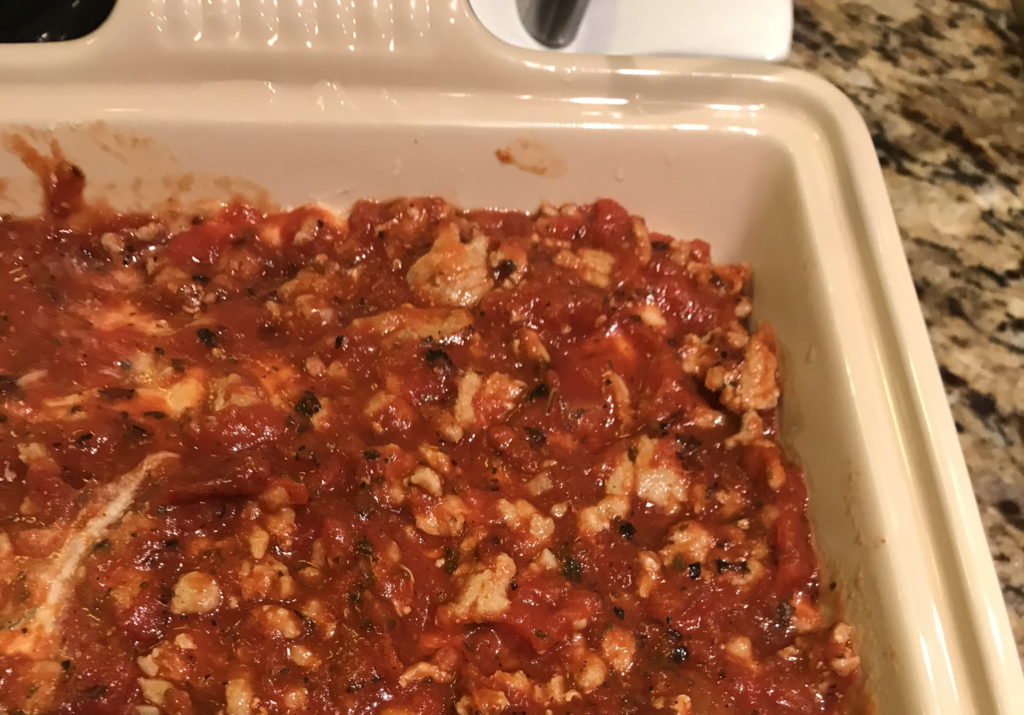
First, in the slow cooker (if you have a saute setting) or in a pan, brown some ground turkey and chopped onions with some salt and pepper. The original recipe did not call for the salt and pepper, but I think it’s important to season your meat or it could taste bland. This recipe also calls for beef, but turkey is so much better. The beef overpowered the other ingredients and made it too meaty, if that’s possible. But this is just my opinion. Feel free to use any type of ground meat.

Next you’ll be doing some labor intensive can opening. About 9 cans worth. I’m not kidding. This recipe has a ton of ingredients, but isn’t that better than chopping 9 different ingredients? Seriously, the can is your friend.

Taco Soup

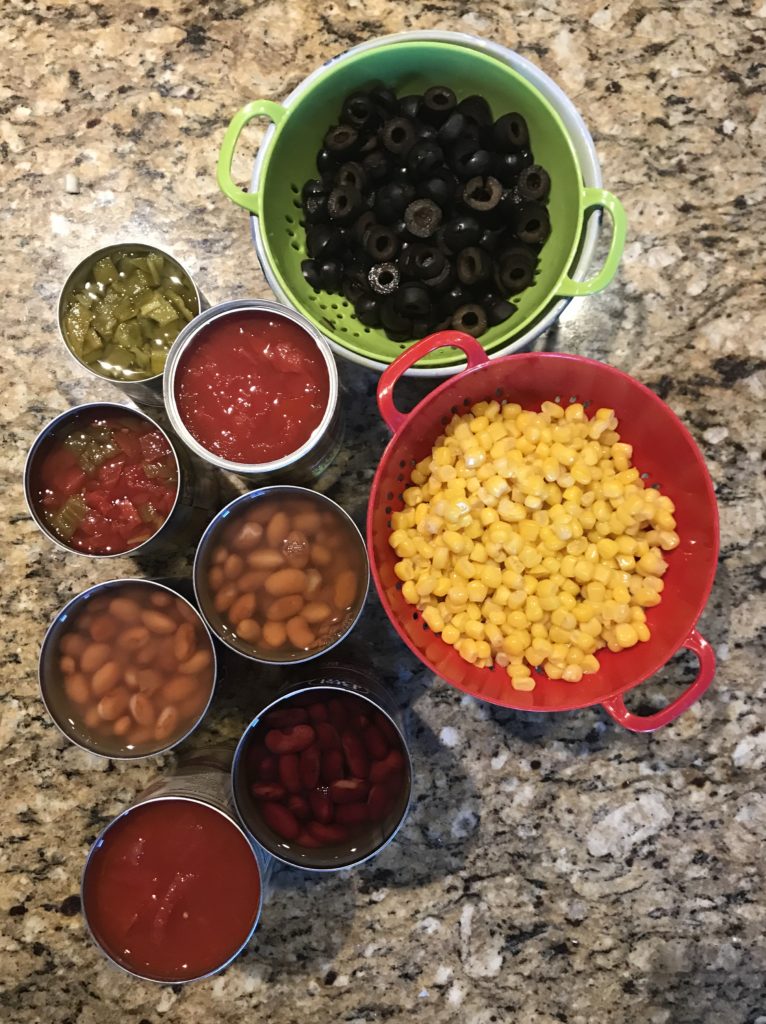
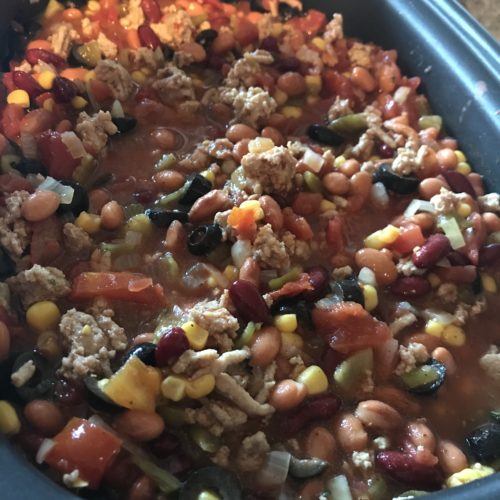
After opening all these cans, add the browned meat to a large slow cooker and then start dumping each can in. Be sure to drain the olives and corn, but not the beans. You’ll need that for the liquid, which is something the original recipe doesn’t mention. Learn from my mistakes. This is soup, not some sort of defiant bean chili that would make every Texan cry. You’ll also add packets of ranch dressing mix and taco seasoning. Ranch?! Yes! Trust me. As with bacon, everything is better with ranch. This soup is no exception.

Taco Soup

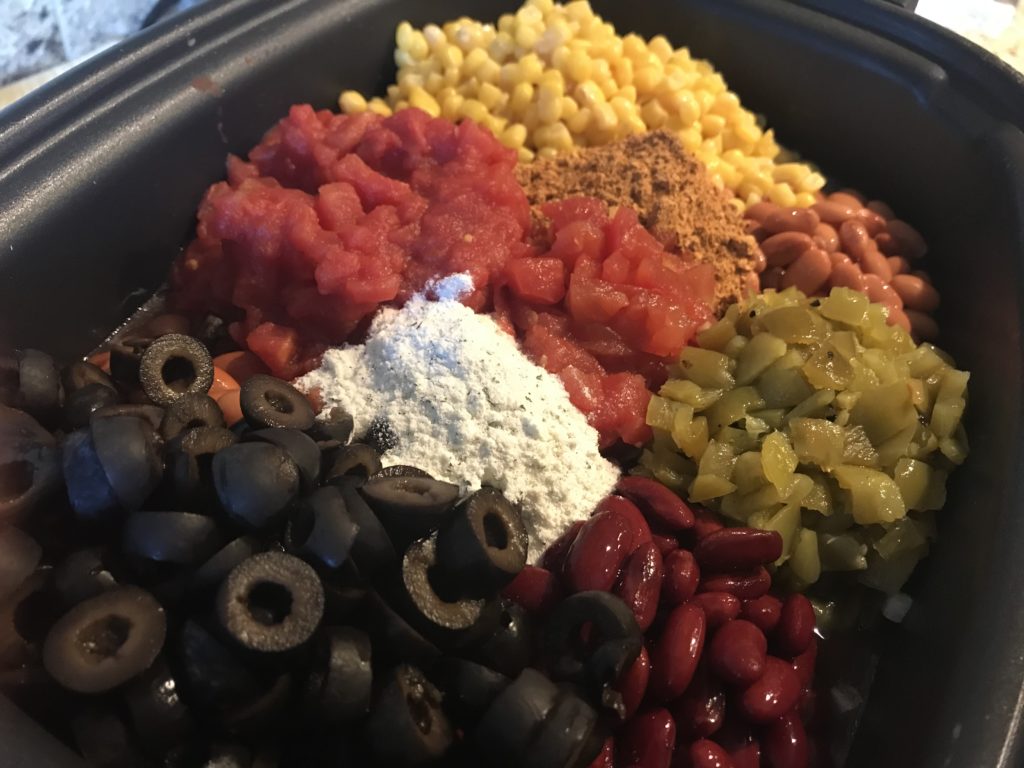
This is a pretty mild soup so if you need something with more kick, don’t use mild canned tomatoes with chiles. Buy the hot stuff. If that’s not spicy enough, add a few dashes of your favorite hot sauce, a couple pinches of red pepper flakes, or a couple chopped up jalapenos. Sliced pickled jalapenos would be good too.

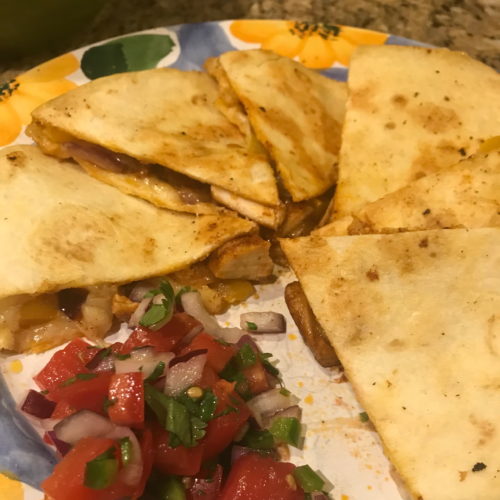
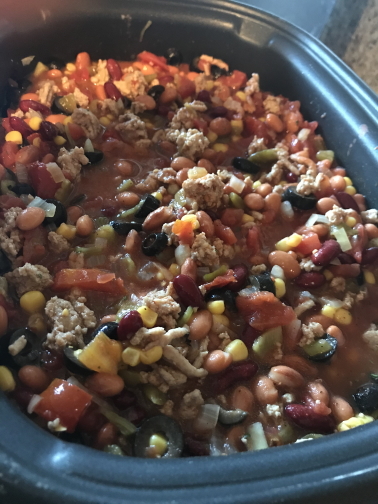
Mix it all together and slow cook on low for at least 6 hours (or simmer for an hour). When it’s ready, mix it up again and ladle it into soup bowls. Garnish with your favorite taco toppings or even top with some corn or tortilla chips.

This soup is so satisfying on a cold winter evening or even in the middle of summer when you want a taco but you’ve run out of tortillas (but you happen to have 9 cans of stuff…okay, a stretch of the imagination, but work with me here!). It’s so delicious that you’ll even forget to take pictures of it served. Like I did.

Taco Soup

This recipe makes a lot of soup. Freeze leftovers or refrigerate to enjoy throughout the week.

Taco Soup

Taco Soup

Servings 16

Ingredients
  

  • 2 pounds turkey
  • 2 cups onions diced
  • salt and pepper
  • 2 15.5 ounce canned pinto beans undrained
  • 15.5 ounces canned kidney beans undrained
  • 15.25 ounces whole canned corn drained
  • 14.5 ounces canned Mexican-style stewed tomatoes
  • 14.5 ounces canned diced tomatoes
  • 14.5 ounces canned tomatoes with chiles hot or mild
  • 9 ounces canned diced green chiles
  • 6.5 ounces canned black olives sliced and drained
  • 1 package taco seasoning mix
  • 1 package ranch salad dressing mix
  • taco toppings see recipe

Instructions
 

  • Brown the ground turkey and onions on the saute setting of a slow cooker or in a skillet. Season with salt and pepper to taste.
  • If needed, transfer the browned turkey and onions to a large slow cooker or a stockpot.
  • Drain the corn and olives. Do not drain the rest of the cans. Add the beans, corn (drained), tomatoes, green chiles, olives, taco seasoning, and ranch dressing mix.
  • Cook in a slow cooker on low for 6 to 8 hours or simmer over low heat for about 1 hour in a pot on the stove.
  • To serve, ladle soup into bowls. Top with corn or tortilla chips, sour cream, cheese, green onions and/or jalapenos.
Blog

Bulgogi

Jump to Recipe

I’ve always been interested with how food intersects with culture. I like to connect with other cultures that are not my own to experience other places. Partly it satisfies my interest to travel. Partly it feels like I’ll making up for a lack of culture. You see, I’m embedded in the nondescript culture of California. I know that someone far away imagines we’re the land of sunshine, fresh produce, and wine, and maybe we are, but when you’ve only grown up with this, you don’t know anything else and you take it for granted. It’s mundane and not so exciting or unique. What you don’t have is more interesting. The grass is greener on the other side.

Not to get all deep on you guys, but sometimes you just have to go outside of the box and make something you’re completely unfamiliar (and maybe even uncomfortable) with to learn from the experiences you’ve never had. This has lead me to trying new Asian dishes lately. Today, I share with you bulgogi, which is a South Korean dish I can barely pronounce, but absolutely love. This recipe is probably not authentic, but it’s fast and delicious, and it exposes me to a bit to Korean culture.

This “weekend-style” bulgogi recipe comes from the Kitchn. Naturally, I changed it, but more by accident than anything. I’ll get to that in a minute.

First, the marinade. Unlike most marinades I’ve made, this owe uses shredded pears with the juices to tenderize the meat. Who would have thought?! Combined with ginger, garlic, onions, soy sauce, brown sugar, sesame oil, and red pepper flakes, it screams Asian flavors. I almost wish there was a candle for it because it smelled that good.

Bulgogi

Next, slice up a steak in thin strips.

Bulgogi

This is where I went off course. Instead of grabbing the 2-pound package of flank steak from the back of my fridge, I accidentally pulled out the 1-pound package of skirt steak. Doh! A steak is a steak, but not exactly. It turns out that skirt steak has a super meaty taste (more so than flank steak) and holds up to marinades better than flank steak. Cool! Sounds like I chose the wrong meat wisely! Fortunately, it’s perfectly acceptable to use other cuts of beef (such as rib-eye) in bulgogi, or even chicken or pork.

After adding the meat, I had a lot of marinade going on and no idea why. What a weird recipe. No, I was just missing a pound without realizing it. Sort of wasteful, but no harm to the beef.

Marinate for at least 30 minutes or up to 8 hours. After that, it’s time to cook it up. But where are the veggies? Green onions count, right? This is a meat-lovers dish although you can add green peppers if you like. I used a cast iron pan, hoping to get a good sear. Bulgogi is typically grilled, but it was cold outside. Probably 60 F. Welcome to California culture.

Bulgogi

When it’s done, garnish with sliced green onions and serve over rice, if you wish. I had mine plain. The meat wasn’t as seared as I had hoped for, but the steak was so incredibly tender that it practically melted in my mouth. I might need to start marinating everything in pears.

Bulgogi
Bulgogi

Bulgogi

Servings 4

Ingredients
  

  • 2 large pears grated
  • 2 inches fresh ginger grated
  • 3 cloves garlic grated
  • 4 green onions thinly sliced, white and green parts separated
  • 2 tablespoons soy sauce
  • 1 tablespoon packed light brown sugar
  • 1 tablespoon sesame oil
  • pinch red pepper flakes
  • 1-2 pounds skirt steak
  • 1-2 tablespoon vegetable oil
  • cooked rice optional

Instructions
 

  • Grate the pears on the large holes of a box grater into a large bowl. Make sure to collect the juices along with the peel and flesh of the pear. Grate ginger and garlic on the small holes of the grater into the same bowl.
  • In the same bowl, add the white parts of the green onions, soy sauce, brown sugar, sesame oil, and red pepper flakes. Stir to combine.
  • Slice the steak into thin pieces across the grain of the meat. Add to the marinade and toss to coat.
  • Cover the bowl and let the beef marinate for 30 minutes to 8 hours.
  • When ready to cook, heat a large, wide cast iron or other pan over medium-high heat. Add a tablespoon of the oil to the hot pan and about a pound of meat. Sear until slightly charred and cooked through, 1 to 2 minutes on each side. Transfer to a serving dish. If you are using more than a pound of meat, repeat with another tablespoon of oil and the rest of the meat.
  • Garnish with the green parts of the green onion. Serve over rice (optional).
Blog

Italian Sausage Lasagna

Jump to Recipe

Lasagna sort of seems daunting and time-consuming. There’s a lot of work involved with all those layers. Cooking the noodles, making the meat sauce, prepping the ricotta mixture…you get the idea. But the reward really is worth it. It’s so comforting and tasty. It’s a great dish to take make for parties, or take to a new parent or sick friend who needs a night off from cooking. If you’re into meal prepping, you can make a couple pans of lasagna to keep in the freezer. Lasagna is easy to pop in the oven for those nights when you don’t want to lift a finger or you have surprise guests. Why not buy a frozen lasagna instead? Because it’s just not as good as homemade. Period. And it’s way cheaper to make your own.

I found some ground pork sausage in my freezer, which I wanted to use up, so I looked for a recipe with that in mind. I found a good one on The Spruce Eats, but changed it up a little. I prefer a saucier meat sauce using fire-roasted tomatoes. I’ve had some bad experiences with dry lasagna so I’m on the school that you can’t have too much sauce. As a result, my lasagna isn’t the prettiest, but it definitely tastes good.

Grab your ingredients and get to work. Smash your garlic. Open those cans. Measure out the seasonings. Chop the parsley. Shred the cheeses. Yes, lots of prepping.

Brown the sausage and then add garlic, tomatoes, seasonings, and tomato paste. You need to let it simmer for at least 30 minutes. The longer the better, really. Tomato paste has a raw taste that needs to be cooked out for at least 30 minutes. Like tasting baking chocolate (the kind without the sugar), tasting your tomato paste is not something you want to try. Yuck. So cook it for a while to get that tomato flavor going.

While this is going on, boil your noodles al dente. Do not overcook them or you’ll end up with mushy noodles. This recipe doesn’t use no-cook noodles, but they would probably work. Just put them directly in your lasagna. For a lower carb alternative, I like using Dreamfields lasagna noodles. Although not a true low-carb pasta, they are higher in fiber and more filling. Just don’t eat half a pan of lasagna! I’ve used them before and they hold up really well. You can also use thin strips of zucchini, but is that really lasagna? Probably not.

Make your ricotta cheese mixture last. When your meat sauce and noodles are done, the fun starts! I made half the original recipe so use a 9 x 9 x 2 inch casserole dish and start with a layer of noodles. Cover the noodles with a layer of mozzarella cheese. If you’re like me, be sure to taste the cheese to ensure it’s good and not poisoned. Yes, I love cheese.

Add a layer of ricotta. Don’t get obsessive about it. Dollop spoonfuls, spread it out until the edges are touching, and call it good. It’ll all blend together anyway.

Italian Sausage Lasagna

Next a layer of meat sauce.

Italian Sausage Lasagna

Do it all over again with another layer of noodles, ricotta, and meat. Top it all with mozzarella cheese.

Italian Sausage Lasagna

Bake it in the oven until the cheese is all melty on top, about 30-40 minutes.

Italian Sausage Lasagna

Let it rest a bit so you don’t burn the rough of your mouth when you take a bite. It also helps the cheese to solidify a little, but that didn’t seem to help my case. A hunk of lasagna does not photograph well, but tastes delicious so who cares?

Italian Sausage Lasagna

Italian Sausage Lasagna

Servings 4

Ingredients
  

  • 1/2 pound Italian pork sausage
  • 1 clove garlic minced
  • 14.5 ounces fire roasted tomatoes crushed or diced
  • 1 teaspoon dried basil
  • 1/2 teaspoon dried oregano
  • 1 1/4 teaspoons kosher salt divided
  • 6 ounces tomato paste
  • 6 lasagna noodles
  • 1 1/2 cups ricotta cheese
  • 1/3 cup Parmesan cheese shredded
  • 2 tablespoons fresh parsley chopped
  • 1 large egg
  • 1/4 teaspoon pepper
  • 8 ounces mozzarella cheese shredded

Instructions
 

  • Preheat the oven to 375 F.
  • In a skillet, brown the sausage and then drain the excess fat. Add the garlic, tomatoes, basil, oregano, 3/4 teaspoon salt, and tomato paste. Simmer, uncovered, for 30 minutes. If the sauce is too thick, add a little water.
  • Meanwhile, cook the lasagna noodles al dente, according to the package directions.
  • In a bowl, combine the ricotta cheese, Parmesan cheese, parsley, eggs, 1/2 teaspoon salt, and pepper.
  • In the bottom of a 9 x 9 x 2-inch casserole dish, place one layer of the noodles.
  • Cover the noodle layer with a layer of mozzarella cheese, and then add half of the ricotta mixture over the mozzarella. Add half of the meat sauce over the ricotta cheese layer. Repeat the layers (starting with the noodles), ending with mozzarella cheese.
  • Bake for 30 to 40 minutes in the preheated oven. Remove the lasagna from the oven and allow it to rest a few minutes before serving.
Blog

Beef and Italian Sausage Meatloaf

Jump to Recipe

I’m always on the hunt for the world’s best meatloaf recipe. It’s a home-style classic that is making a comeback, but it’s different now. We will no longer settle for the dense, dry loaf of our youth. Meatloaf can be delicious!

The secret lies with a few tricks.

Meat. You cannot use lean ground beef alone. It’ll come out dry because there’s no fat in it. When it comes to meatloaf, fat is your friend. If you want to make a leaner meatloaf, try a combination of lean and not so lean meats. For example, use lean beef or ground chicken with ground sausage (like in the recipe I’m going to share with you).

Breadcrumbs. Your best meatloaf might not be Keto or low-carb friendly. Sorry, but someone needs to discuss these truths. I’m sure there are bread substitutes (like almond flour) you can try, but that’s not this recipe. Straight up breadcrumbs make meatloaf less dense and help to hold in the juices. Remember, you are making meatloaf, not a meatbrick. If you are watching your carbs, just eat less meatloaf and more salad.

Vegetables. Shhhh! Meatloaf is a great way to hide those veggies your picky eaters won’t touch with a 10-foot pole. It also adds a bunch of moisture when the veggies break down and cook. The key is to chop them really finely so no one notices them. They’ll make your meatloaf tasty. The breadcrumbs will capture the juices and do its thing.

Do not over mix. I actually have a difficult time following this one. My OCD comes out. I have a tendency to mix everything together a lot because I want it well blended. But over mixing messes with the texture and leaves you with tough, dry meatloaf. You should barely mix it. You’ll end up mixing it a little more when you add the vegetables and then again when you put it in the pan. Whatever you do, do not compress it in the loaf pan. Smooshing (a real word) makes it dense, which is exactly what you are trying to avoid.

I’m a fan of several meatloaf recipes. Let me count the ways. Ina Garten’s Meat Loaf, BA’s Meat Loaf with Barbecue Sauce, and The Pioneer Woman’s Meatloaf are good choices, although I’m not a fan of ketchup on meatloaf. I’d like to try BA’s Best Beef-and-Bacon Meatloaf, but I’m skeptical because bacon on meatloaf never seems to crisp up for me. If you want to try a leaner one with turkey, go for Giada’s Turkey Meatloaf with Feta and Sun-Dried Tomatoes. I was impressed with the short cooking time of Sheet-Pan Glazed Meat Loaf and Blue Cheese Spinach Meat Loaf Muffins.

This recipe was inspired by The Spruce Eat. I needed to use up the leftover sausage from the Christmas dressing I made and this seemed like a perfectly good recipe to try out. I changed up the type of sausage to use and added a few tips for you. I was also surprised that they want you to pack the meat into a loaf pan, which is a big NO in my book.

Barely combine the meats, egg, and breadcrumbs. Remember, you’ll be mixing it again. Pulverize your canned tomatoes. I like to use a NutriBullet, but you can use a food processor or even chop it up with a knife. Chop up onion, garlic, and bell pepper into tiny pieces. Add these to a bowl along with your seasonings and cheese.

Beef and Italian Sausage Meatloaf

Mix it up with half of the tomatoes and meat mixture. Lightly press into a loaf pan.

Beef and Italian Sausage Meatloaf

Go find something fun to do while it bakes. Like make a bundt cake while watching HGTV. I know. I’m weird.

After an hour, spread the rest of the tomato mixture over the top of the meatloaf. I like it better than ketchup. There’s something not right about warm ketchup.

About 15 minutes later, pull it out of the oven and let it rest a bit like you would a steak. This helps keep the juices in. I did expect the tomato to brown a little, but it didn’t. and that’s okay.

Not your mom’s meatloaf. Better. But don’t tell her.

Beef and Italian Sausage Meatloaf

Beef and Italian Sausage Meatloaf

Servings 6

Ingredients
  

  • 1 pound lean ground beef
  • 1/2 pound ground Italian sausage
  • 1 large egg slightly beaten
  • 3/4 cup breadcrumbs
  • 14.5 ounces diced tomatoes divided
  • 1/2 onion finely chopped
  • 2 cloves garlic minced
  • 1/2 bell pepper any color, finely chopped
  • 1 1/2 tablespoons dried basil
  • 1 teaspoon dried oregano
  • 1 teaspoon salt
  • 1/4 teaspoon ground black pepper
  • 3/4 cup Parmesan cheese freshly shredded

Instructions
 

  • Spray cooking oil in a 9 x 5 x 3-inch loaf pan. Preheat the oven to 375F.
  • In a large bowl, combine meats, egg, and breadcrumbs until barely blended.
  • Puree tomatoes in a food processor.
  • Add half of the tomatoes to the meat mixture. Then, add diced onion, minced garlic, diced pepper, basil, oregano, salt, pepper, and shredded cheese to the meat mixture. Mix until barely blended.
  • Put meat mixture into the loaf pan. Bake for 1 hour.
  • Top with remaining tomatoes. Bake for another 15-20 minutes, or until the internal temperature is about 155F.
  • Allow the meatloaf to rest for about 5 minutes, slice, and serve.
Blog

Soy-Maple Salmon

Jump to Recipe

Seafood is so damn expensive.

We’ve been trying to cut our grocery bill because it seems what we spend is so outrageous for a family of three so I’ve been buying a lot of ground beef and chicken thighs. My family finally complained. I was sort of missing fish too so I broke down and bought three salmon fillets. I thought they were $7.99 a pound. Wow! What a great deal! After the seafood dude wrapped them up for me, I saw the real price and gasped. No, they were $7.99 each. Damn. I bought them anyway.

So at this price, I better not mess it up. Or I will cry.

When it comes to fish, simple is best. I went with a trusted recipe from the Food Network where you marinate the salmon in a few ingredients: soy sauce, real maple syrup, orange juice, garlic, and water. It has that salty, sweet thing going for it.

Soy-Maple Salmon

The key thing to learn here is that more is not better. Do not marinate your salmon for too long or the proteins start to break down. The results: a mushy piece of fish. Which would make me cry.

Let your salmon soak for about 20 minutes.

Soy-Maple Salmon

Twenty minutes later, pull it out of the marinade, season it with some salt and pepper, and bake it for about 10 minutes, depending on the thickness. That’s it!

I started checking on it after 8 minutes. The last thing you want is overcooked salmon. Take a fork and gently peek in the middle. It needs to flake a little and be slightly pink instead of deep pink. If it’s a little under cooked, it’s okay to pull it out of the oven and let it finish as it rests. It’s so much easier to stick it back in the oven if you have to. Once it’s overcooked, it’s all over. And that would make me cry. Notice a theme of sorrow?

Serve with bread or rice, and a salad or some fruit. The original recipe included directions to make a cauliflower side, which sounded good to me, but I knew my family would veto it. I decided to make one of my crazy salads instead where I combine every salad ingredient I can find in the fridge and top it with bacon. Because everything is better with bacon.

Soy-Maple Salmon
Soy-Maple Salmon

Soy-Maple Salmon

Servings 3

Ingredients
  

  • 2 tablespoons low-sodium soy sauce
  • 2 tablespoons real maple syrup
  • 1 tablespoon orange juice
  • 3 cloves garlic smashed
  • 3 5-ounce skinless center-cut salmon fillets

Instructions
 

  • Preheat the oven to 400F.
  • Mix everything together (except the salmon) with 2 tablespoons of water in a large bowl.
  • Add the salmon and turn to coat. Cover and refrigerate for 20 minutes.
  • Coat a rimmed baking sheet with cooking spray. Drain the salmon, season with salt and pepper, and place on the baking sheet.
  • Bake for about 8 to 10 minutes, until it's a slight pink in the middle.
Blog

Sweet and Sour Chicken

Jump to Recipe

I don’t think I’ve ever been to a Chinese restaurant that didn’t have some variation of sweet and sour chicken. It might have even been one of the first Chinese dishes I’ve ever had. It has fruit in it so it’s kid friendly, right?

So much of our Chinese food is westernized beyond recognition so I am almost embarrassed to call this Chinese food. To educate myself, I decided to learn more about the origins of this dish. I am glad to report that sweet and sour sauce actually originated in China, but it is more of a light vinegar and sugar mixture. It wasn’t until it came to America did we decide to bread and deep fry the meat, throw in peppers and pineapple, and then toss it in that glossy syrupy thick sauce common in most restaurants in the US. Naturally we would take a relatively healthy dish and supersize it. It’s the American way.

Although this recipe has peppers and pineapple, I’m also glad to say that this recipe is way more mellow and delicious than what you’d find at Chinese restaurants. It doesn’t have any of that sickly sweet goop smothering everything. You might not go back to restaurant sweet and sour chicken. I definitely will think twice and stick to Mongolian beef.

Prep all your ingredients. This is known as “mise en place.” Leave it to the French to come up with a phrase for prepping food. Ok, I actually love it. Makes me feel organized.

Be sure to use canned pineapple in 100% juice because you’ll need to save the juice for your sweet and sour sauce, which you’ll make next. After making the sauce, chop up your veggies and chicken into bite-sized pieces. Chop the chicken after the veggies so you don’t contaminate the board and have to use a second board for the veggies. Less mess. Coat the chicken with cornstarch and season with salt. I chose to use thighs instead of breast meat for the extra flavor.

Mince your garlic and ginger. To mince the ginger, I actually use a cheese grater. You don’t have to peel the ginger or deal with any of the tough fibers found in ginger. You could also grate your garlic, but I know I’ll grate my fingers and that’s just not right.

Sweet and Sour Chicken

Once you have everything ready to go, making the dish goes pretty fast.

Sweet and Sour Chicken

Stir-fry your veggies in a little oil. This recipe comes from the Kitchn, who recommend waiting until you have charred spots in the peppers, but I disagree. I like my veggies to be firm and slightly hold their shape, which means you should stir the veggies often. Next, add the garlic and ginger.

Sweet and Sour Chicken

In less than a minute, everything should smell pretty good, which means it’s time to transfer all this to a plate or bowl, and cook the chicken separately. This is the trick to ensure everything is ready at the same time. You won’t end up with mushy veggies or dried out chicken.

Instead of deep-frying the chicken, only add a couple tablespoons of oil to the pan. After heating up the oil, spread the chicken into an even layer in the pan. Now, DO NOT TOUCH IT. Resist the urge. It will not burn. You want to brown the chicken to provide flavor to the dish, and you want the cornstarch to stick to the chicken, creating an almost crispy texture that resembles deep-frying. You’ll flip it after it’s brown on one side. You’ll know this because the chicken will no longer stick to the pan. You definitely want to wait until this happens so all your cornstarch doesn’t stick to the pan.

Sweet and Sour Chicken

After the chicken is cooked, return everything to the pan plus the pineapple and pour the sauce over it all. Stir until everything is coated. Wait a few minutes, stirring a couple times, until the sauce is thickened to your liking. The cornstarch you used on the chicken will help thicken the sauce.

Sweet and Sour Chicken

Serve over rice if you don’t care about carbs. Eat.

What I really liked about this recipe is how healthy and fresh it tastes without any overwhelming sugary taste. After all, it’s a main dish, not dessert. The apple cider vinegar really stands out for that sour element, but it has just enough sugar to make it sweet. Two-thumbs up.

Sweet and Sour Chicken

Sweet and Sour Chicken

Servings 4

Ingredients
  

  • 8 ounces canned pineapple chunks in 100% pineapple juice with juice reserved
  • 1/4 cup ketchup
  • 2 tablespoons apple cider vinegar
  • 1 tablespoon brown sugar packed
  • 1 tablespoon soy sauce
  • 3 tablespoon canola oil divided
  • 1/2 medium onion
  • 2 medium bell peppers any color
  • 1 pound boneless, skinless chicken thighs
  • 3 tablespoons cornstarch
  • 1 1/4 teaspoons kosher salt divided
  • 2 cloves garlic minced
  • 2 tablespoons ginger grated
  • steamed rice

Instructions
 

  • Drain the pineapple, but save keep 1/4 cup of the juice from canned pineapple. Set the juice aside in a small bowl. Set the pineapple aside.
  • In the bowl with your pineapple juice, add ketchup, vinegar, brown sugar, and soy sauce. Whisk to combine. Set aside.
  • Cut onions and peppers into 1-inch pieces. Set aside. Cut chicken into 1-inch pieces. Sprinkle with 1 teaspoon of salt and cornstarch. Toss until well coated.
  • Mince garlic with a knife. Using a cheese grater, grate ginger.
  • Heat 1 tablespoon of the oil in a large nonstick frying pan over medium-high heat until shimmering. Add the onion and stir-fry for 1 minute. Add the peppers, season with 1/4 teaspoon of the salt, and stir-fry for about 3 to 4 minutes.
  • Add the garlic and ginger to the vegetables and stir-fry until fragrant, about 30 seconds. Transfer to a plate and set aside.
  • Heat the remaining 2 tablespoons oil in the pan over medium-high heat until shimmering. Add the chicken and spread into an even layer. Cook without stirring until browned on the bottom, 3 to 4 minutes. Flip and cook without stirring until the chicken is browned on the second side and cooked through, 3 to 4 minutes more.
  • Return the vegetables to the pan. Add the pineapple and sauce into the pan.
  • Stir-fry until thickened and coats the chicken and vegetables, 1 to 2 minutes. Serve over rice.
Blog

Kielbasa Fried Rice

Jump to Recipe

Fried rice is yummy and convenient. It’s one of those things you can usually make with your spare ingredients. All you need is some meat, veggies, rice, and eggs. Some soy sauce and garlic helps too.

So why don’t I make fried rice very often? Because I’m on this low carb deal and I’d have to make two sets of fried rice, one with actual rice and the other with riced cauliflower. I should try that sometime, but now is not this time. Instead, I’m going to run through this two-thumbs up fried rice I made the other night. I found the recipe on Bon Appétit, but it wasn’t in a recipe format so providing you with a recipe is my value add here. That and I’ll explain a few things because I have opinions and you’re reading this so I might as well share them with you.

The nice thing about this recipe is that you can use fresh rice. Most fried rice uses leftover rice, which you can still use, but I rarely have cooked rice around so I made some in my Instant Pot before I started.

Although this recipe uses kielbasa, you can use any protein like chicken, pork, tofu, or even a combination. Whatever you have should work. I purchased kielbasa because I wanted to follow the recipe exactly and I was not disappointed.

I sliced up the kielbasa and then the green onions at an angle (other than it looks fancier, I have no idea why recipes suggest this) and garlic. Again, you can probably use any type of onion. I was a little wary of not mincing my garlic, but it all worked out fine.

Kielbasa Fried Rice

Throw the kielbasa in the pan. Then, don’t touch it! When you brown the kielbasa, be sure not to constantly stir it around. If you do, you’ll end up with warmed up, bland meat. Blah. Searing the meat is key. You want to let it sear on one side before moving it around so it creates a nice, golden caramelization that adds a bunch of flavor to your dish.

Add your onions, garlic, and a pinch of salt, and then flip the meat over to cook the other side.

Kielbasa Fried Rice

Cook it until the onions are slightly soft. Add your rice, another pinch of salt (remember you are adding layers of flavors instead of dumping all your salt at the end like your mom probably taught you, if she even let me add salt, but that’s another story), a few splashes of soy sauce, and a pinch or two of sugar to add a bit of sweetness. Salty sweet. Mmmm… Mix it around.

Kielbasa Fried Rice

Now the fun begins! Egg time. Whisk up 3 eggs with a pinch of salt. Make a wall of rice mixture on each side of the pan and pour your eggs down the middle.

Kielbasa Fried Rice

Let the eggs sit for a minute or two to let them cook a little and then scramble them a bit. When they are cooked, mix the rice and goodies with the scrambled egg. Throw it in a bowl, squeeze some lime over it for acidity, and eat! Nothing’s easier than this for a delicious weeknight meal. So many flavors…salty, sweet, umami (a fancy way of saying savory) with that soft, sticky rice mixed with scrambled eggs…ok, I really need to take a bite to make sure it’s ok. Mmmm… Damn carbs.

Kielbasa Fried Rice
Kielbasa Fried Rice

Kielbasa Fried Rice

Servings 4

Ingredients
  

  • 1 1/2 cups cooked rice
  • 14-16 ounces Polish style kielbasa sliced 1/4-in thick, at an angle
  • 8 green onions thinly sliced, at an angle
  • 2 cloves garlic thinly sliced
  • 2 tablespoons vegetable oil
  • 3-4 pinches kosher salt
  • 2-3 splashes soy sauce
  • 1-2 pinches white sugar
  • 3 eggs whisked
  • lime quartered

Instructions
 

  • Make rice. While it's steaming, slice the Polish style kielbasa at an angle and about 1/4" thick. Thinly slice green onions on an angle. Thinly slice garlic.
  • Heat vegetable oil in a large nonstick skillet or wok over medium-high heat. Add the sliced kielbasa in the pan and let it cook without stirring for about 3 minutes until the underside is a deep brown color.
  • Add the sliced green onions and garlic to the pan. Add a pinch of salt. Flip most of the kielbasa to the other side and stir. Continue to cook for another couple minutes, until the green onions begin to soften.
  • Add the steamed rice into the skillet, a 1-2 pinches of salt, a 2-3 splashes of soy sauce, and 1-2 pinches of white sugar. Stir everything together so the green onions, garlic, and kielbasa are evenly distributed.
  • In a small bowl, whisk 3 large eggs and a pinch of salt.
  • Split your rice mixture in half and push each half to each side of the skillet so that a strip of pan with nothing in it runs down the middle. No rice should be in the middle.
  • Pour the eggs into the middle section of the skillet. Let the eggs cook for 1–2 minutes without stirring. Then, scramble quickly, scraping along the bottom of the skillet. When the eggs have cooked through, combine the egg into the rice mixture to distribute the eggs throughout the rice evenly.
  • Pour into bowls and squeeze a quarter of lime over each bowl.
Blog

Mac and Cheese with Ham

Jump to Recipe

I love mac and cheese. Pasta. Cheese. Gooey deliciousness. What’s not to love? To make a more hearty meal, add a protein or mix it up a bit. Use tortellini instead of macaroni or shells. Top with a cracker crumble. Throw in some chicken and broccoli. That makes it healthy, right? Other add-in ideas: meatballs, bacon (mmmm…bacon), spicy sausage, veggies, pesto, or even tuna. I decided to take it up a notch by throwing in some diced ham.

I have a super yummy recipe when I don’t want to make boxed mac and cheese. You can use any kind of cheese that melts easily, like American (which does have its place but not today), but this is fancy mac and cheese so you swap out the American for a more grown up cheese: Gruyere. Gruyere is a type of Swiss cheese that doesn’t taste anything like that strong, holey Swiss cheese. Instead, it’s sweet, salty, and nutty without being overpowering. It’s also really creamy and melts easily so it’s perfect for fondue, grilled cheese, and of course, mac and cheese.

Making homemade mac and cheese is not hard, but is a little more time consuming that the box. The “hardest” part is making the actually sauce, but it’s a lot easier to make than you think. You won’t mess up. It won’t come out lumpy or burnt if you follow a few simple steps. I promise.

Do your prep work. Shred a bunch of cheese and dice your ham into bite-sized pieces.

While you’re cooking your pasta (to slightly under al dente because it’ll continue to cook a little in the oven), make your sauce. Heat up some milk. When it’s ready, it should be hot, but not boiling. If you can stick your little finger in it and it’s a little uncomfortable, but not burning, it’s perfect. It’ll also coat the spoon and pan a little. It took about three minutes for me on medium heat.

The key is not to heat it on high and or it might scorch the bottom of the pan. If that happens, just start over and be patient. It’ll do the right thing if you don’t rush it.

While this is going on, melt some butter that you’ve cubed into smaller squares so it melts quickly and more evenly than if you threw the whole stick in. Add the same amount of flour and whisk over low heat for about two minutes. Watch you go! You’re now making a roux, which is just a fancy way of saying you’ve combined some butter and flour that you can use to thicken a lot of stuff.

I depend on time to make sure the roux comes out right. After you’ve made a roux a few times, you’ll know what to look for, but for now, just stick to stirring for two minutes and note that it’s bubbly, no longer has that raw flour taste, and slightly darker than before. You can cook it longer to a more golden-brown if you want a darker, richer sauce, but I prefer mine fairly blond.

Add the hot milk and whisk the entire time for one to two minutes. The sauce will be thickened and smooth. Next comes the cheese. Throw that all in along with your seasonings and ham. When it’s well mixed and melty, it’ll look like fondue and it’ll be difficult not to dip cubes of sourdough bread into it. Resist the temptation. I mean, you should taste it to make sure it’s ok, but use some self-restraint.

Mix it with the cooked pasta, stir again until all the pasta is well coated. Plop it into a casserole pan.

Bake it until bubbly and slightly toasted on top.

That’s it.

The original recipe comes from Ina Garten, who makes a ton of amazing food. I completely trust all of her recipes. This recipe has been halved and macaroni has been substituted with shells. I also skipped the tomato and bread crumb topping.

Mac and Cheese with Ham

Mac and Cheese with Ham

Ingredients
  

  • kosher salt
  • 1/2 pound pasta shells
  • 2 cups milk
  • 1/4 cup butter
  • 1/4 cup all-purpose flour
  • 6 ounces Gruyere cheese shredded
  • 4 ounces cheddar cheese shredded
  • 1/8 teaspoon black pepper
  • 1/8 teaspoon nutmeg
  • 2 cups ham diced

Instructions
 

  • Preheat the oven to 375 degrees F.
  • Add the pasta to boiling, salted water and cook according to the directions on the package, 6 to 8 minutes. Drain well.
  • Meanwhile, heat the milk in a small saucepan, but don't boil it. Melt butter in a pot and add the flour. Cook over low heat for 2 minutes, stirring with a whisk. While whisking, add the hot milk and cook for a minute or two more, until thickened and smooth. Off the heat, add the Gruyere, Cheddar, 1 tablespoon salt, pepper, nutmeg, and ham. Add the cooked pasta and stir well. Pour into a baking dish.
  • Bake for 30 to 35 minutes, or until the sauce is bubbly and the macaroni is browned on the top.
Blog

Chicken Noodle Soup

Jump to Recipe

The days are chilly and crisp, yet often bright. Everyone and everything just wants to be cozy. We’re in the midst of soup season. I’ve made this chicken noodle soup recipe a few times before (thank you Food Network!) and now I’m spoiled. No more canned chicken noodle soup for me. No more mushy noodles and veggies, if I can even find any goodies. A bit of carrot? A scrap of chicken?

This recipe calls for parsnips, which I rarely use and barely familiar with. I also get them mixed up with turnips. And how does the rutabaga fit in, other than it’s a funny word to say? Let’s educate ourselves, shall we?

The parsnip is a long, tuberous root vegetable, has cream-colored skin and flesh root, and is related to carrots and parsley.

Turnips look completely different. They are round and mostly white, with some purple, red, or green, depending on the variety. So what’s a rutabaga? Some say it’s the same as a turnip, but others disagree. The rutabaga is larger and sweeter, is a cross between a cabbage and turnip, and has a yellow flesh.

The secret soup ingredient is fresh dill. Don’t skip it. I’ve made this soup with and without, and there’s something about that sweet, slightly licorice flavor that enhances the chicken and veggies. It sounds weird, but it works.

My only issue with this recipes is that there’s way too little broth, but I ended up using that in my favor. If you are eating the soup in one sitting, use 1 1/2 to 2 times the amount of broth the recipe calls for, about 9-12 cups. For our family of three, I split the original recipe and used 4 cups of broth instead of 3. The original recipe makes 4 large portions, but these people must be giants. We were able to get 8 servings from the full recipe. On the first day, I will serve the soup with most of the broth. This prevents your noodles from soaking in the broth and becoming mushy for when you have it for leftovers. When you do heat it up again, add another 4 cups of broth so it’s more like soup instead of a plate of pasta.

I like to prep everything first. First chop your veggies.

Then dice your chicken. If you do it the other way around, you’ll need to use two cutting boards instead of one to avoid cross-contamination.

First add your carrots. Wait a minute or so. Then add your parsnips and wait another minute or two. The recipe assumes you are chopping as you go along so if you prep like me, don’t add the veggies all at once. Space it out. Add the onions next. Another couple minutes later, add your celery. Adding your veggies in this order ensures that the carrots are cooked the longest and the celery is not over cooked.

Season and add a couple bay leaves. Add your preferred amount of broth, boil, add chicken, and boil again. Turn it down to simmer, cook the chicken for a couple of minutes, and then add the noodles.

When the noodles are tender, your soup is about ready. You just need to add fresh parsley and dill (don’t use dried!), remove bay leaves, and serve. Yum. Now you are all cozy.

Chicken Noodle Soup

Chicken Noodle Soup

Ingredients
  

  • 2 tablespoons extra-virgin olive oil
  • 2 medium carrots peeled and chopped
  • 1 parsnip peeled and chopped
  • 1 medium onion chopped
  • 2 stalks celery chopped
  • 2 bay leaves
  • salt and pepper
  • 9-12 cups chicken broth
  • 1 pound chicken breasts diced
  • 1 1/2 cups egg noodles
  • handful fresh parsley chopped
  • handful fresh dill chopped

Instructions
 

  • Heat extra-virgin olive oil in a very large pot over moderate heat. Prep the vegetables by chopping/or peeling them. Keep them in separate piles.
  • Add each vegetable to the pot in the order they are listed, waiting a couple minutes between each vegetable before adding the next.
  • Add bay leaves and season vegetables with salt and pepper, to taste. Depending on how thick you want your soup, add broth to the pot until it's the amount you prefer. Bring it to a boil.
  • Add diced chicken, return soup to a boil, and reduce heat back to moderate. Cook the chicken for 2 minutes and then add the noodles. Cook the soup for 6 minutes or until noodles are tender. Remove soup from the heat.
  • Stir in parsley and dill, remove bay leaves, and serve.
Blog

Chicken Quesadillas

Jump to Recipe

My son just finished a home ec class at his middle school. He learned how to make quesadillas and said they tasted good. I was surprised because when he was 5, he suddenly declared he disliked cheese quesadillas and would only eat grilled cheese. On raisin bread. Without the crust. Sigh.

When I asked him why the sudden acceptance towards quesadillas, he said it was because I left out the chicken. Seriously? All this time, it was missing chicken. I was determined to make the best damn chicken quesadilla for my picky kid.

Making chicken quesadillas barely requires a recipe. It’s just meat and melted cheese, sandwiched between a couple tortillas, right? How hard can it be? The most difficult part is flipping it over without losing half of the filling, but there’s a trick to prevent that. Regardless, I wanted to get some inspiration, which I found in The Pioneer Woman’s recipe. And then completed changed it up.

I recommend making the pico de gallo first. The longer it sits, the better it’ll taste so feel free to make this the day before.

To make the pico de gallo, cut up six Roma tomatoes with a serrated knife. I usually cut off the stem end, and then use the flat stem end side to slice the tomato down the middle. Face the flat side down on the cutting board and cut lengthwise into strips, and then dice across. Don’t worry if the pieces are not perfect. People will just be impressed that you made fresh pico. Of course, you could buy it pre-made and pour it in a bowl. I won’t judge.

I know this is incredibly time consuming so trust me when I say it goes much faster (and safer) if you use a serrated knife, which cuts through the tomato skin easily. This prevents the knife from slipping around so you don’t accidentally cut yourself.

Chop up some onions and cilantro. It looks like a lot of cilantro, but it wilts easily (sort of like spinach). Then, finely dice a jalapeño with the white membrane for more heat. Scrape out out the membrane first if you want less heat.

Squeeze a lime over it all and mix. Now you have pico de gallo. Yes, it’s that easy. This recipe makes a lot so you’ll have plenty for leftovers on chips or even a salad.

After that’s done, chop up your chicken and then in a bowl, season it with salt, pepper, and taco seasonings. Sauté it in a large skillet until it’s cooked through, but not overdone. Don’t forget you’ll be cooking it some more later. Remove the chicken.

Slice up some veggies and throw them in the same pan that you cooked the chicken in. I like using colored peppers and red onion, but you can use any veggie you you like. Sauté them in the pan until the peppers are slightly tender. They might have a few char marks, which is fine.

Confession time. This is when I should have taken another picture to show you what to look for, but I was busy nibbling on the chicken. Sorry. My bad.

Turn down the heat (or your tortillas will burn) and melt some butter on the skillet. You could use a separate griddle to make more at a time, but I like having only one pan to clean.

Lay down a tortilla and add a ton of cheese. Adding the cheese first acts like a glue and helps the chicken and veggies stay inside. Place the chicken and veggies on top and pile on more cheese. Cover with another tortilla. This makes a very large quesadilla so if you want to make a smaller one, feel free to place the cheese, chicken, and veggies on one half of the tortilla and fold it over like an omelet. I have to admit that this makes it easier to flip too.

After a couple minutes, take a peek underneath to see if the tortilla is golden. When it is, using the biggest spatula you own, hold your hand over the center of the quesadilla and expertly flip that sucker in one single motion. Do not be hesitant or tentative. You want to be quick about it or you might lose some chicken, which isn’t the end of the world, but it’s nice when every stays in its proper place.

Cook for another couple of minutes until the other side is golden and the cheese is completely melted (it’s ok to lift the top to check). Slide the quesadilla onto a plate and scoop a pile of pico on the side.

Yummy and fairly quick. It tastes better than it looks. Now off I go to work on my photography skills.

Chicken Quesadillas

Chicken Quesadillas

Servings 3

Ingredients
  

  • 6 large flour tortillas
  • 2 tablespoons olive oil
  • 1 pound skinless, boneless chicken breasts
  • salt and pepper
  • 1/2 package taco seasoning mix
  • 1/2 large red onion cut in half and then sliced
  • 1-2 bell peppers any color, seeded and sliced into strips
  • 2 1/2 cups grated Monterey jack cheese
  • butter for frying

Pico de Gallo

  • 6 Roma tomatoes diced
  • 1 1/2 red onions diced
  • 1 cup fresh cilantro leaves chopped
  • 1 jalapeño finely diced
  • juice of 1 lime
  • salt to taste

Instructions
 

  • Heat 1 tablespoon of the olive oil in a skillet over medium-high heat. Chop or dice the chicken into bite-sized pieces. Sprinkle the chicken with salt, pepper, and taco seasoning. Add the chicken to the skillet and sauté until browned. Because the pieces are small, the chicken will be cooked through. Set aside.
  • Add the remaining 1 tablespoon olive oil to the skillet over medium-high heat. Slice onions and peppers, and add them to the skillet. Cook until the peppers are tender, 3 to 4 minutes. Remove and set aside.
  • Turn down the heat slightly to medium-low and melt 1/2 tablespoon of the butter in the skillet or griddle. Lay a flour tortilla in the skillet. Add grated cheese on the bottom tortilla, and then add the chicken and cooked peppers/onion mixture. Top with more grated cheese and cover with another tortilla.
  • When the tortilla is golden on the first side, carefully flip the quesadilla to the other side, adding another 1/2 tablespoon butter to the skillet at the same time. Continue cooking until the second side is golden. Repeat to make additional quesadillas.
  • Cut each quesadilla into wedges and serve with pico de gallo.

Pico de Gallo:

  • Dice tomatoes (using a serrated knife) and onions. Chop the cilantro.
  • Cut a jalapeño in half. With a spoon, scrape out the insides. For more spice, leave some of the white membranes. Dice the jalapenos very finely. Add all four ingredients to a large bowl.
  • Slice a lime in half and squeeze the juice into the bowl. Sprinkle with salt, and stir together until combined. Taste the pico de gallo and add more salt if needed.