Blog

Dirty Rice

Jump to Recipe

I’m fascinated with Louisiana. Maybe it’s because I’m from California and our cuisine has no history. In my opinion, Californian food means locally grown and fresh, which is great and all, but I don’t find any culture in it. It’s too new. I’m sure I’m taking it for granted. I love living here and would never move (except to Hawaii and I LOVE their food, but that’s for another day). Southern food has a history to it that California doesn’t.

In high school, I read The Awakening by Kate Chopin. Her book was my introduction to Louisianian culture. The part that interested me the most were the Creoles, a people of mixed colonial French, African American and Native American descent, and Cajuns, or Acadians, who are also from French descent, but distinctly their own with a full rich history.

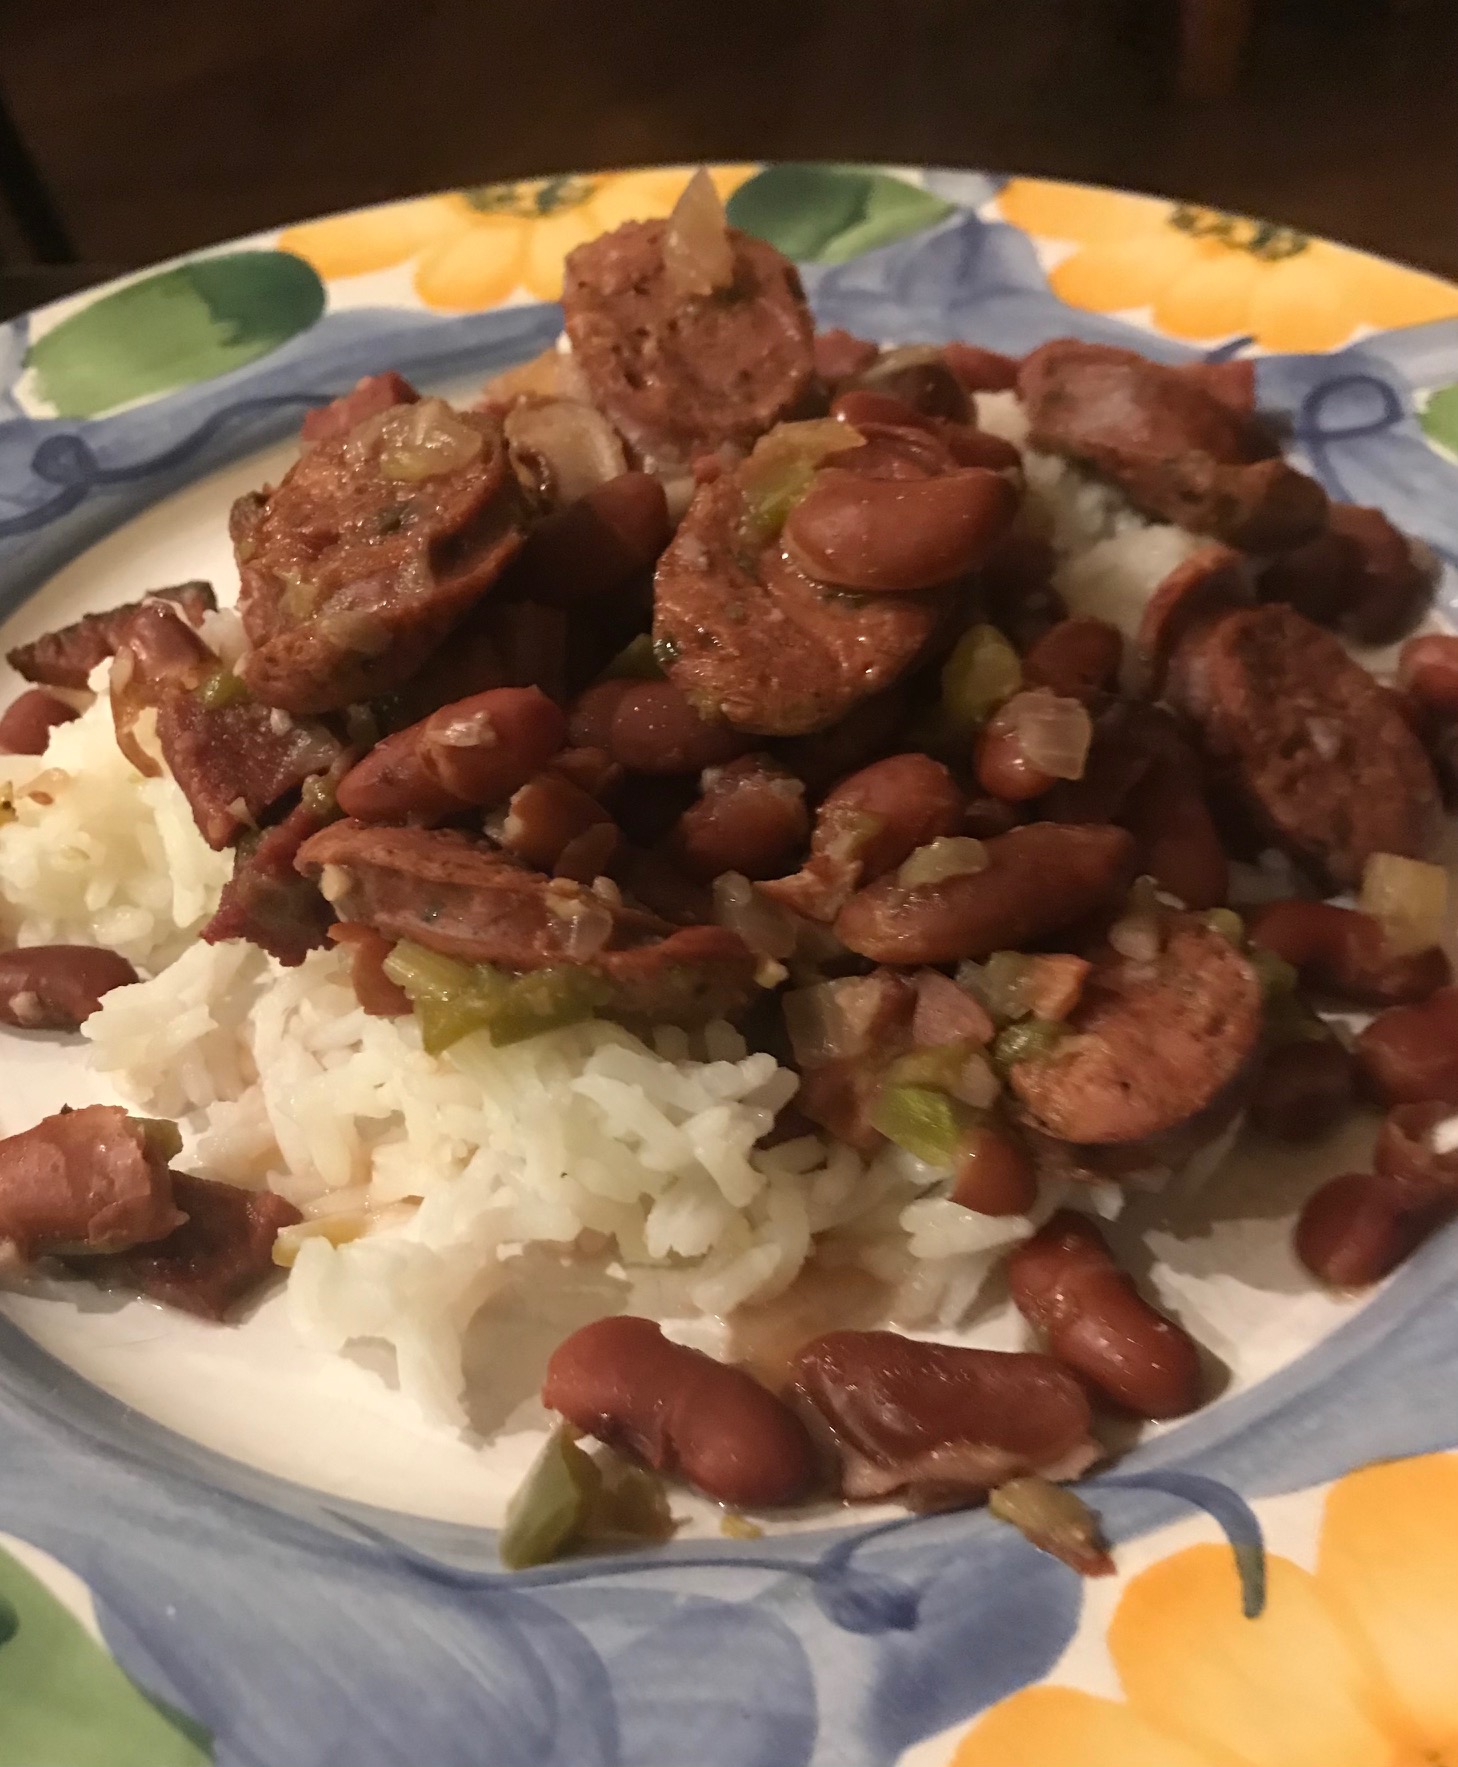
I went to New Orleans in high school and fell in love with the food: gumbo, jambalaya, red beans and rice, blackened fish, beignets, and the list goes on. I remember eating the most amazing chocolate pecan pie in New Orleans that ruined me for life. No other pie can live up to it.

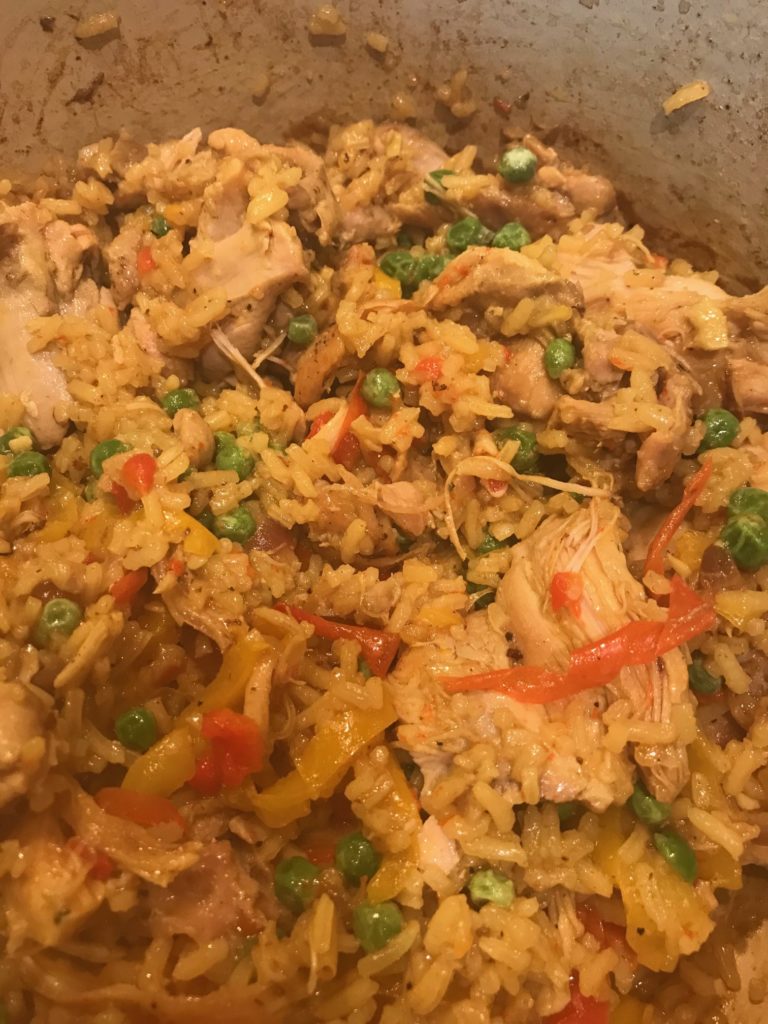
Louisiana made such an impression that I wanted to make the food, but I have never made Dirty Rice until now. You’re probably wondering why one would want to eat something with the word “dirty” in it. That doesn’t sound very good. But it’s easy to make, delicious, inexpensive, and filling. Can it get any better than that? Dirty Rice is a Creole dish made from rice that turns “dirty” from being cooked with meat, cayenne, and black pepper. Today, Dirty Rice commonly contains pork, beef, or chicken. Historically, the meats were organ meats, which were the cheapest cuts that the slaves could afford. The meat would be cooked and finely chopped, creating a broth that colored the rice. After the slaves were freed, this dish remained popular with the poorer people of Louisiana, both black and white, both Creole and Cajun.

The recipe I used came from the kitchn. I didn’t modify the recipe at all, but it would be easy to. I used 12 ounces of andouille sausage, but you can substitute it with another type of sausage, ground beef, chopped up chicken thighs, or even ground turkey.

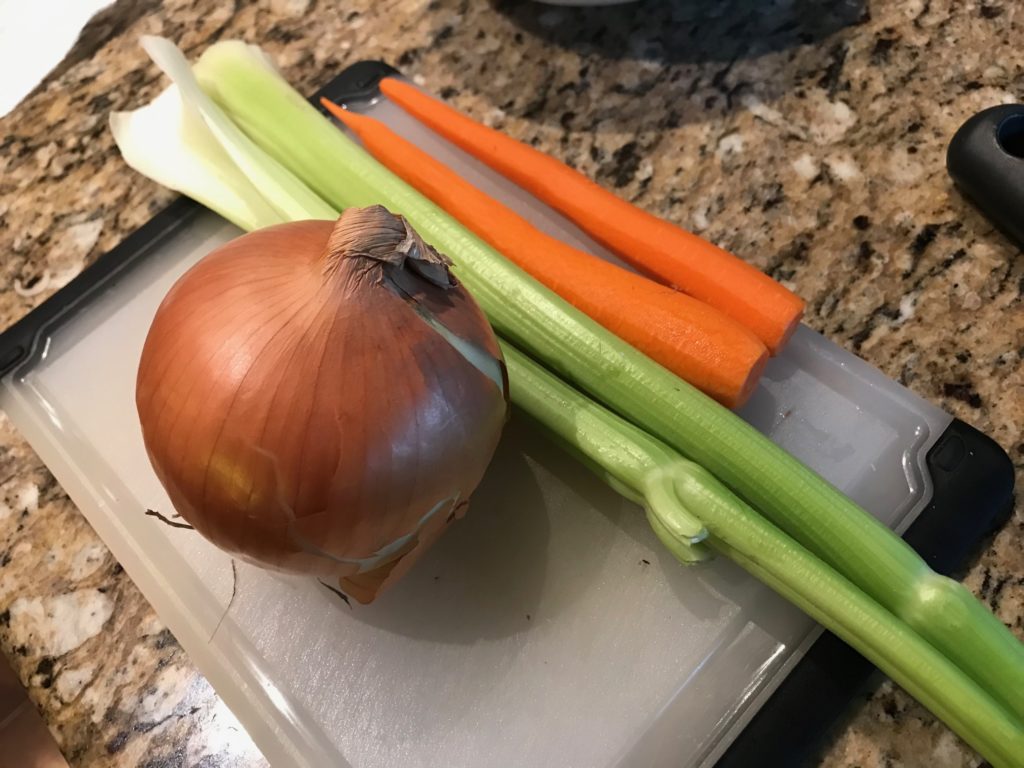
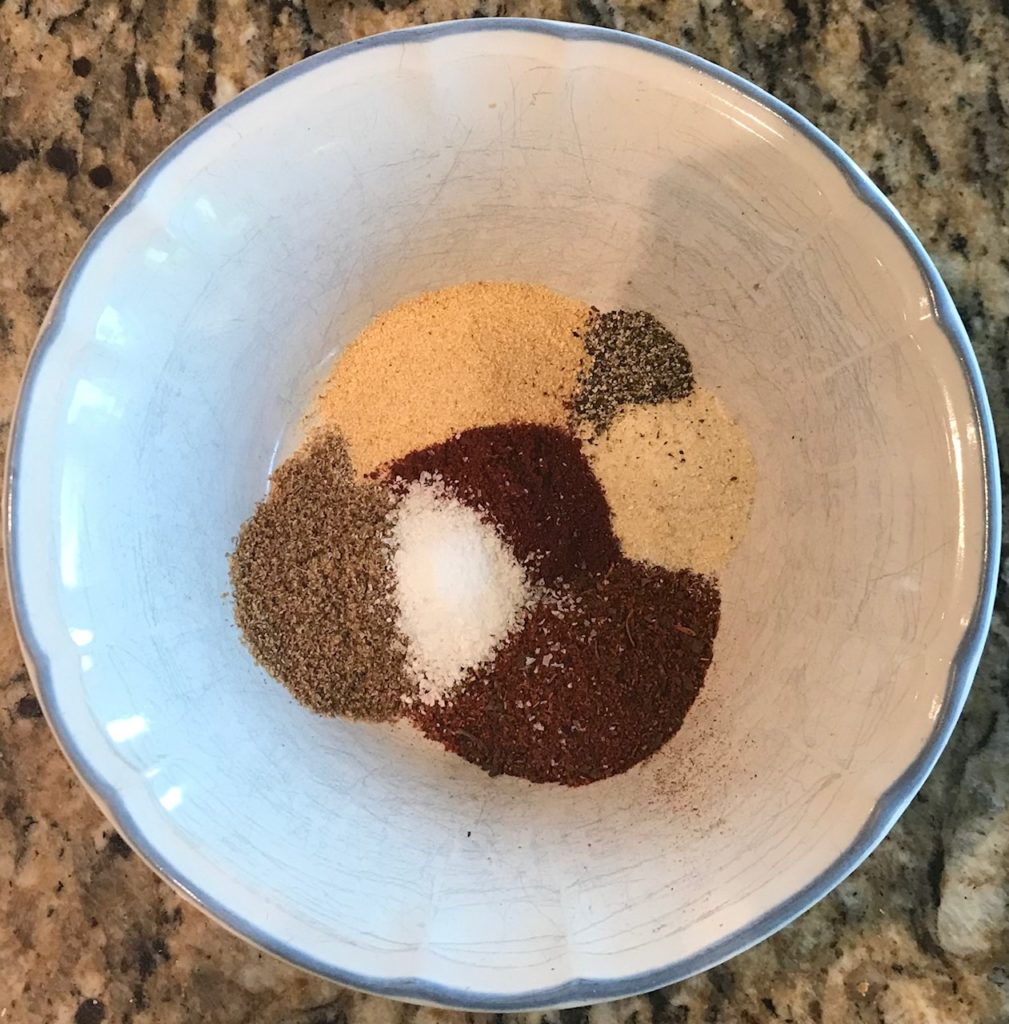
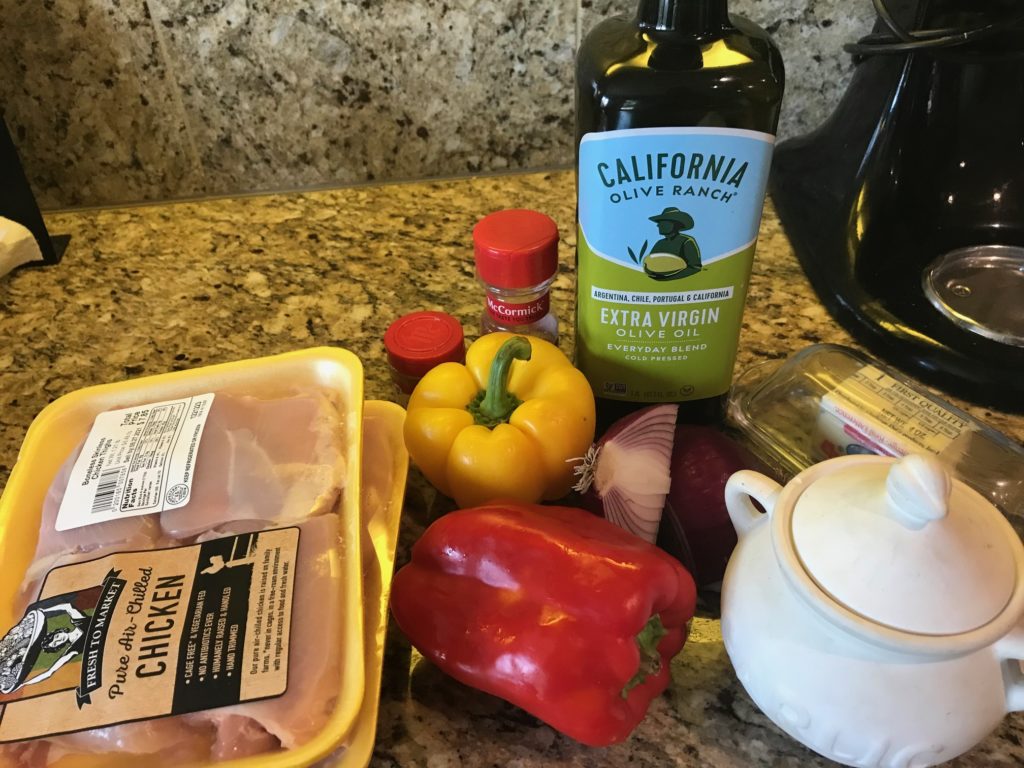
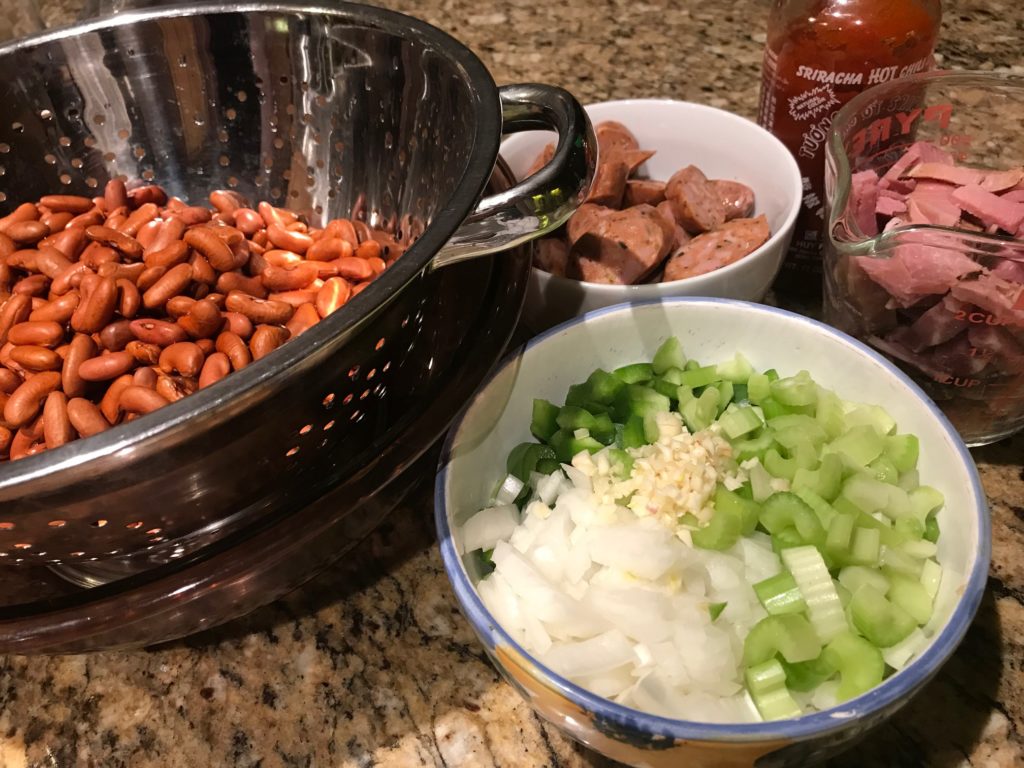
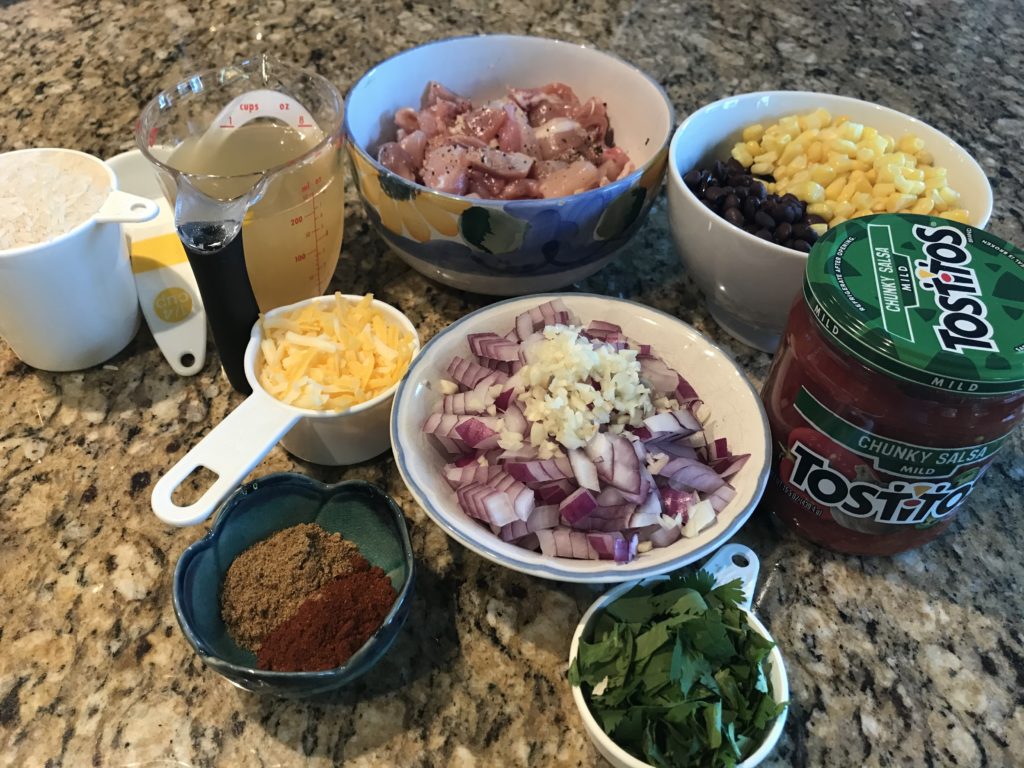
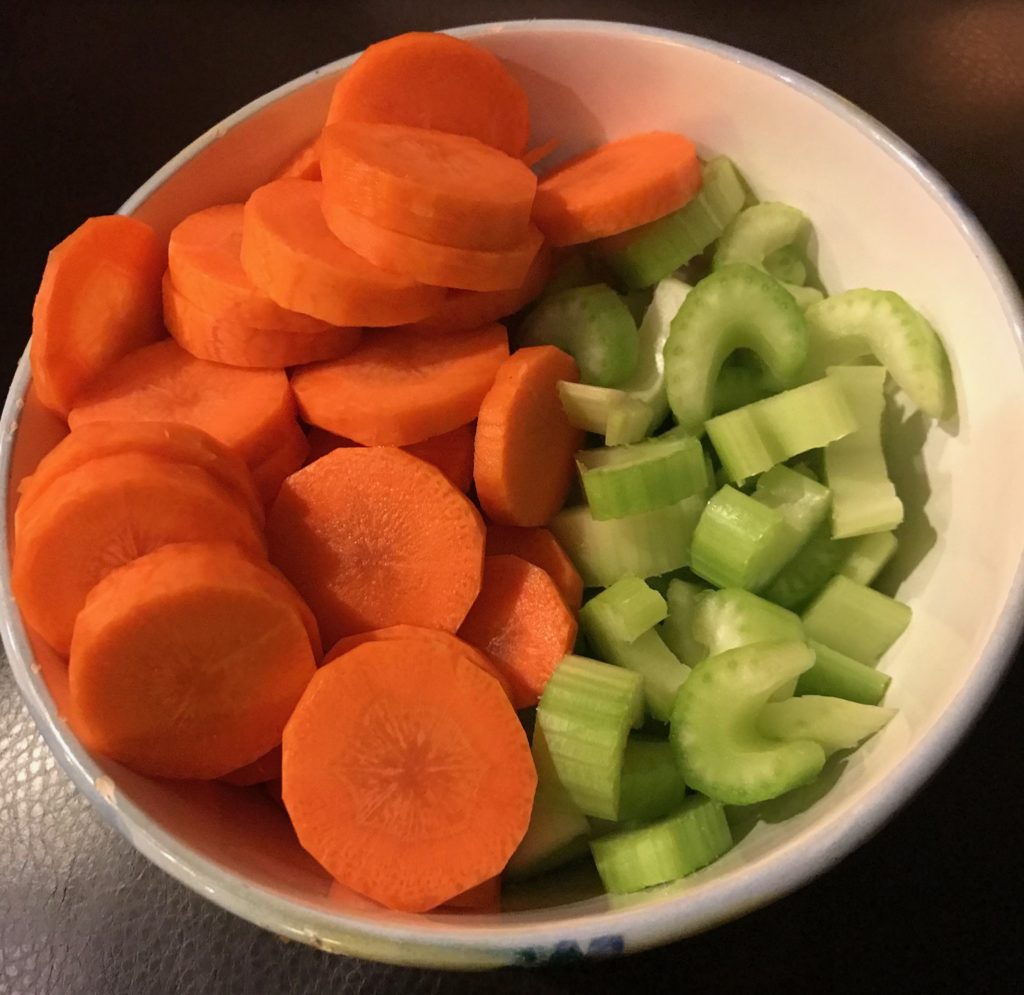
First gather your ingredients.

Dirty Rice

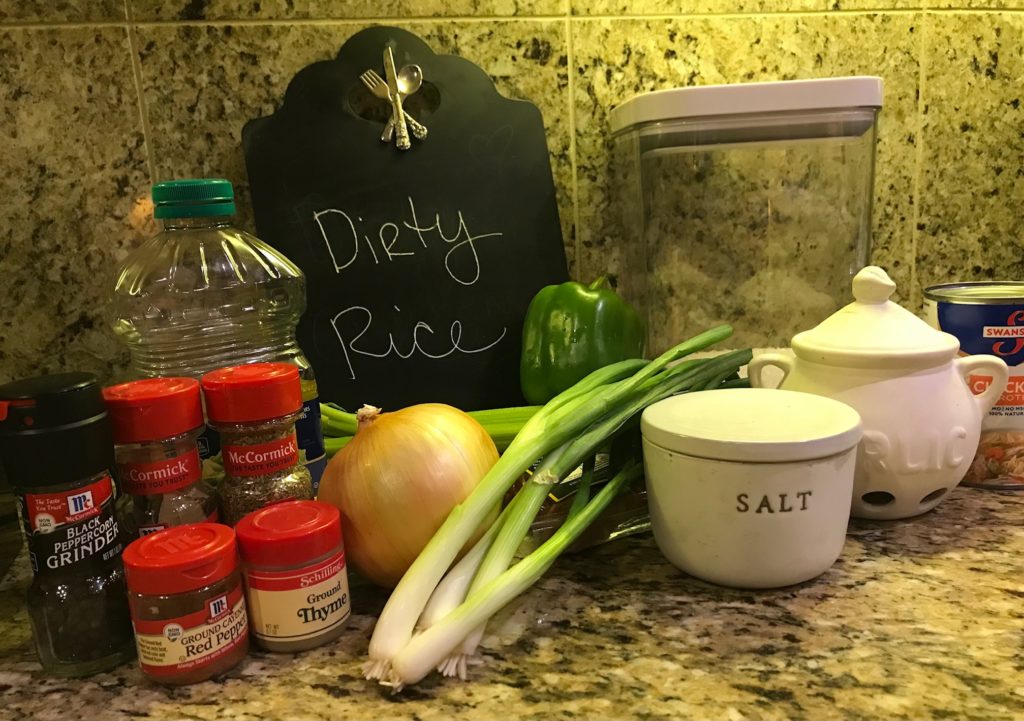
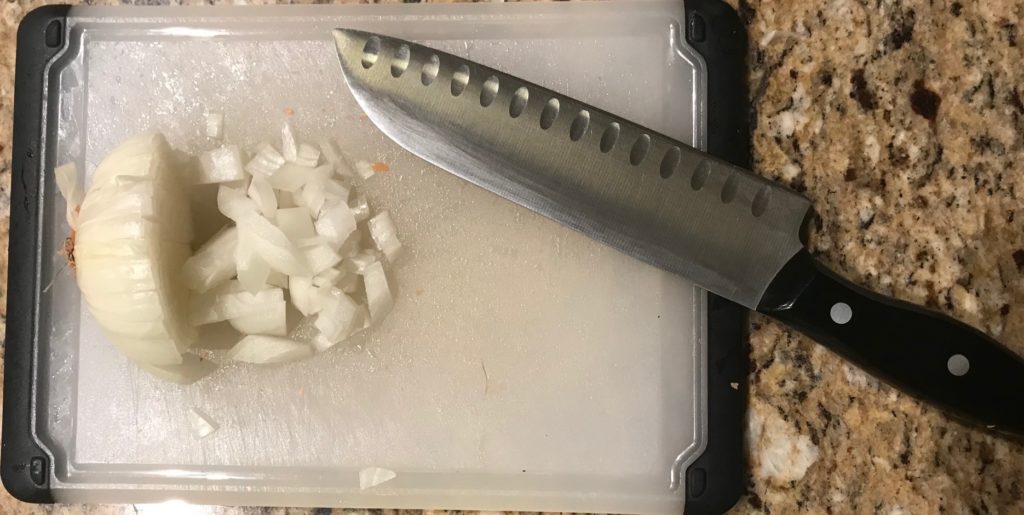
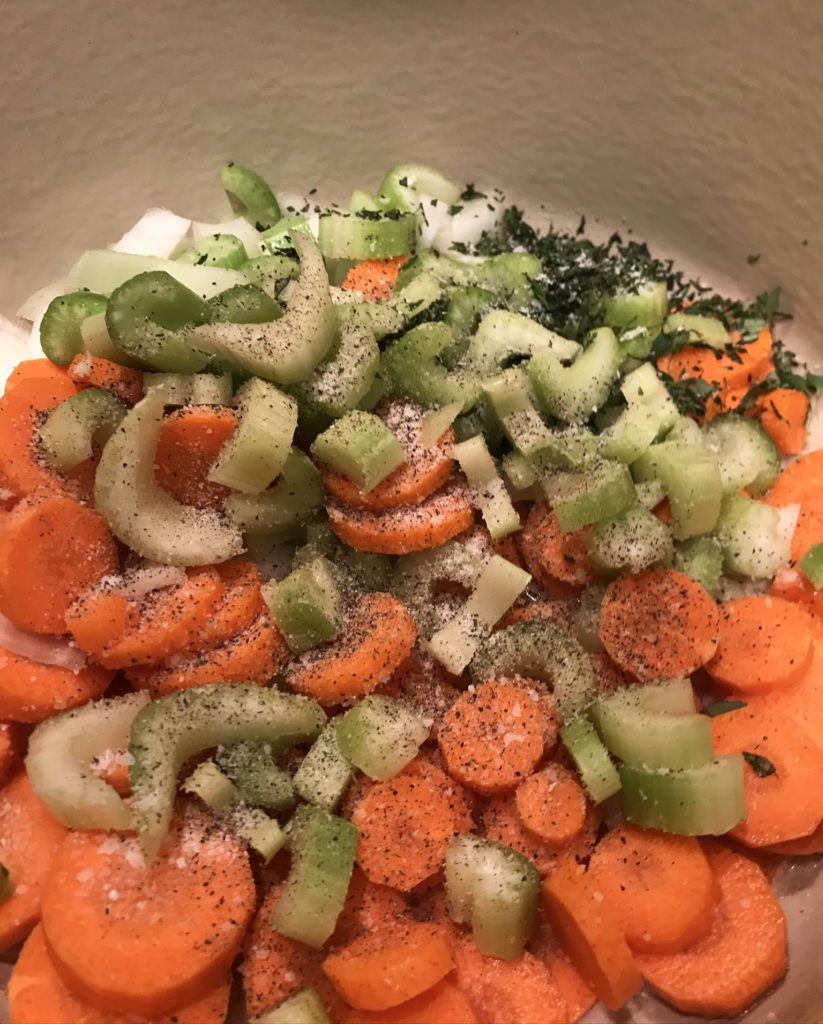
Next, dice up your meat and veggies, and measure out the rice and seasonings. Open up a can of chicken broth unless you’re fancy and have homemade broth on hand. Not me.

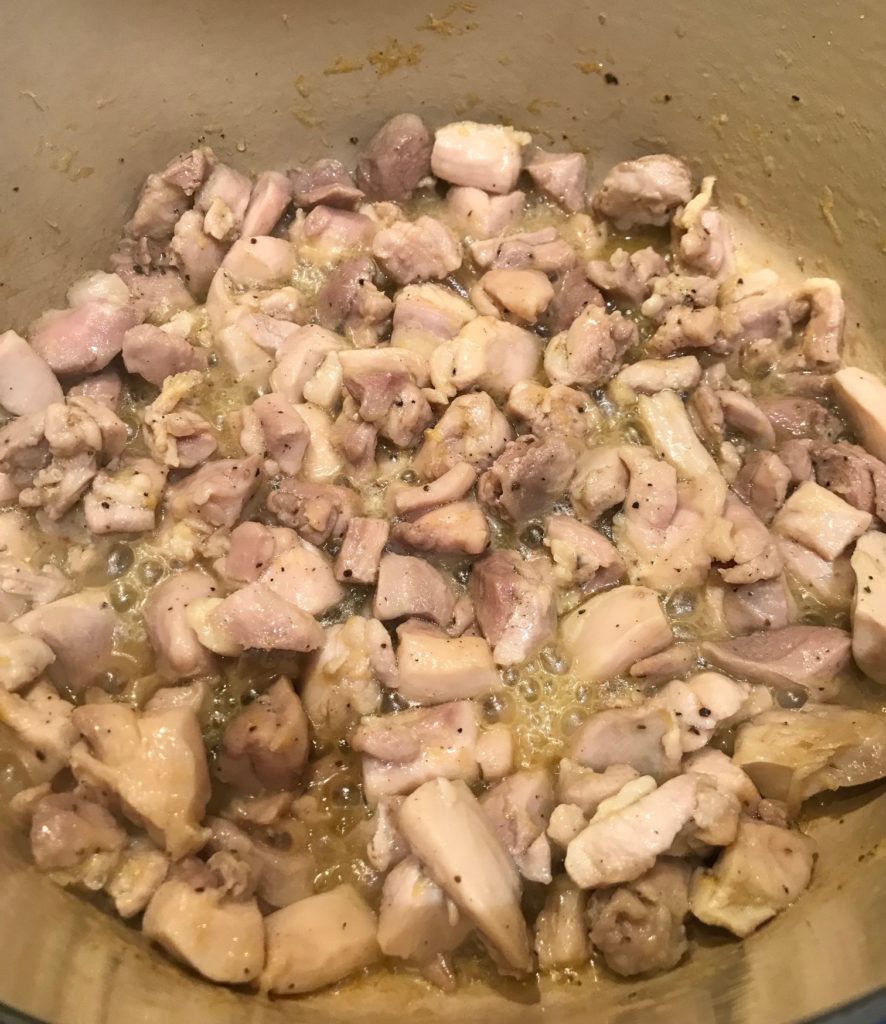
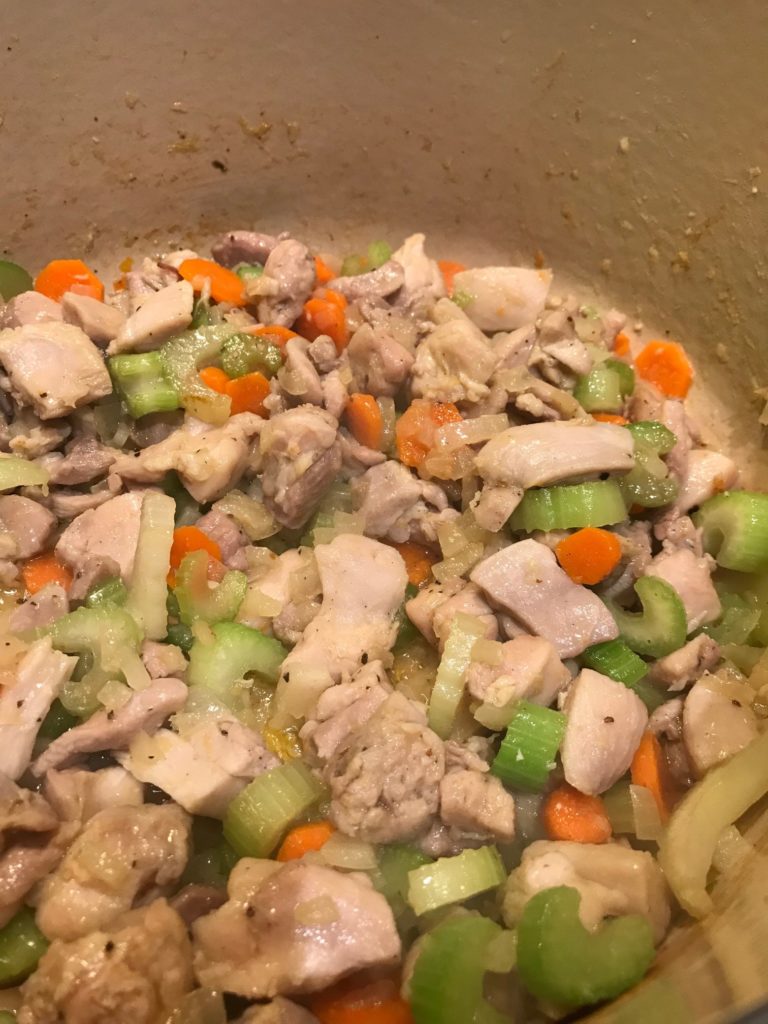
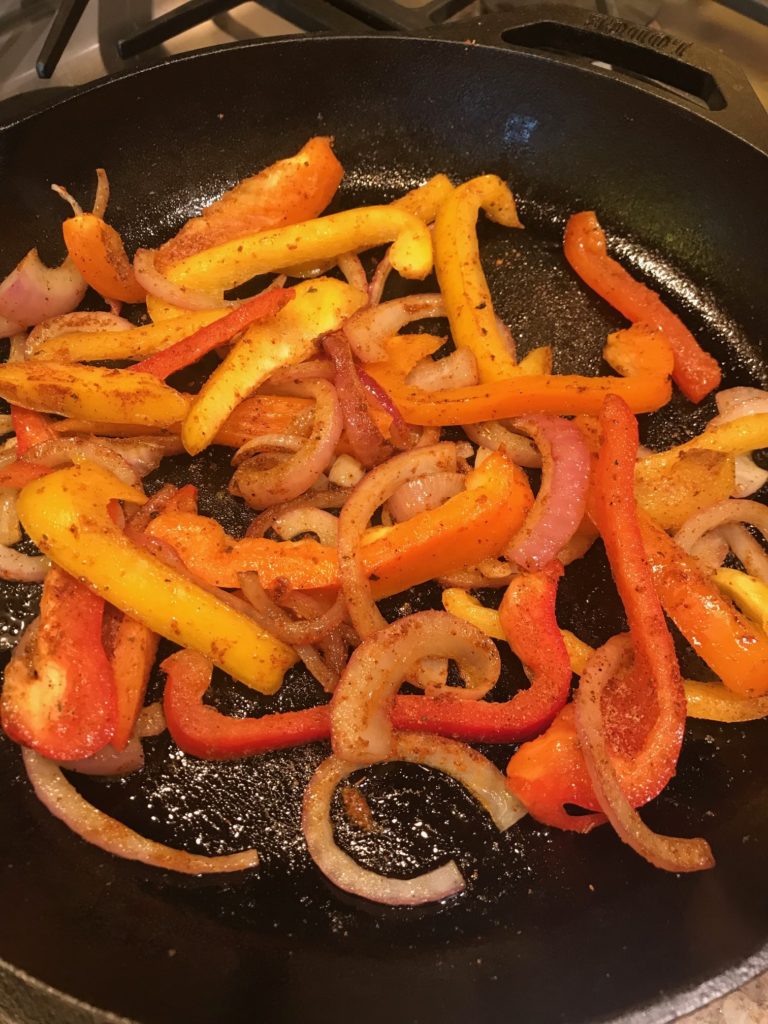
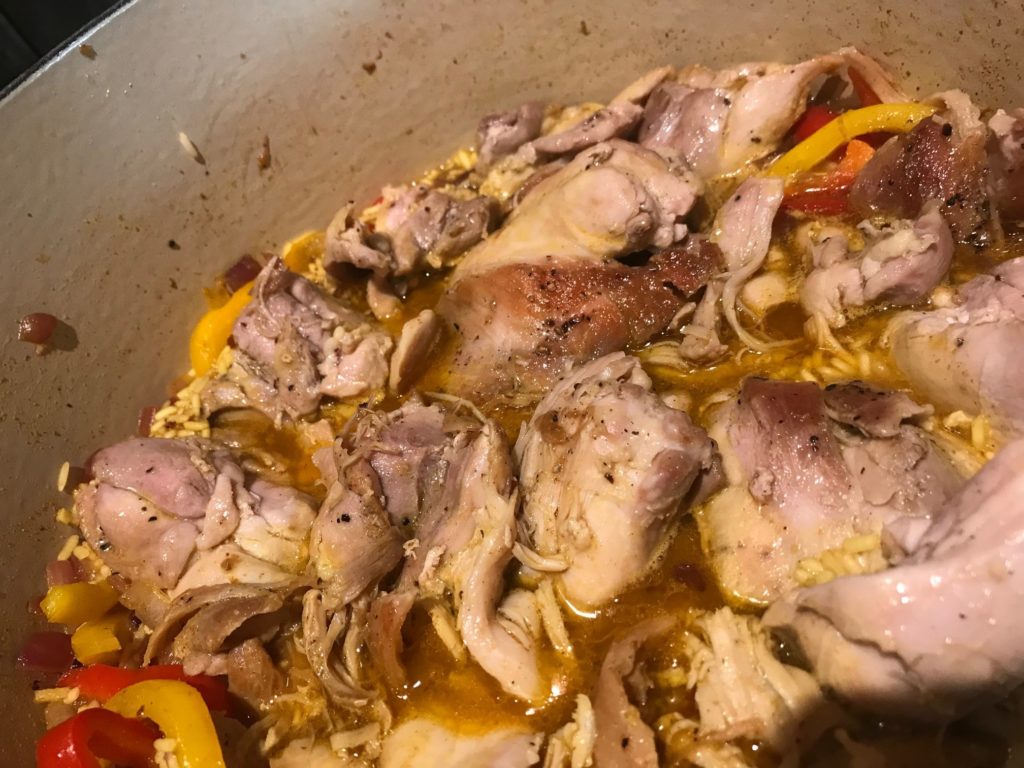
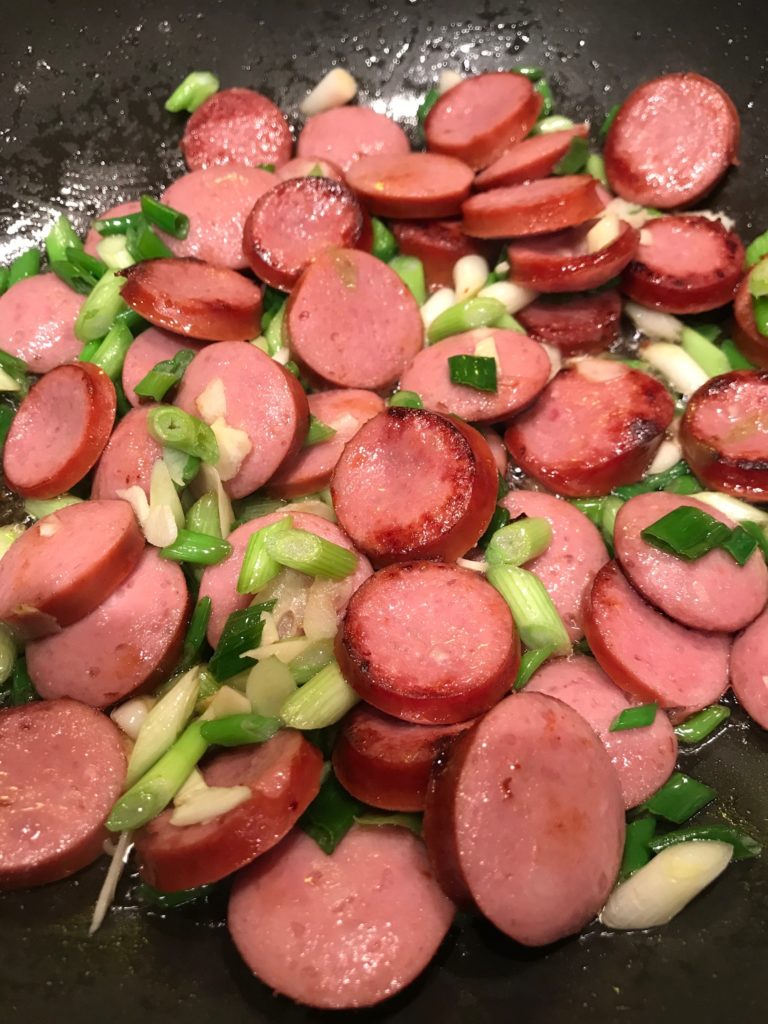
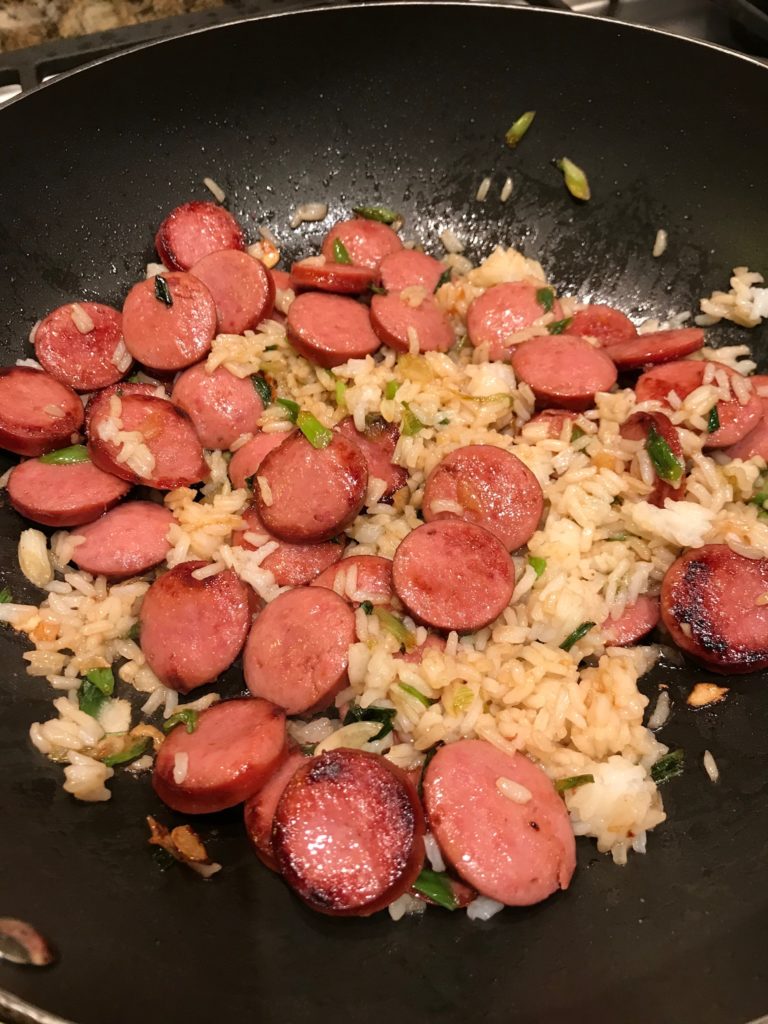
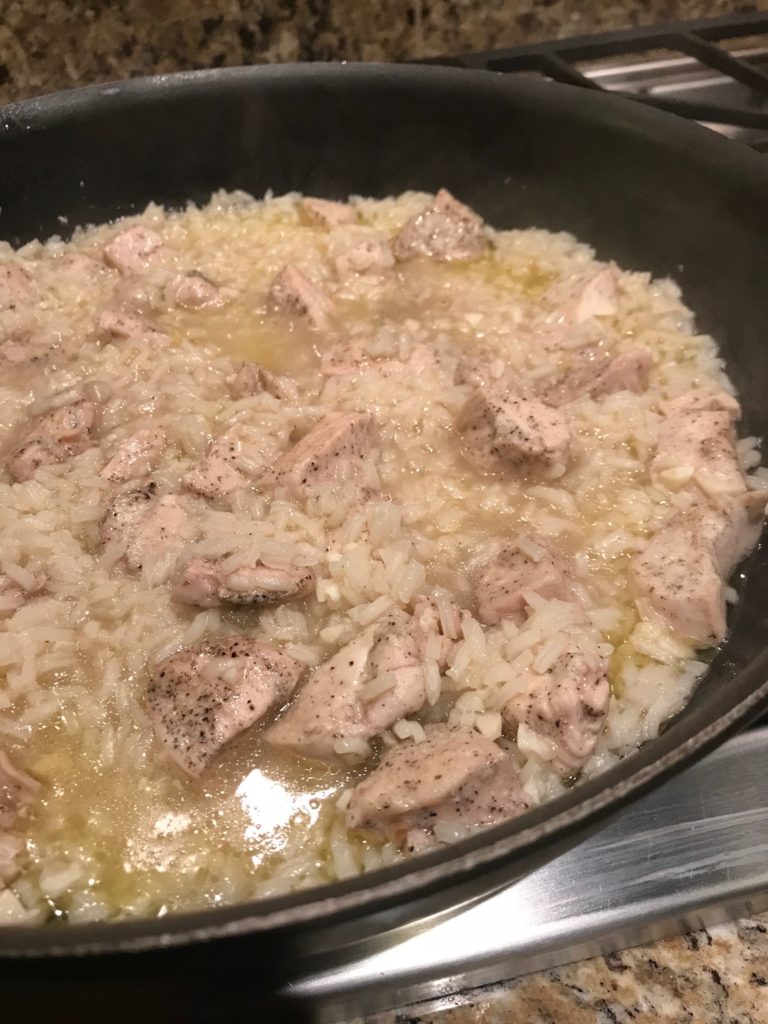
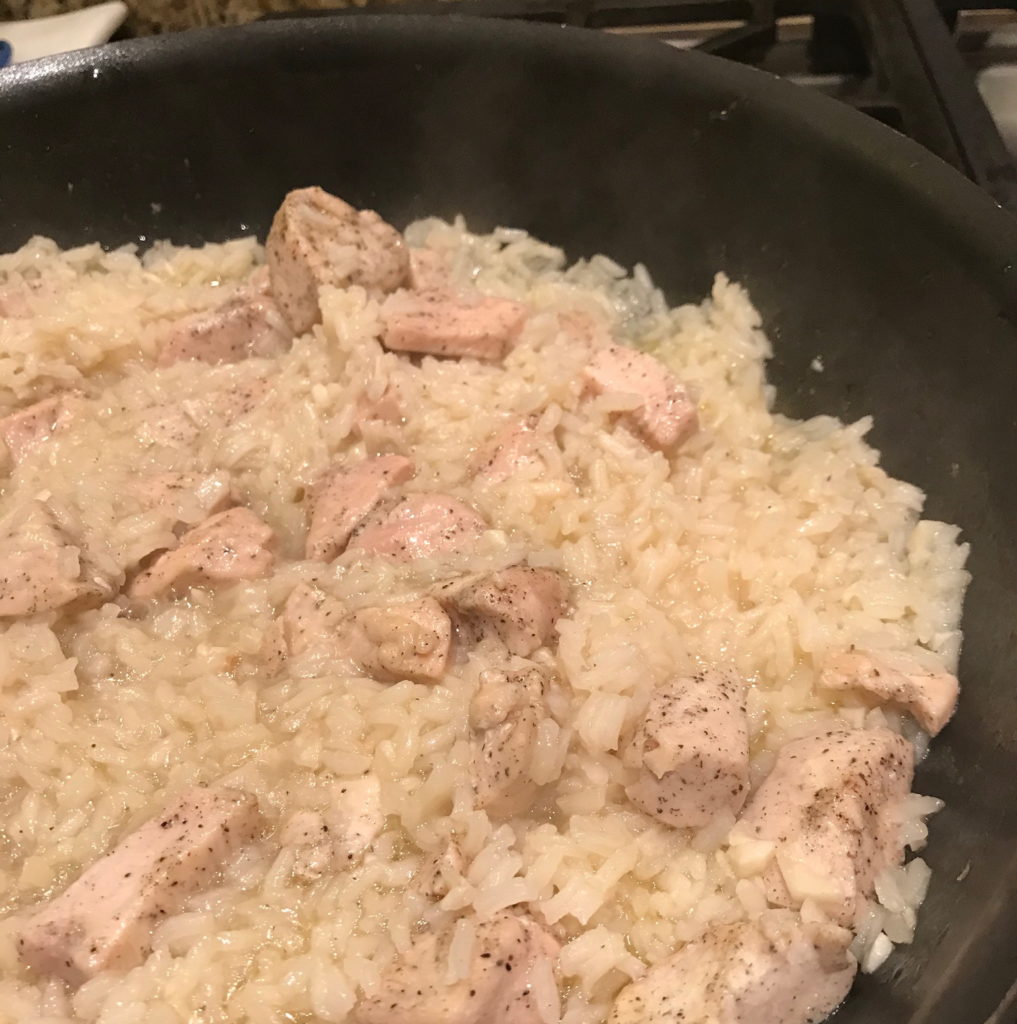
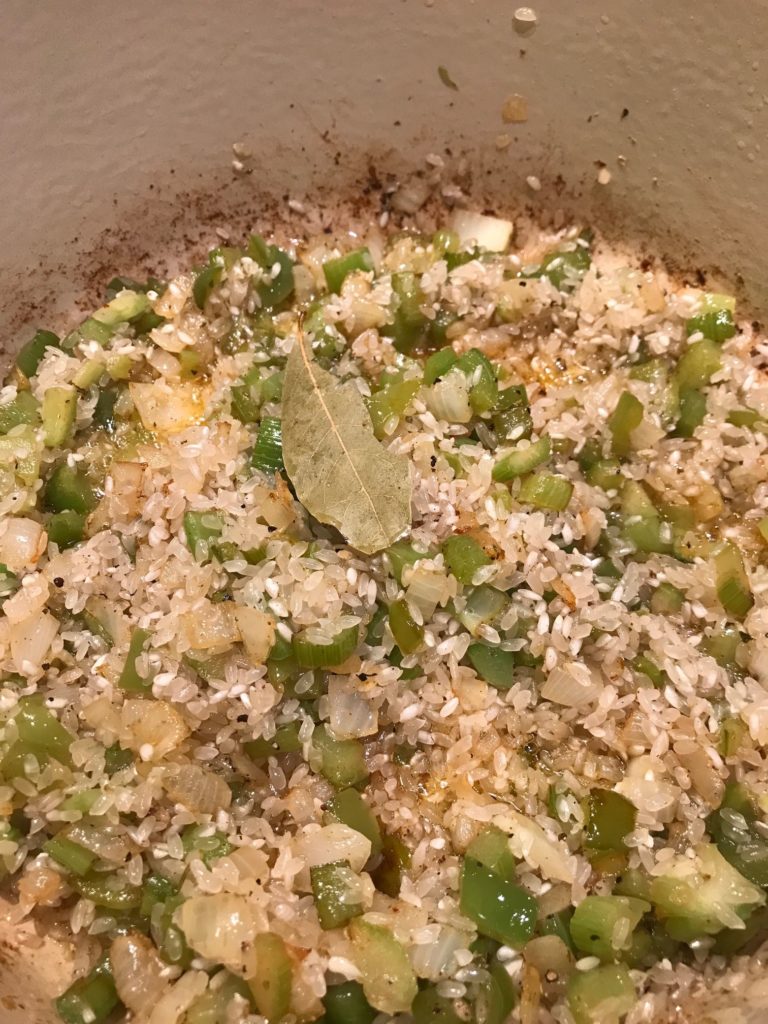
Grab a dutch oven or other large pot, fry up the sausage in a couple tablespoons of vegetable oil, and remove when browned. Next, add the holy trinity, which consists of chopped onion, celery, and bell peppers, and is common in Creole and Cajun dishes. Cook for several minutes until soft. Add rice, garlic, and your seasonings. The recipe says to cook this until the rice crackles, but that sounds scary and my rice merely sizzled. Maybe that’s the same thing. Who knows?

Dirty Rice

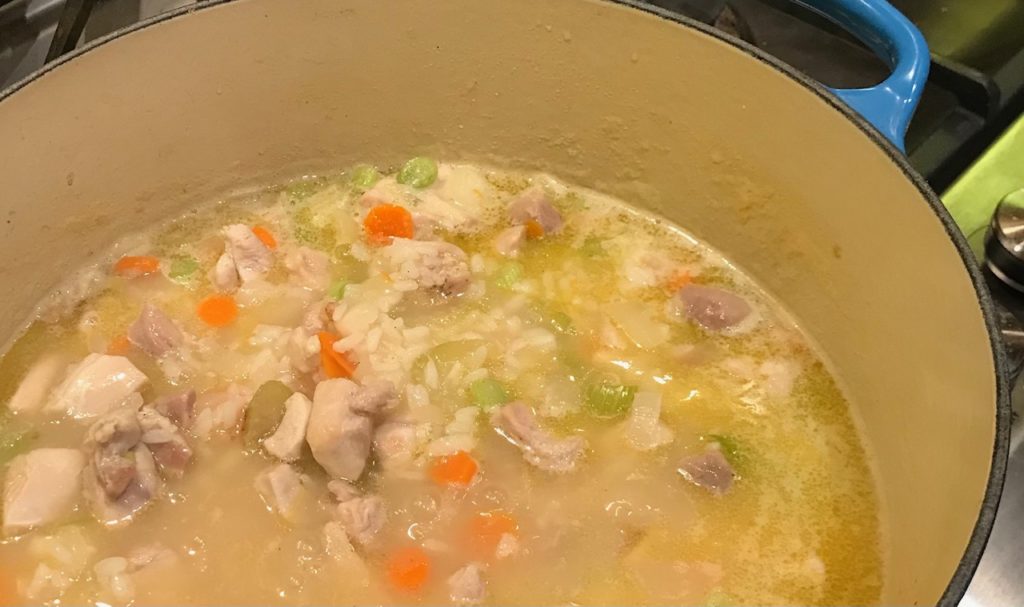
Add broth, water, and sausage, and simmer it on low.

Dirty Rice

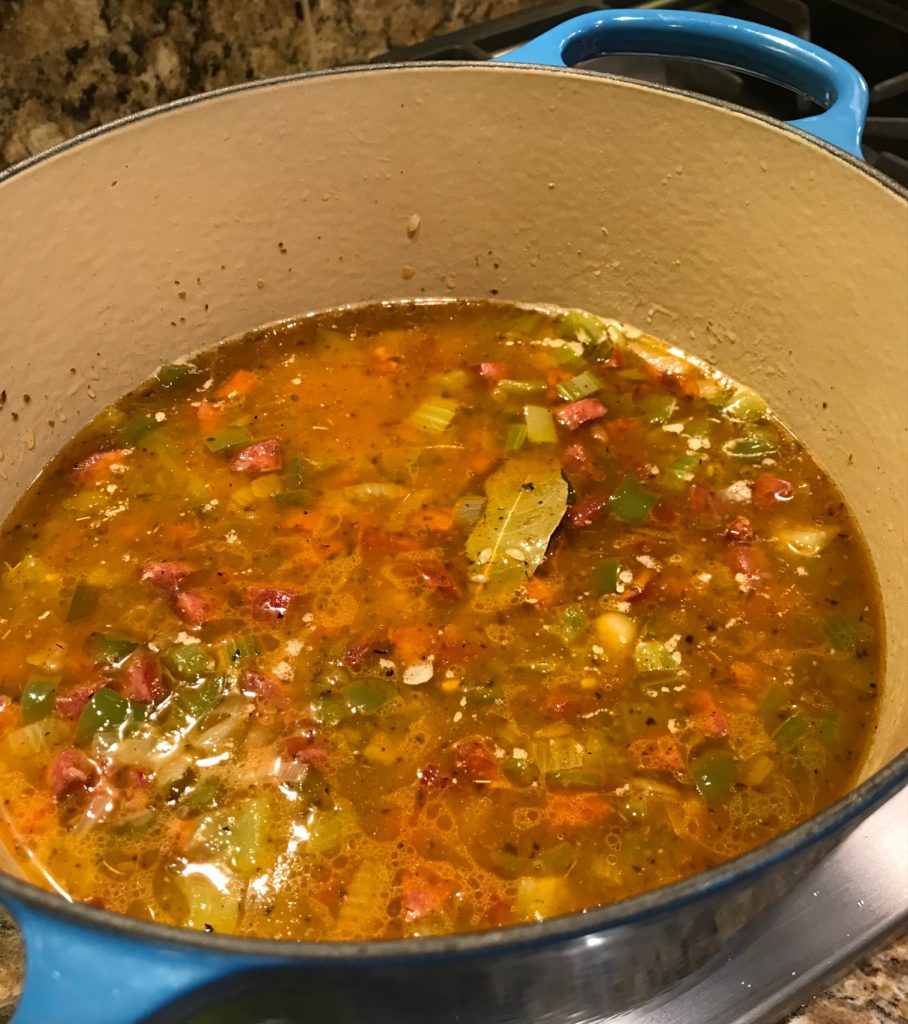
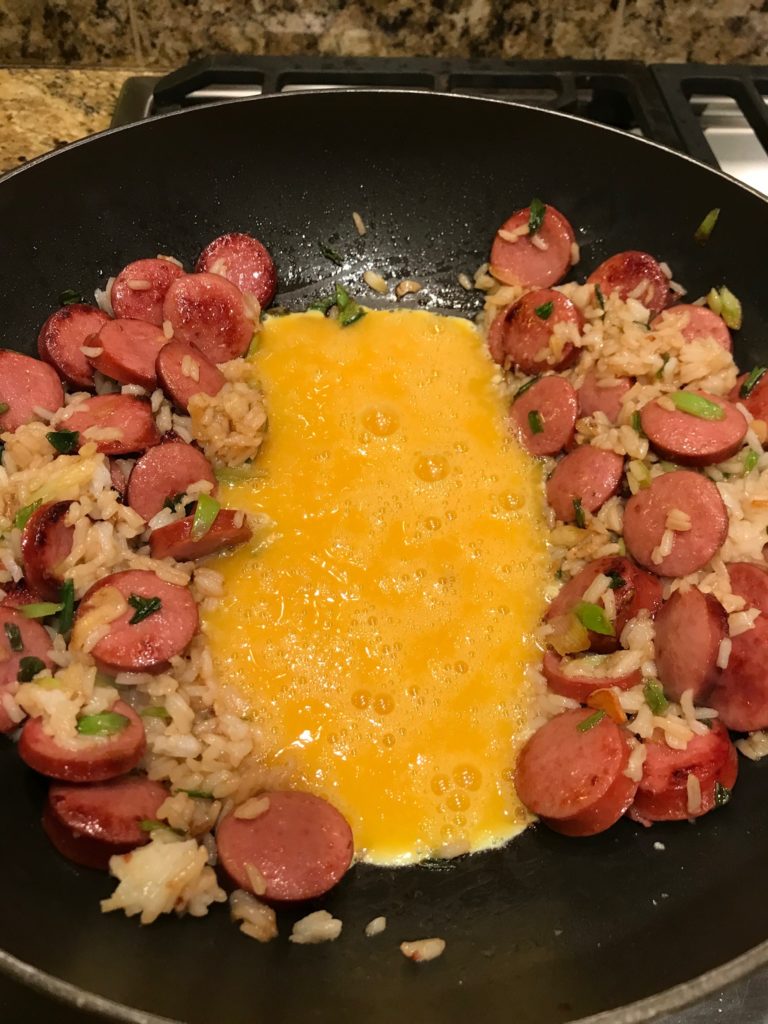
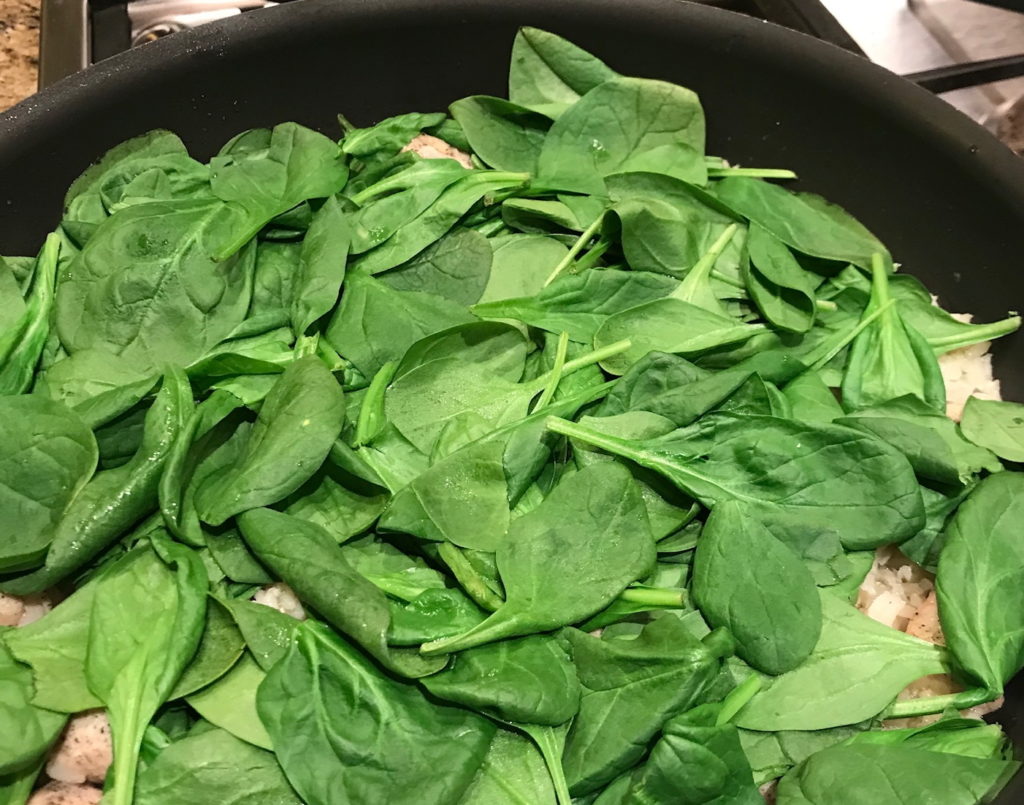
Half way through, stir it so everything is well mixed.

Dirty Rice

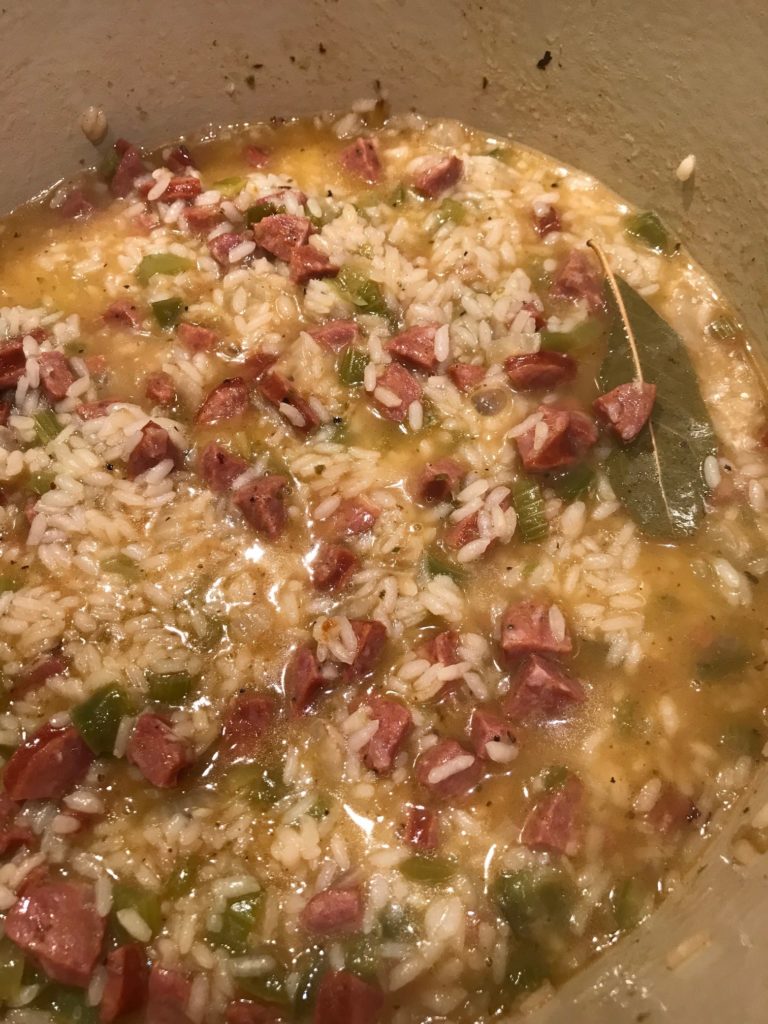
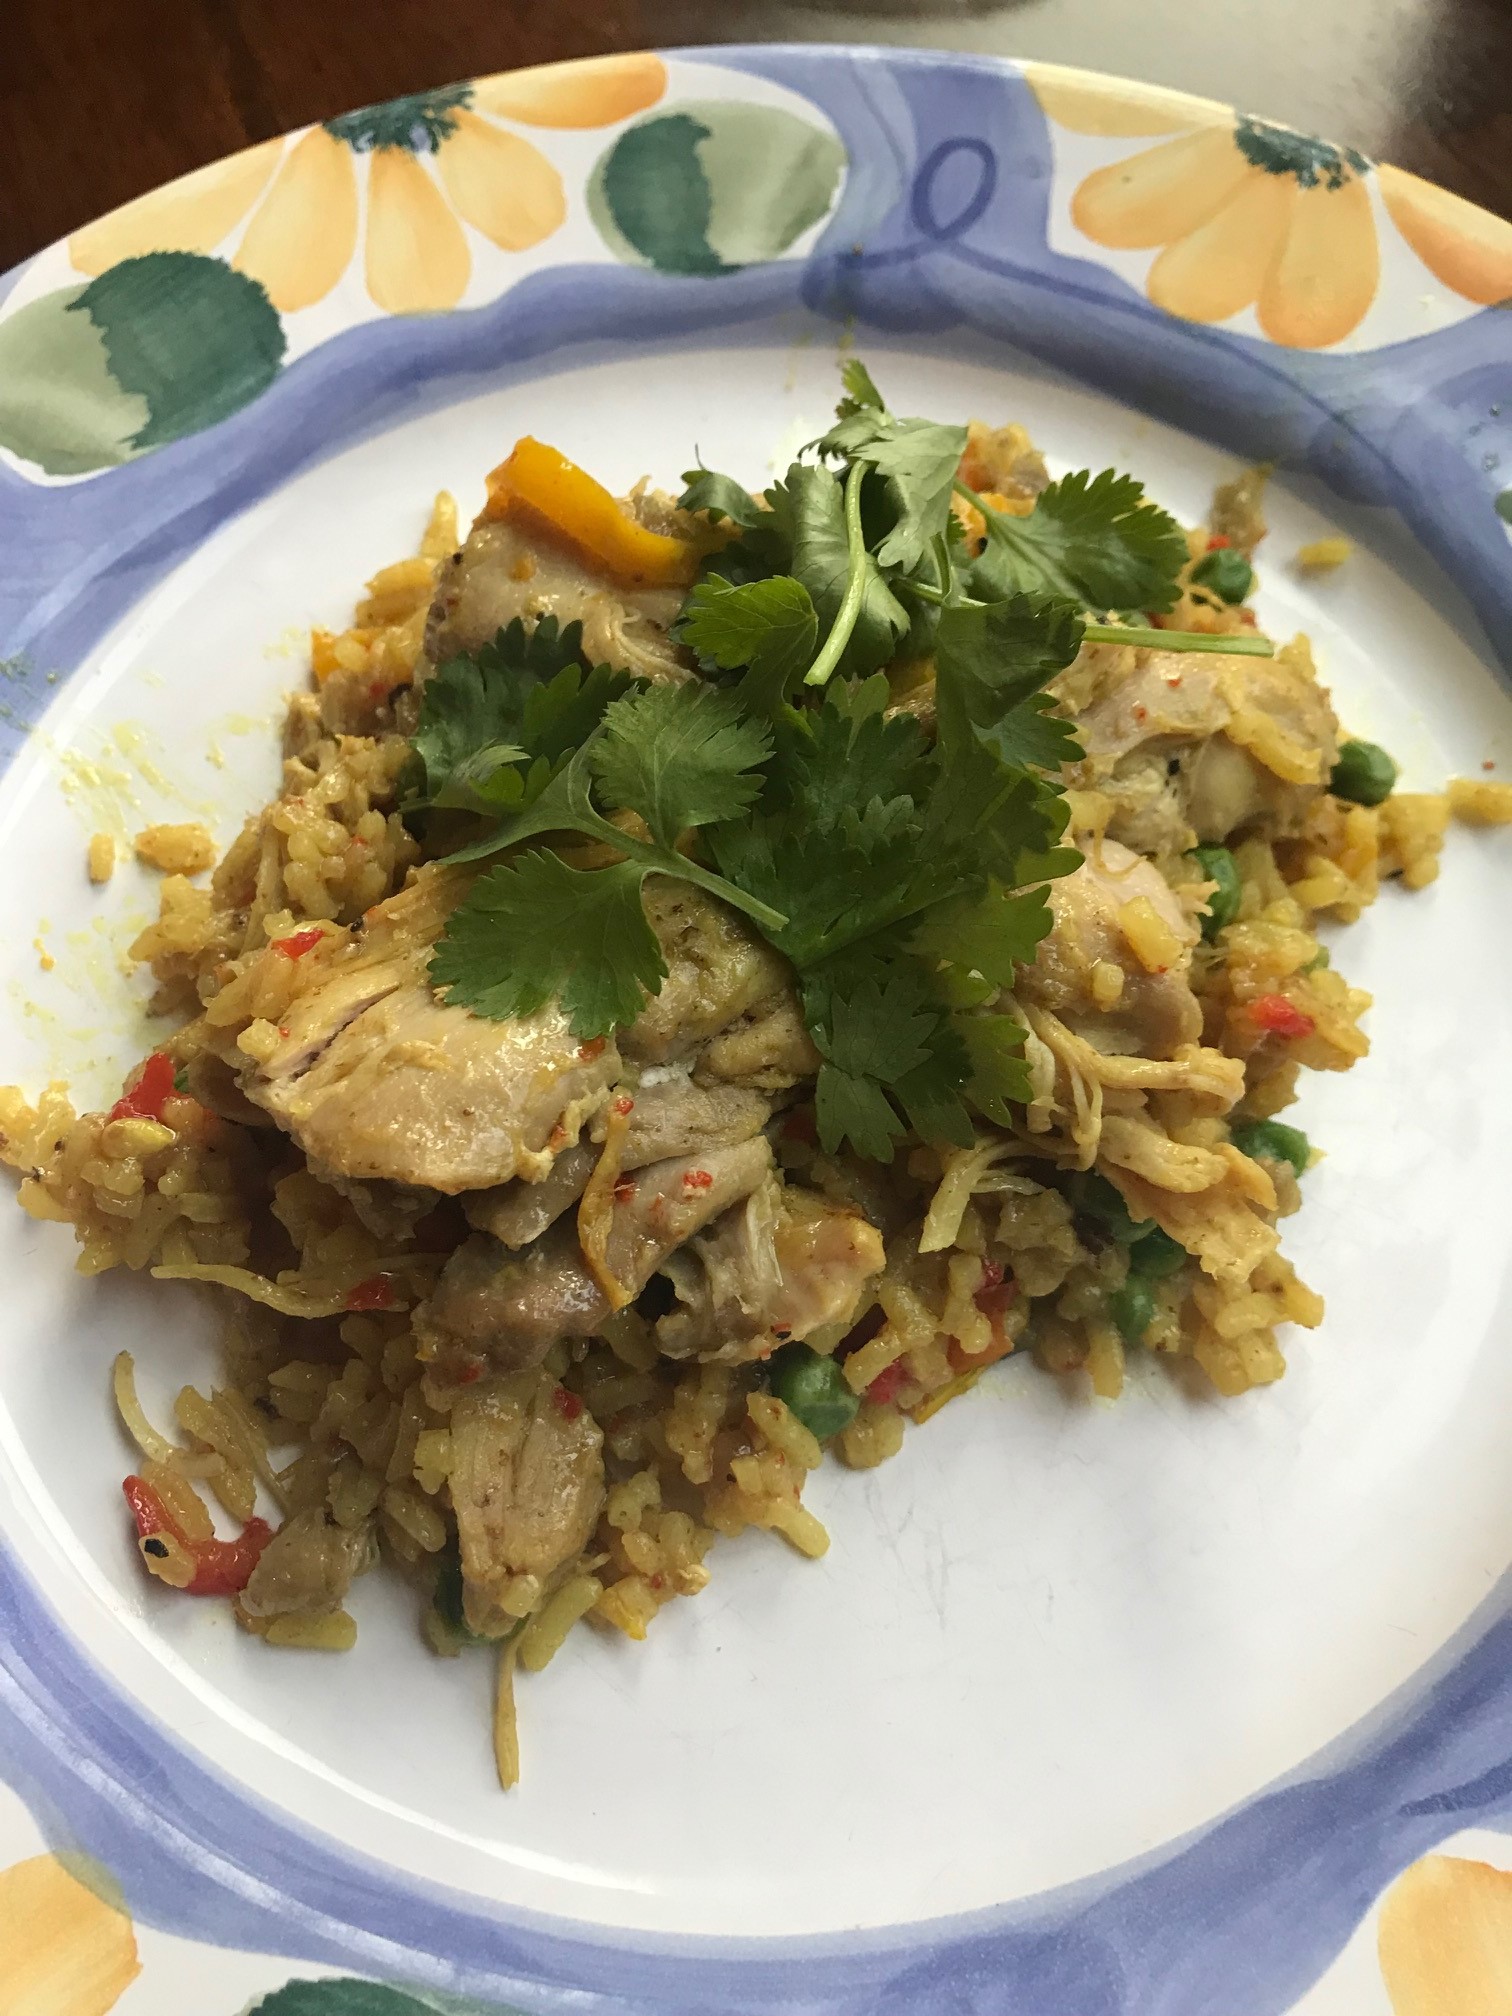
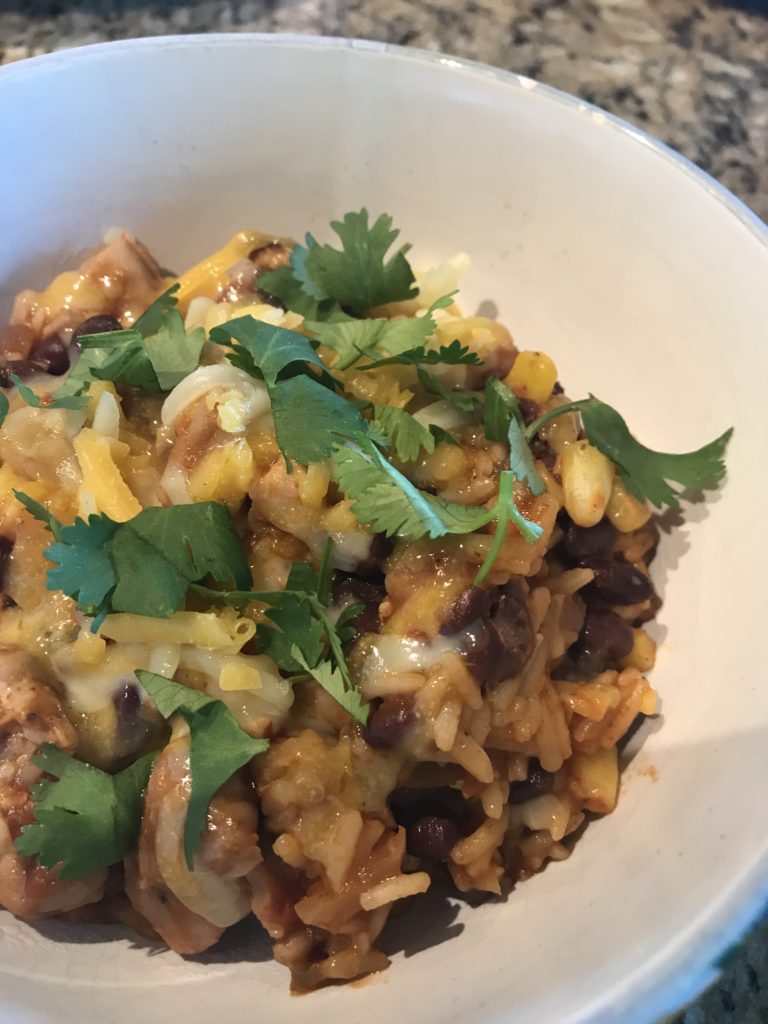
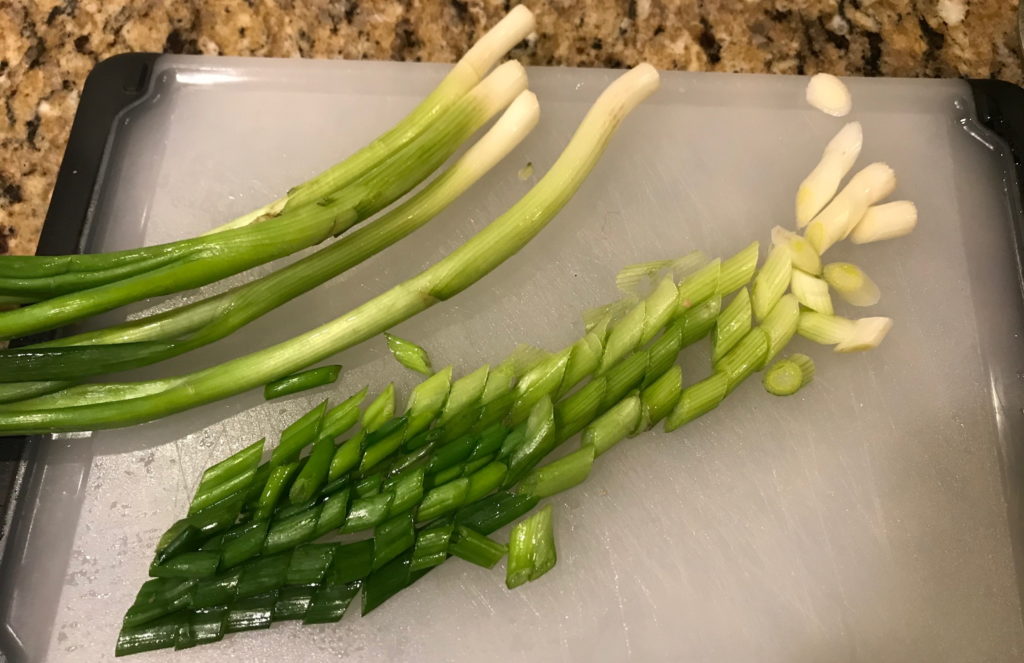
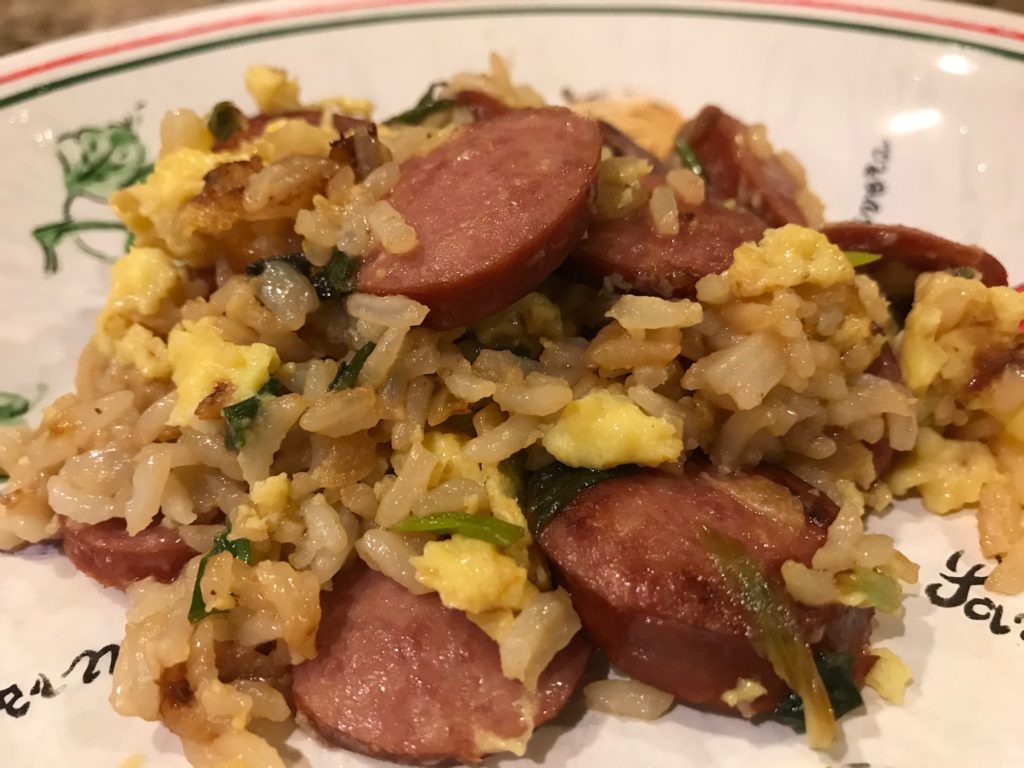
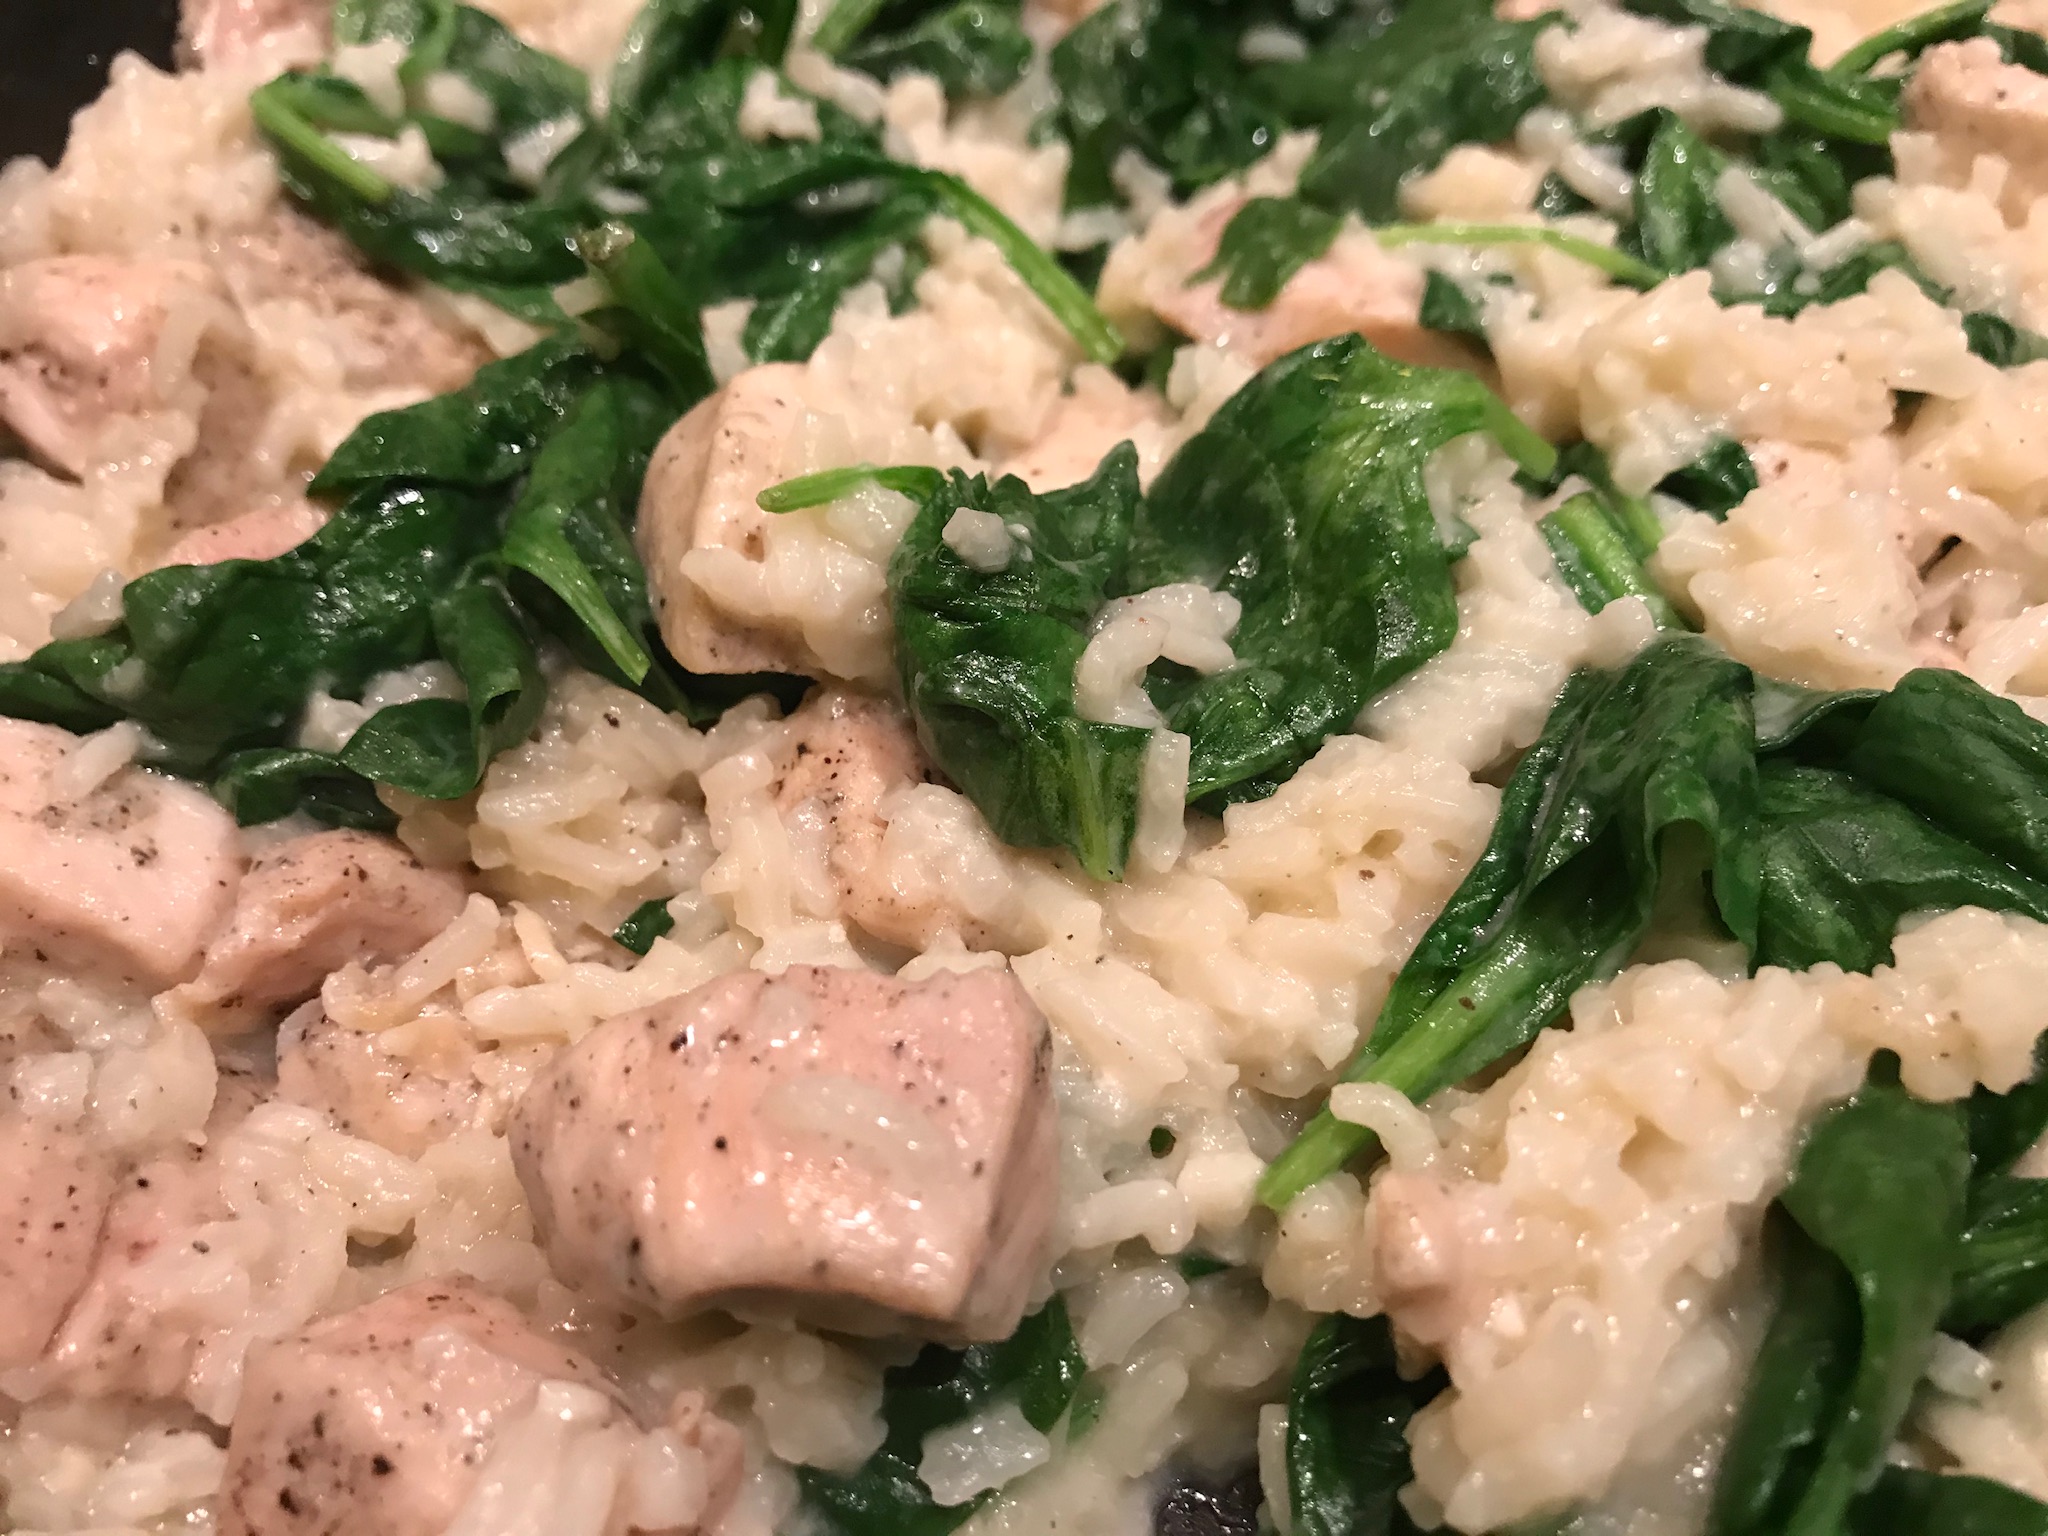
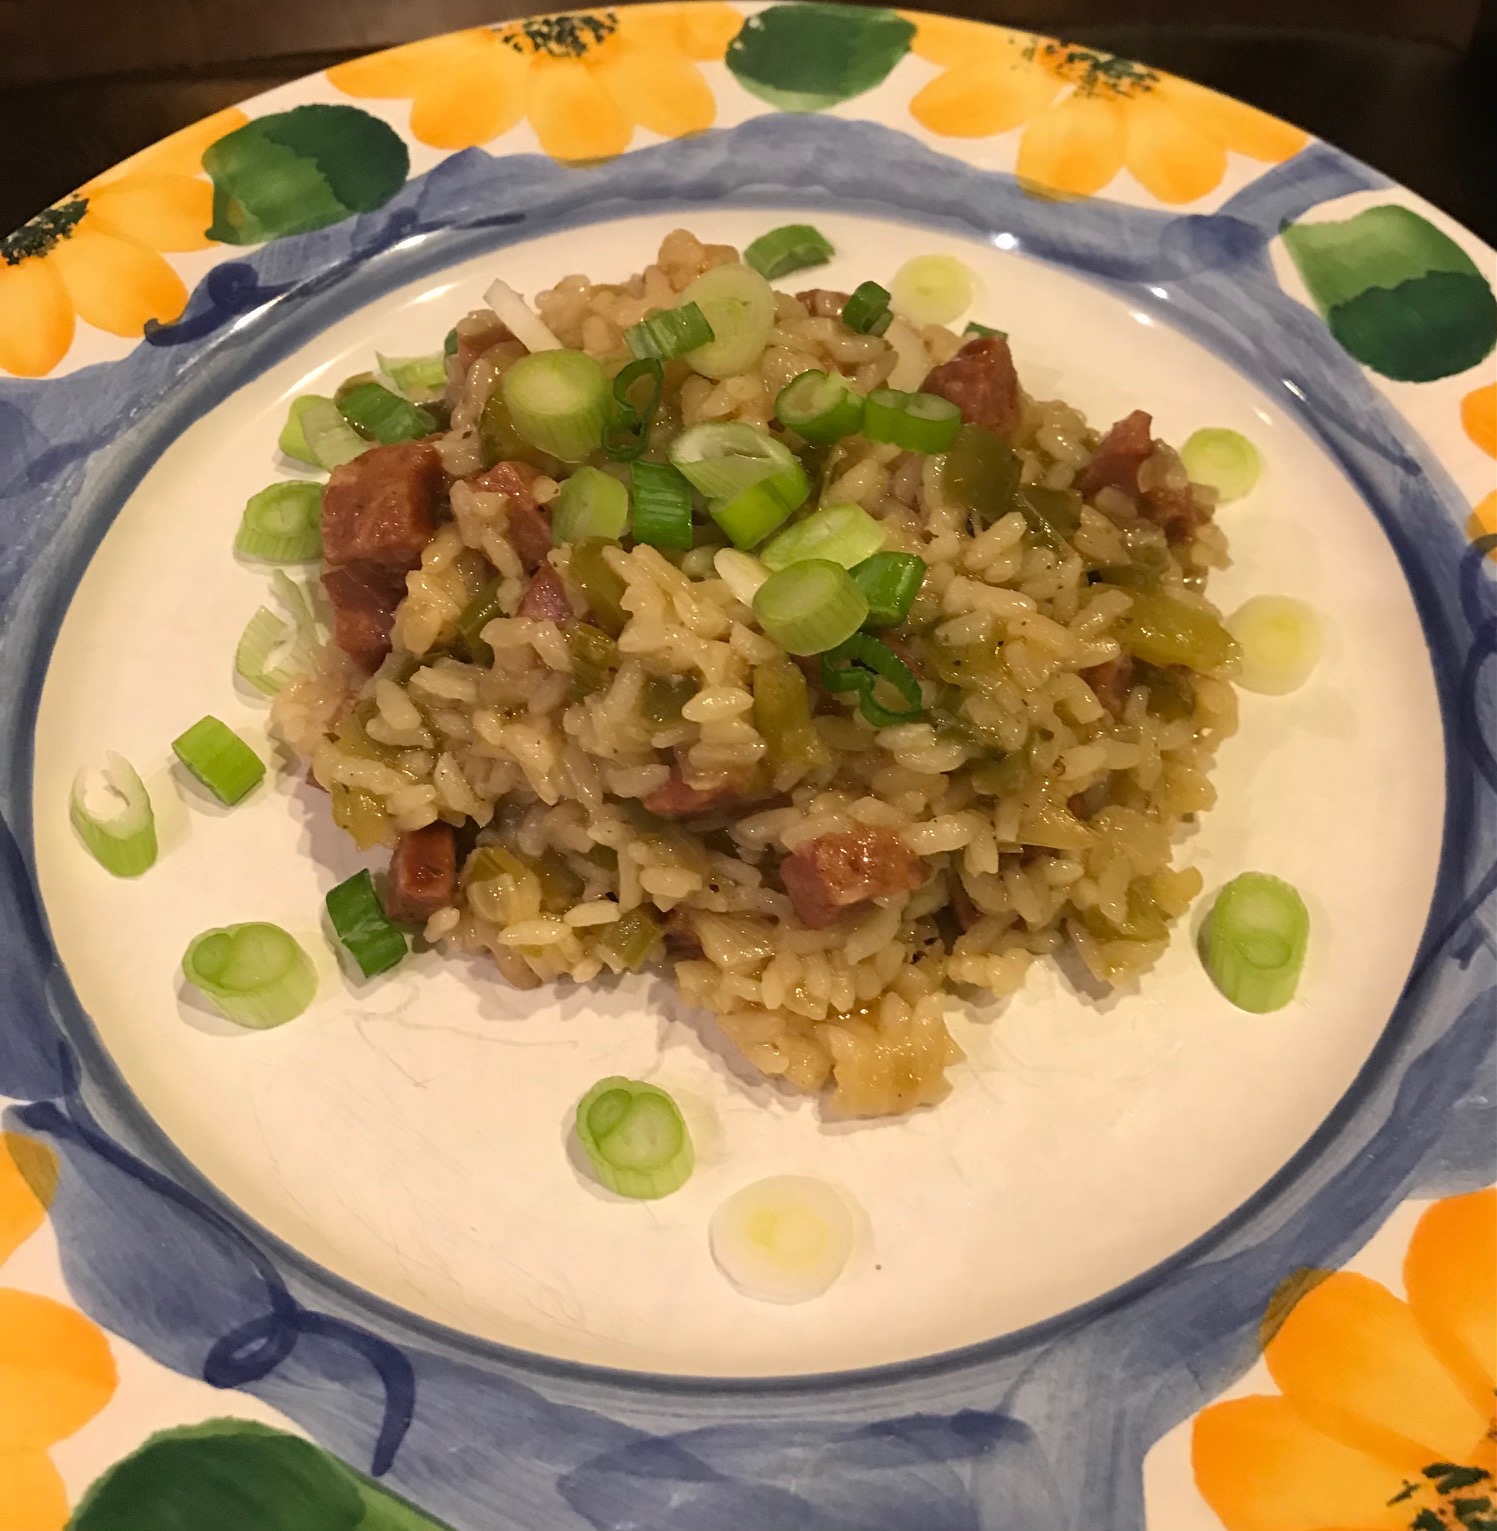
When the rice is tender, take it off the burner and let it rest, covered, for another 5 minutes. Scoop a portion onto a plate and throw some green onions on top. Now it’s time to eat!

Dirty Rice

Although it has plenty of black pepper and cayenne, it isn’t too spicy. I love the caramelized sausage, which gives it smoky and sweet notes. Don’t skip the garnish. The green onions add a nice crunch. The boys approved of this meal, particularly because the younger boy could easily pick out the Holy Trinity. He also didn’t get any green onions. Definitely try this. Everyone will love and it’s super simple to cook. It also makes great leftovers!

Dirty Rice

Dirty Rice

Servings 8

Ingredients
  

  • 2 tablespoons vegetable oil
  • 12 ounces cooked andouille sausage diced
  • 1 medium yellow onion diced
  • 2 medium celery stalks diced
  • 1 medium green bell pepper seeded and diced
  • 1 1/2 cups long-grain white rice
  • 2 cloves garlic minced
  • 1 bay leaf
  • 1 teaspoon kosher salt
  • 1/2 teaspoon dried oregano
  • 1/2 teaspoon dried thyme
  • 1/2 teaspoon freshly ground black pepper
  • 1/8 teaspoon cayenne pepper
  • 2 cups chicken broth
  • 1 cup water
  • 4 medium green onions sliced

Instructions
 

  • Heat the oil in a Dutch oven or large pot over medium-high heat until shimmering. Add the sausage and cook until browned, about 6 minutes. Using a slotted spoon, remove the sausage to a plate and set aside.
  • Reduce the heat to medium. Add the onion, celery, and bell pepper to the pot and cook, stirring occasionally, until softened, 8 to 10 minutes. Add the rice, garlic, bay leaf, salt, oregano, thyme, black pepper, and cayenne. Cook, stirring occasionally, until the rice makes a crackling/sizzling sound, about 3 minutes.
  • Add the broth, water, and reserved sausage. Scrape up any browned bits from the bottom of the pot. Bring to a boil. Stir the rice and spread into an even layer. Reduce the heat to low, cover, and simmer for 10 minutes. Stir the rice, cover again, and cook undisturbed until the rice is tender, 5 to 10 minutes more. All the liquid should be absorbed.
  • Remove from the heat and let it sit covered for 5 minutes for the rice to steam. Fluff the rice with a fork and season with more salt and pepper as needed. Sprinkle with the green onions and serve.
Blog

Lemon Chicken and Rice Soup

Jump to Recipe

The rain is really coming down today, which in many ways is good for drought-ridden Northern California. The trees are whipping, water is pounding on the windows, and the sky is dark. The house is shaking a bit, which I’m not a big fan of. I really hope we don’t lose power because we’ll all go out of our minds. I know this is nothing compared to the snow storms of the East, but when it rains here, people freak out like it’s the apocalypse or something. What’s that wet stuff falling from the sky?! Everyone, run for your lives!

My point? It’s definitely soup weather.

Today’s recipe is from Delish, Lemon Chicken and Rice Soup. It’s so amazing that you definitely need to make this now. It’s even easier than last week’s Beef and Cannellini Bean Minestrone. I made a few changes according to my preferences, but otherwise, it’s pretty much perfect.

Prep your ingredients. Cube chicken thighs into bite sized pieces. Juice and zest a lemon. Mince up a garlic clove. Chop up an onion. Slice a few carrots and celery stalks. Grab the chicken stock from the pantry. And please, when a recipe says stock, use stock, not broth. Broth and stock are not the same. You need the stock to provide that intense flavor as if you’ve been simmering this soup for hours. Don’t forget to cook a cup of rice and slice up a few green onions.

Lemon Chicken and Rice Soup

Heat some olive oil in a large pot or Dutch oven and throw you chicken in. Be sure to season it with salt and pepper, and throw in the lemon zest. The recipe calls for half the zest now and then use the rest for a garnish, but I think it’s better to use it all now for that distinct lemony flavor. I don’t want some half-ass lemon flavored soup. Pardon my French.

Cook the chicken until it’s no longer pink, about 5 minutes.

Lemon Chicken and Rice Soup

Taste it to make sure it has enough salt and pepper, and add more if necessary. Next, add your garlic and veggies. I went for sliced veggies instead of diced because I like my veggies to be in larger pieces. It’s really up to you.

Lemon Chicken and Rice Soup

Cook all that until the veggies are slightly soft, about 7 minutes. Next, throw in your stock, lemon juice, cooked rice, and some of the green onions. Save the rest for garnish. The recipe calls for 1 cup of cooked rice, but I added 2 cups. It makes for a more substantial soup.

Lemon Chicken and Rice Soup

Bring it to a boil and then let this simmer away for about 5 minutes. You won’t have time to do much else so don’t wander off. When it’s ready, ladle it into some bowls and garnish with the rest of the green onions.

Lemon Chicken and Rice Soup

And that’s it. I told you it was easy. There’s hardly any clean up because it was all made in a single pot. It’s lemony goodness with a touch of garlic. The soup is full of delicious chunks of chicken and veggies, and just the right amount of rice so you won’t go hungry an hour later. Comfort food at its best. Next time, I’m going to experiment with dill, which would complement the lemon nicely. Enjoy!

Lemon Chicken and Rice Soup

Lemon Chicken and Rice Soup

Servings 4

Ingredients
  

  • 1 tablespoon olive oil
  • 1 pound chicken thighs cut into bite-sized pieces
  • Kosher salt and freshly ground black pepper
  • 1 lemon zested and juiced
  • 1 clove garlic minced
  • 1 yellow onion diced
  • 2 carrots sliced
  • 2 celery stalks sliced
  • 4 cups chicken stock
  • 2 cups cooked white rice
  • 4 green onions sliced

Instructions
 

  • In a large pot or Dutch oven over medium-high heat, heat oil. Add chicken to pot. Season with salt, pepper, and add the lemon zest. Cook chicken on all sides, 5 minutes. Add garlic, onion, carrots, celery. Season with salt. Cook until softened, about 7 minutes.
  • Add chicken stock, lemon juice, cooked rice, and half of the green onions, reserving the rest for garnish. Bring to a boil and then simmer uncovered for 5 minutes. Garnish with the rest of the green onions and serve.
Blog

Chipotle Steak Rice Bowls

Jump to Recipe

I’ll get to the point. We love tacos and fajitas. So much so that I came to the conclusion that we needed another Taco Tuesday, but let’s say on a Friday. I decided mix it up a bit and make these tasty fajita steak rice bowls, which feature juicy slices of homemade fajita-seasoned skirt steak along side sliced onions and peppers over rice. I promise the effort is worth the reward. What am I saying?! You’ll find this recipe is a quick and satisfying meal. This recipe comes from The Recipe Critic and will not disappoint.

First, bring out all your ingredients, which are your seasonings, olive oil, limes, soy sauce, skirt steak (try to pull it out an hour ahead of time because meat cooks more evenly when it’s at room temperature), peppers (any color you want), some butter, and rice (brown or white, your choice).

Go cook some rice.

Next, make the fajita seasoning. A lot of stuff (seven!) goes into this, but that’s where all the flavor. Please do that skip the chipotle chili pepper powder, which you can find among all the other spices at the grocery store. I hate buying spices that I never use again, but you can use this instead of your regular chili powder. It’s worth the purchase.

Chipotle Steak Rice Bowls

Mix it up, spoon out some for your veggies, and put the rest aside for the marinade.

Time for the marinade. You don’t have to marinate the meat for hours. Love it. If you’re like me, you usually forget to marinate ahead of time. Not a problem here. In a gallon size zip-top bag, add olive oil, lime juice, soy sauce, and the fajita seasoning. Throw your steak in the mag, close the bag, and squish the bag around to coat the steak. Let it hang out on your counter while you slice and cook up the peppers and onion. BTW, you can use any color of bell pepper. Any type of onion too. I used yellow and red peppers with red onions.

Now you’re going to cook your onions. I used an iron cast skillet because it makes a nice crust on the steak and it makes me feel fancy (which is super important when cooking as it boosts your confidence level), but any skillet works. After you’ve softened the onion a bit, add your peppers and reserved fajita seasoning. Give it a stir. I don’t like overcooked, soft peppers so I only cooked them for about 4 minutes. These are perfect.

Chipotle Steak Rice Bowls

Transfer them to a plate and set them aside.

Next is the steak. I did sort of make a mess, but that’s okay. Melt some butter in the skillet and gently place it in the pan so you don’t splatter the butter like I did.

Chipotle Steak Rice Bowls

Sear the steak for about 4 minutes on each side. When you think it’s ready, take our your trusty instant thermometer. Wait, you don’t have one? You need to buy one (and no, I’m not making any money from this recommendation). It’s perfect when making sure your meat isn’t raw. Ick. I like mine around medium rare, which is about 145F. If you want it medium, cook until 160F. Let’s not discuss any other acceptable level of rareness.

Chipotle Steak Rice Bowls

When the steak is cooked, transfer it to a cutting board and slice it as thin as you like. Fill a bowl up with hot, cooked rice. Throw on your steak and veggies. Add any toppings you like. Cilantro is a must in our family. We also added spicy pickled carrots and avocado. Yum.

Chipotle Steak Rice Bowls

This is a make again. Two thumbs up. This meal pleases everyone because it’s both adult and kid friendly. The perfectly seasoned steak is flavorful without being too spicy. You can customize the bowl to however you want. My picky eater skipped everything but the rice and steak while throwing some cheese on top. Perfect! There’s no wrong way to make your bowl. Because I tend to low carb it, I skipped the rice and put it on a bed of kale (yes, I’m weird that way), but cabbage would have worked too.

Go make this. Please and thank you.

Chipotle Steak Rice Bowls

Chipotle Steak Rice Bowls

Servings 4

Ingredients
  

  • 1 1/2 teaspoons chipotle chili pepper powder
  • 1 teaspoon cumin
  • 1 teaspoon garlic powder
  • 1/2 teaspoon onion powder
  • 1/2 teaspoon smoked paprika
  • 1/4 teaspoon salt
  • 1/8 teaspoon black pepper
  • 3 tablespoon olive oil divided
  • 2 limes juiced
  • 1 teaspoon soy sauce
  • 1 1/2 pounds skirt steak
  • 2 medium bell peppers any color
  • 1 medium onion any type
  • 2 tablespoons butter
  • 2 cups rice
  • your favorite toppings

Instructions
 

  • About an hour before cooking, place the steak on the counter so it comes up to room temperature.
  • In a small bowl, combine the chipotle chili powder, cumin, garlic powder, onion powder, paprika, salt, and pepper. Reserve 1 1/2 teaspoons for the vegetables.
  • In a large zip-top bag, combine 2 tablespoons of olive oil, lime juice, soy sauce, and the remainder of the fajita seasonings. Add the steak, seal the bag, and press the bag to coat the marinade onto steak. Set it aside on the counter while you prepare the vegetables.
  • Remove the onion skin and slice into thin strips. Core the bell peppers to remove the seeds and thinly slice.
  • Heat 1 tablespoon olive oil in a 12" cast iron or non-stick skillet over medium high heat. Add the onions and allow to cook for 4-5 minutes, or until softened. Add the bell peppers and sprinkle with the reserved 1 1/2 teaspoons of fajita seasoning. Cook for about 3-5 minutes. Transfer and set aside on a plate.
  • Melt butter on the same skillet and sear the steak. Allow to sear for 3 to 4 minutes (or more depending on how done you like your steak) on each side. Internal steak temperature should be 145F for medium rare or 160F for medium. Transfer steak to a cutting board and allow to rest for at least 5 minutes before slicing into thin strips.
  • Fill bowls with rice. Top with steak, onions, peppers, and your favorite toppings.
Blog

Cuban Baked Chicken with Sweet Peppers and Yellow Rice

Jump to Recipe

I recently read an amazing book called Next Year in Havana by Chanel Cleeton. It’s a beautiful story told from the perspectives of two women. There’s also a lot of discussion of food. On the first night, Marisal, one of the women, eats lechón asado, which is pork marinated in a mojo sauce (sour oranges with seasonings such as oregano, garlic, and cumin), served with black beans, rice, and maduros (fried sweet plantains). It sounds amazing. I would love to make it some day, but I heard that the authentic way is to roast a whole pig all day. I think I’ll find an easier recipe.

Cuban Baked Chicken has Cuban influences, but is not traditionally Cuban. It’s a variation of pollo con arroz and includes peppers, cumin, turmeric, and peas, ingredients you’d find in many Cuban dishes. I changed up the recipe found on Food Network because I’m just that way. More important, this dish cures the recent casserole cravings going through my household.

Pull all your ingredients together: chicken, salt/pepper, olive oil, an onion, yellow and red bell peppers, turmeric, cumin, rice, chicken broth, and peas. I like to measure everything out so all I have to do is dump it into a dutch oven or skillet.

Cuban Chicken

The original recipe calls for a whole chicken cut in 8 pieces, but I find that using my favorite cut of meat, boneless, skinless chicken thighs, tastier. Cook the chicken for about 8 minutes each side. Mine fell apart, which I think made it better. Just be sure it’s nicely browned before you set it aside.

Cook in stages: first the onion for a few minutes, add garlic for another minute, add the peppers for a few minutes, and then add your spices and rice. Stir until well coated. Pour in the broth and bring it to a boil. Throw in your browned chicken and transfer the whole thing to the oven at 375F for about 25 minutes.

Cuban Chicken

Because everything is cooking all by itself and is a complete meal, go do something fun in the meantime.

When it’s done, pull it out of the oven (of course), fluff up the rice, and add some peas.

Cuban Chicken

Scoop it onto a plate and top with cilantro to make it look pretty. Dinner is served!

Cuban Chicken

This is comfort food at its best. Pieces of juicy chicken with seasoned rice that is perfectly tender. Just enough veggies as not to distract. The cumin really comes through and I love the color of turmeric. This is definitely a make again.

Cuban Chicken

Cuban Baked Chicken with Sweet Peppers and Yellow Rice

Servings 8

Ingredients
  

  • 2 pounds boneless, skinless chicken thighs
  • Kosher salt and freshly ground pepper
  • 2 tablespoons olive oil
  • 1 medium onion diced
  • 2 cloves garlic minced
  • 1 yellow bell pepper seeded, cored, and thinly sliced
  • 1 red bell pepper seeded, cored, and thinly sliced
  • 1/2 teaspoon turmeric
  • 1/2 teaspoon ground cumin
  • 1 cup white rice
  • 1 3/4 cup chicken broth
  • 1 cup frozen peas
  • cilantro for granish

Instructions
 

  • Preheat the oven to 375 degrees F. Pat the chicken dry. Season with salt and pepper. Heat the olive oil in a large oven-proof dutch oven pan or deep skillet, with a lid, over medium-high heat. Add the chicken and cook until well browned, about 8 minutes on each side. Transfer chicken to a plate.
  • Add the onion to the pan and cook, stirring often, until soft, 3 to 5 minutes. Add the garlic and cook 1 minute longer. Add the peppers and cook, stirring, until softened, about 3 minutes. Stir in the turmeric, cumin, rice, and 1/4 teaspoon salt. Stir until the rice is coated. Pour in the broth, and stir to distribute the rice evenly. Increase the heat to high and boil until liquid begins to be absorbed into the rice, about 2 minutes. Add the chicken to the rice. Cover and transfer the pan to the oven. Bake until the rice is tender and chicken cooks through, about 25 minutes.
  • Remove from oven and uncover. Fluff the rice and stir in the peas. Cover and let sit to warm the peas, about 5 minutes. Season with additional salt and pepper. Garnish with cilantro and serve.
Blog

Lora’s Pressure-Cooker Red Beans and Rice

Jump to Recipe

No, it’s not a typo. This is is Lora’s recipe, not Flora’s. It’s also the last dish I made to finish off the Christmas ham. You’ll find this recipe to be super tasty and easy to make plus there are tons of leftovers that are good to freeze. The hardest part is to remember to soak the beans the night before. Make yourself a little reminder so you don’t forget.

Before you start prepping your ingredients, make some rice. I use my Instant Pot as rice cooker, which is what I did, but you can obviously make it over the stove. I just recommend getting this out of the way before you make the rest of the meal.

While your rice is cooking, start on your chopping. There’s a lot of chopping, but that’s ok. You’ve got this. For instance, chop up an onion by using this little trick of cutting the onion in half, leave the root attached, slice into strips up to the root, and then across. You’ll end up with perfectly chopped onion pieces.

Red Beans and Rice

After you’ve chopped your ham and veggies into bit-sized pieces, start adding everything to your Instant Pot.

Red Beans and Rice

The only changes I made was to use Italian-style sausage instead of andouille and the only hot pepper sauce I could find in my fridge was sriracha.

Toss everything in the Instant Pot pot except your rice, which should be done by now. I keep two stainless steels pots so I can switch them out for this very purpose. Pull the rice pot out and put the beans pot in. Seal it up and cook on high for 30 minutes. Quick release and you’re done. Seriously that easy.

Maybe this is a preference, I did find a lot more liquid than I would have liked so I used a slotted spoon to scoop out the bean mixture before serving it over rice. If I made this again, I’d experiment with 2 cups of water instead of 4.

Red Beans and Rice

This recipe makes 10 servings so you should have plenty to freeze for another time. I froze a couple containers without the recipe so I can make fresh rice next time.

Red Beans and Rice

Lora’s Pressure-Cooker Red Beans and Rice

Servings 10

Ingredients
  

  • 16 ounces dried kidney beans
  • 2 cups cooked ham cubed
  • 12 ounces Italian-style chicken sausage or other sausage sliced
  • 1 medium green pepper chopped
  • 1 medium onion chopped
  • 2 celery stalks chopped
  • 1 teaspoon sriracha or other hot sauce
  • 2 garlic cloves minced
  • 1 teaspoon salt
  • 4 cups water
  • hot cooked rice

Instructions
 

  • Rinse and sort beans. Soak overnight according to package directions. Drain, discarding water, and rinse with cool water.
  • Prepare rice ahead of time and set aside.
  • In a 6-qt. Instant Pot (or other electric pressure cooker), combine beans, ham, sausage, vegetables, sriracha, garlic, salt, and water.
  • Lock lid and close pressure-release valve. Pressure cook on high for 30 minutes. Quick-release pressure. Serve over hot cooked rice.
Blog

Instant Pot Chicken and Rice Burrito Bowls

Jump to Recipe

These chicken and rice bowls are amazing. Flat out amazing. There are a lot of ingredients and you need an Instant Pot (go out and buy one already! here’s another reason why!), but it’s totally, completely worth it. Thank you kitchn!

First, do your prep. The kitchn says to do it as you go, but I disagree. Because there are a lot of ingredients, I would rather be prepared than frantically chopping chicken and opening cans. So…dice up an onion. Mince a couple cloves of garlic (lately I’ve been using a microplane/zester and finding it faster). Measure out some chili powder and cumin. Open your cans of broth and black beans. Cut chicken thighs into 1-inch chunks, and season with salt and pepper. Grab the frozen corn, a jar of salsa, and rice. Shred some cheese and chop up fresh cilantro. Whew. Ok, take a break. Admire your work.

Instant Pot Chicken and Rice Burrito Bowls

In your Instant Pot, heat some oil until shimmering, which means there are little ripples rolling in it. Or you can just time it to about 2 minutes or so. Throw in the onion and garlic, and cook until the onion is soft. Be sure to stir it occasionally so the garlic doesn’t burn. Stir in your seasonings and cook until it smells really good, which is really only about a half a minute. I mean it’ll continue smelling good, but don’t get distracted. Add some chicken broth, scrap the bits from the bottom, and simmer for a minute.

Add chicken, beans, corn, and salsa. Stir. Now the technical part: pour the rice over this. Do NOT stir. You might feel compelled to submerge the rain. Just leave it be. Trust me on this one. You’ll then pour some more broth over it, but again, don’t stir.

Set the pressure to high for 10 minutes and let it do its thing. Go watch the news. Actually, don’t watch the news. It’s super depressing these days. Go make a salad instead. It’s better for you than the news.

It’ll take about 10-12 minutes to come to pressure, and I have to say, I love it when Instant Pot recipes tell you this. Yes, it’s faster to cook in an Instant Pot, but when the recipe tells you to cook it for 10 minutes, it’s really at least double than that.

After the Instant Pot beeps, quick release the pressure and then carefully open the lid. Don’t panic when you see the rice sitting on top looking raw. I promise you it’s fully cooked. Just stir everything together, scoop some into a bowl, and top with shredded cheese and chopped cilantro.

Instant Pot Chicken and Rice Burrito Bowls

The cheese is all gooey. The beans are all soft. The rice is all tender. Oh, deliciousness! What’s not to love? This one is a make again.

Instant Pot Chicken and Rice Burrito Bowls

Instant Pot Chicken and Rice Burrito Bowls

Servings 6

Ingredients
  

  • 1 1/2 tablespoons canola oil
  • 1 medium onion diced
  • 2 cloves garlic minced
  • 1 tablespoon chili powder
  • 1 1/2 teaspoons ground cumin
  • 1 cup low-sodium chicken broth divided
  • 1 1/2 pounds boneless, skinless chicken thighs cut into 1-inch pieces
  • Kosher salt and freshly ground pepper
  • 15 ounces canned black beans drained and rinsed
  • 1 cup frozen corn kernels
  • 16 ounces salsa
  • 1 cup long-grain white rice
  • 1/2 cup shredded cheese (cheddar, jack, or a blend)
  • 1/4 cup fresh cilantro coarsely chopped

Instructions
 

  • Add the oil to the Instant Pot, turn on saute setting. Heat until shimmering.
  • Add the onion and garlic. Cook, stirring occasionally, until softened, about 4 minutes.
  • Stir in the chili powder and cumin. Cook until fragrant, about 30 seconds.
  • Add 1/4 cup of the chicken broth. Cook, gently scraping the bottom of the pot with a wooden spoon to loosen any stuck-on bits, and simmer for 1 minute.
  • Season the chicken with the salt and pepper. Add the chicken, beans, corn, salsa, and stir to combine.
  • Sprinkle the rice over the top. Pour the remaining 3/4 cup broth over the rice, but do not stir.
  • Using the manual setting, set the pressure to HIGH for 10 minutes. Close and lock the lid. It should take the pressure cooker about 10 to 12 minutes to come to pressure and begin the 10 minute countdown. When the cooking time is complete, do a quick release of the pressure.
  • Gently stir everything together. Divide between bowls and top with the cheese and cilantro.
Blog

Kielbasa Fried Rice

Jump to Recipe

Fried rice is yummy and convenient. It’s one of those things you can usually make with your spare ingredients. All you need is some meat, veggies, rice, and eggs. Some soy sauce and garlic helps too.

So why don’t I make fried rice very often? Because I’m on this low carb deal and I’d have to make two sets of fried rice, one with actual rice and the other with riced cauliflower. I should try that sometime, but now is not this time. Instead, I’m going to run through this two-thumbs up fried rice I made the other night. I found the recipe on Bon Appétit, but it wasn’t in a recipe format so providing you with a recipe is my value add here. That and I’ll explain a few things because I have opinions and you’re reading this so I might as well share them with you.

The nice thing about this recipe is that you can use fresh rice. Most fried rice uses leftover rice, which you can still use, but I rarely have cooked rice around so I made some in my Instant Pot before I started.

Although this recipe uses kielbasa, you can use any protein like chicken, pork, tofu, or even a combination. Whatever you have should work. I purchased kielbasa because I wanted to follow the recipe exactly and I was not disappointed.

I sliced up the kielbasa and then the green onions at an angle (other than it looks fancier, I have no idea why recipes suggest this) and garlic. Again, you can probably use any type of onion. I was a little wary of not mincing my garlic, but it all worked out fine.

Kielbasa Fried Rice

Throw the kielbasa in the pan. Then, don’t touch it! When you brown the kielbasa, be sure not to constantly stir it around. If you do, you’ll end up with warmed up, bland meat. Blah. Searing the meat is key. You want to let it sear on one side before moving it around so it creates a nice, golden caramelization that adds a bunch of flavor to your dish.

Add your onions, garlic, and a pinch of salt, and then flip the meat over to cook the other side.

Kielbasa Fried Rice

Cook it until the onions are slightly soft. Add your rice, another pinch of salt (remember you are adding layers of flavors instead of dumping all your salt at the end like your mom probably taught you, if she even let me add salt, but that’s another story), a few splashes of soy sauce, and a pinch or two of sugar to add a bit of sweetness. Salty sweet. Mmmm… Mix it around.

Kielbasa Fried Rice

Now the fun begins! Egg time. Whisk up 3 eggs with a pinch of salt. Make a wall of rice mixture on each side of the pan and pour your eggs down the middle.

Kielbasa Fried Rice

Let the eggs sit for a minute or two to let them cook a little and then scramble them a bit. When they are cooked, mix the rice and goodies with the scrambled egg. Throw it in a bowl, squeeze some lime over it for acidity, and eat! Nothing’s easier than this for a delicious weeknight meal. So many flavors…salty, sweet, umami (a fancy way of saying savory) with that soft, sticky rice mixed with scrambled eggs…ok, I really need to take a bite to make sure it’s ok. Mmmm… Damn carbs.

Kielbasa Fried Rice
Kielbasa Fried Rice

Kielbasa Fried Rice

Servings 4

Ingredients
  

  • 1 1/2 cups cooked rice
  • 14-16 ounces Polish style kielbasa sliced 1/4-in thick, at an angle
  • 8 green onions thinly sliced, at an angle
  • 2 cloves garlic thinly sliced
  • 2 tablespoons vegetable oil
  • 3-4 pinches kosher salt
  • 2-3 splashes soy sauce
  • 1-2 pinches white sugar
  • 3 eggs whisked
  • lime quartered

Instructions
 

  • Make rice. While it's steaming, slice the Polish style kielbasa at an angle and about 1/4" thick. Thinly slice green onions on an angle. Thinly slice garlic.
  • Heat vegetable oil in a large nonstick skillet or wok over medium-high heat. Add the sliced kielbasa in the pan and let it cook without stirring for about 3 minutes until the underside is a deep brown color.
  • Add the sliced green onions and garlic to the pan. Add a pinch of salt. Flip most of the kielbasa to the other side and stir. Continue to cook for another couple minutes, until the green onions begin to soften.
  • Add the steamed rice into the skillet, a 1-2 pinches of salt, a 2-3 splashes of soy sauce, and 1-2 pinches of white sugar. Stir everything together so the green onions, garlic, and kielbasa are evenly distributed.
  • In a small bowl, whisk 3 large eggs and a pinch of salt.
  • Split your rice mixture in half and push each half to each side of the skillet so that a strip of pan with nothing in it runs down the middle. No rice should be in the middle.
  • Pour the eggs into the middle section of the skillet. Let the eggs cook for 1–2 minutes without stirring. Then, scramble quickly, scraping along the bottom of the skillet. When the eggs have cooked through, combine the egg into the rice mixture to distribute the eggs throughout the rice evenly.
  • Pour into bowls and squeeze a quarter of lime over each bowl.
Blog

Chicken and Wild Rice Soup

Jump to Recipe

After reading an article about wild rice, my husband asked me if I could cook some wild rice for dinner. I completely jumped on the opportunity. You see, as much as I adore my husband, he’s not a foodie. He likes his steak. He likes tasty food. But he would be just as satisfied if he could skip the whole eating process. It takes away from his (gaming) hobbies whereas eating and making food is my hobby. So when he asked for wild rice, I was pretty excited.

I searched high and low for a tasty wild rice recipe. I was inspired by the weather. It’s been rainy and cold so therefore, soup weather. I decided on a soup recipe from Food and Wine. I stuck to the recipe, but if I had to do it over again, I’d leave out the cream. Don’t get me wrong, the cream makes it…creamy (duh). But apparently some of us do not like creamy soups except for clam chowder. And maybe potato and leek. Whatever. Let’s just leave it at that.

First, let’s talk about wild rice. What the heck is it exactly? Wild rice is a grain and distant cousin to white and brown rice. Like other rices, wild rice is the seed from a type of grass grown in Asian and the US, but not the same grass of other rices. It’s more common in the US and pretty healthy for you. High in fiber and protein. Full of antioxidants. That sort of thing. It’s nutty and chewy so seriously, it does feel like you’re eating a superfood.

To make this recipe, I needed 4 cups of cooked chicken. You can use a rotisserie chicken or any leftover chicken, but I didn’t have any so I cubed two large chicken breasts, seasoned them with salt and pepper, and cooked them until they were no longer opaque. I didn’t want to cook it beyond that because I knew they’d continue to cook in the soup and my family is adverse to dried out chicken. So picky.

While the chicken is cooking, I chopped my veggies. It’s important that your carrots and celery are the same thickness, about a 1/2 inch.

In a dutch oven, I melted butter and then added the veggies and seasonings.

Stir it until everything’s starting to soften, but not too much. You want the carrots to be barely tender or they’ll end up mushy at the end. Note that you will be cooking this soup for another 45 minutes. Add flour and cook for another 3 minutes. Add rice and stock. After boiling, bring it down to a simmer and let it do its thing for 30 minutes.

Your veggies will continue to soften and your rice will begin to cook. Add chicken and let it simmer for 15 minutes until the wild rice is tender. If you’ve never had wild rice before, here’s a tip. It won’t be as tender as other rice, but chewy and you can bite through it. At the very end (or not), stir in the cream. Add some salt and pepper, and then serve. This is a really hearty soup that will fill you up and not leave you hungry.

Chicken and Wild Rice Soup

Chicken and Wild Rice Soup

Servings 8

Ingredients
  

  • 4 tablespoons butter
  • 3 celery stalks cut into 1/2-inch pieces
  • 2 carrots cut into 1/2-inch pieces
  • 1 medium onion chopped
  • 2 cloves garlic minced
  • 1 1/2 teaspoons thyme finely chopped
  • salt and pepper
  • 1/4 cup all-purpose flour
  • 5 ounces wild rice about 1 cup
  • 2 quarts chicken stock
  • 2 cups water
  • 4 cups cooked chicken cut into bite-size pieces
  • 1 cup heavy cream optional

Instructions
 

  • In a dutch oven (or large saucepan), melt the butter. Add the celery, carrots, onion, garlic, thyme and a generous pinch of salt and pepper. Cook over moderate heat, stirring occasionally, until the vegetables just start to soften, about 10 minutes. Sprinkle the flour over the vegetables and cook, stirring, until evenly coated and lightly browned, about 3 minutes.
  • Add the wild rice to the saucepan and gradually stir in the stock and water. Bring to a boil, and then simmer over moderately low heat, stirring occasionally, until the vegetables are tender, about 30 minutes.
  • Add the chicken and simmer, stirring occasionally, until the wild rice is tender, 10 to 15 minutes longer. Stir in the cream (optional – if you want a creamy soup) and season with salt and pepper. Ladle the soup into bowls and serve.
Blog

Creamy Garlic Chicken and Rice

Jump to Recipe

If you are looking for a one-pan, easy weeknight dinner, look no further. This is the one. It comes from Tbps., but with a couple minor adjustments.

So first off, I was skeptical. How would the rice cook in time without overcooking the chicken? It all works, but I would try a few things differently in the future. Keep reading.

The recipe calls for chicken breasts. While this works fine, 33% of this household (1 out of 3 people…ha ha!) thought the chicken was dried out. 66% disagreed. Just to test the difference, I’d like to make this again using skinless, boneless chicken thighs, my current favorite cut of chicken. Regardless of what you use, you need a pound of chicken cut into chunks seasoned well with garlic powder, salt, and pepper.

The recipe calls for cooking it until browned. I cooked it just under that in the hopes the chicken would not be overcooked in the end.

Throw in your rice and broth. After reaching to a boil, simmer for 20 minutes. Mine wasn’t ready. Too much liquid.

So I cooked it for another 5 minutes. The liquid should be mostly gone and the rice should be tender. The rice will continue to absorb the liquid so aim for what’s shown below.

Next, add the spinach. Make sure you’ve turned off the heat and removed the pan from the burner. You just want the spinach to wilt slightly. Don’t worry if you barely have enough room. In fact, I think it could use more spinach!

Mix it all up and stir in some cream. If you’re like me and never have cream around, milk works fine too. Dinner is served!

Creamy Garlic Chicken and Rice

Creamy Garlic Chicken and Rice

Servings 4

Ingredients
  

  • 1 pound boneless, skinless chicken breasts or thighs cut into chunks
  • 1 teaspoon garlic powder
  • 1/2 teaspoon salt
  • 1/2 teaspoon black pepper
  • 1 tablespoon olive oil
  • 1 clove garlic minced
  • 3/4 cup white rice
  • 2 1/2 cups chicken broth
  • 2 cups baby spinach
  • 2 tablespoons heavy cream or milk

Instructions
 

  • Toss the chicken with garlic powder, salt, and pepper. Heat olive oil in a 10-inch skillet over medium heat. Add chicken breast and cook for about 3 minutes until it's no longer pink on all sides. Add garlic to skillet and cook for 30 seconds more.
  • Stir in rice and chicken broth. Bring to a boil, reduce to a simmer, and cover. Cook for 20-25 minutes, stirring occasionally, until liquid is absorbed.
  • Remove pan from heat and place baby spinach on top of the rice. Cover and let sit for 5 minutes.
  • Remove lid and stir well. Stir in cream or milk, and serve.