One of my neighbors dropped off a million lemons for me. Now what do I do with them? I made a few loaves of Copycat Starbucks Lemon Loaf, which was amazing by the way. I was tempted to make Lemon Bars, but I seriously need to lay off the sugar. Instead, I searched high and low for the perfect lemon dinner recipe. I found something delicious, but made it my own. The original, Lemon Spaghetti, turned into Lemon Chicken Fettuccine!
This is probably controversial, but we eat meat. Like at every dinner meal. I want to implement Meatless Mondays, but it’s been shot down so many times I’ve given up. I once tried to sneak in a meatless meal by serving cheese tortellini in red sauce and was scowled at. Where’s the meat?! Fine, fine. Therefore, I knew this dish had to have some sort of meat so I chose chicken thighs. It was also pointed out to me that spaghetti is the wrong pasta shape for this dish. Fine, fine, suddenly I was using fettuccine instead. See what I have to do around here?
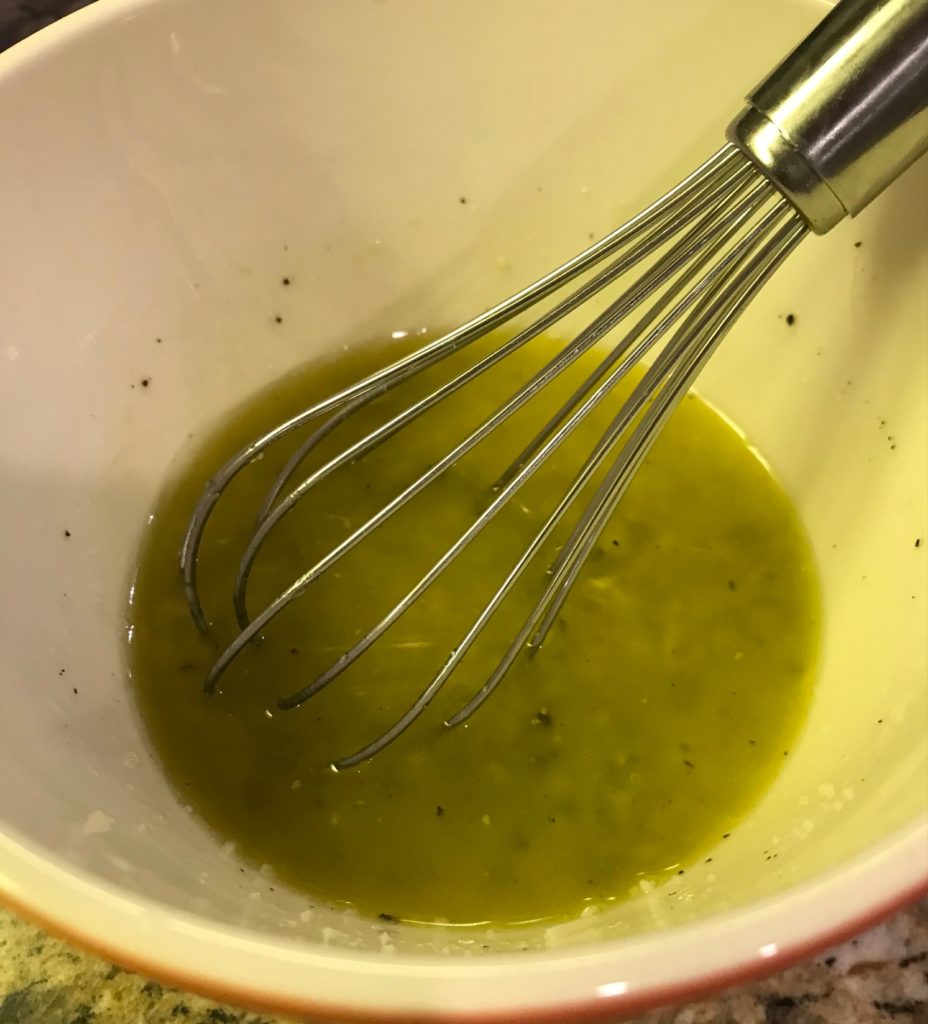
The recipe serves six very hungry eaters (or eight ideal portions) so I split the recipe in half. First chop chicken into bite-sized pieces. Season with salt and pepper. You can leave the chicken thighs whole and chop then after, but chopping them ahead of time reduces the cooking time. You just need to be careful not to overcook the chicken. Fortunately, chicken thighs are forgiving, unlike chicken breasts, so you should be fine. Cook up the chicken in a little olive oil. You can easily use rotisserie chicken instead. While this is going on, boil a large pot of salted water and cook your pasta. If you’re into multitasking, whisk up your sauce at the same time: oil, Parmesan cheese, and lemon juice.
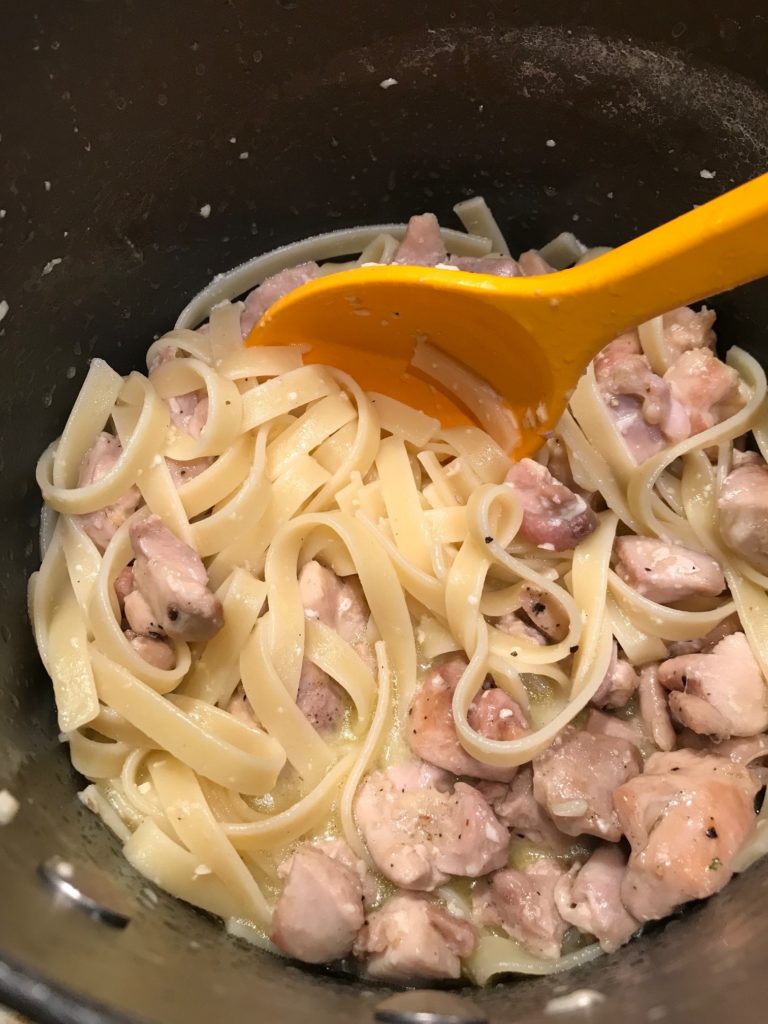
Drain the pasta, but be sure to save about 1/4 cup of pasta water. Toss your lemon sauce and pasta water, about 1/4 cup at a time, into the hot, cooked pasta. Season again with more salt and pepper. Throw in your chicken and stir.
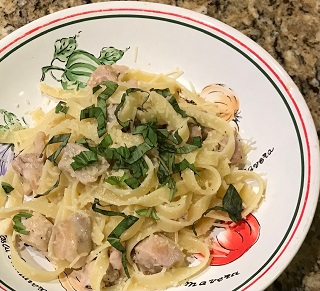
Serve in bowls and garnish with more cheese and some chopped basil. You’re done!
It’s cheesy. It’s lemony. It’s meaty.
Because this is a quick dish to make, it’s perfect for the weeknight when you’re in a hurry to put dinner on the table. It also makes great leftovers so feel free to double it. Definitely a make again.
Chop chicken thighs into bite-sized pieces. Season chicken with salt and pepper. Heat a skillet with olive oil. Cook chicken for about 4 minutes on medium heat. Stir and then cook for another 4 minutes until cooked through. Set aside.
Boil a large pot of salted water. Add pasta and cook al dente, according to the package.
In a small bowl, whisk oil, cheese, and lemon juice until blended.
Drain the pasta, reserving 1/4 cup of pasta water. Toss the pasta with the lemon sauce and reserved pasta water, adding 1/4 cup at a time. Season with salt and pepper. Add chicken and stir. Garnish with more cheese and chopped basil.
Pasta is one of the ultimate comfort foods that you can make in so many different ways. I like to make a big batch of meat sauce and freeze it for future spaghetti dinners. Or make a bunch of meatballs (Ina Garten’s are the best) and freeze those to serve with jarred sauce and noodles. Along those lines, Cheesy Beef and Macaroni is a delicious and easy weeknight pasta dinner that everyone will love. It’s definitely not fancy. This one skillet dish makes plenty so you can freeze some for another night or just have some leftovers for lunch. This recipe comes from the Kitchn, but I changed it a bit. First off, I split the recipe. You are welcomed to make the full recipe, but I have no idea how it would fit in the 12-inch skillet that the recipe specifies. In fact, I used a 12-inch skillet and it barely all fit.
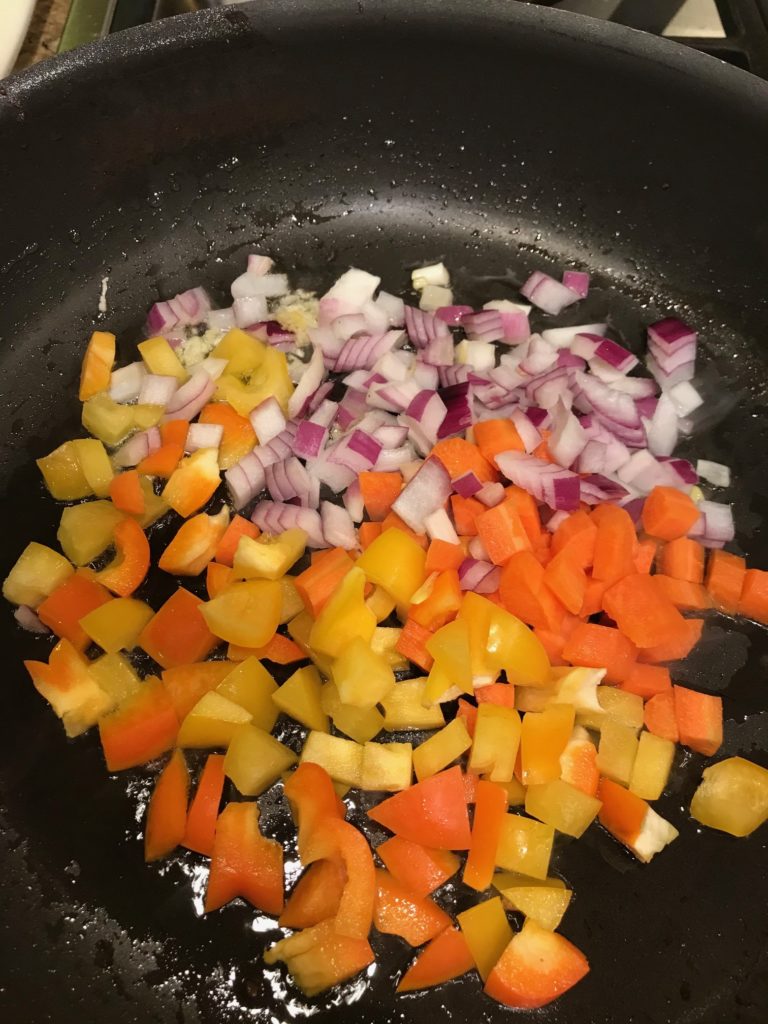
Gather all your ingredients. You need to chop up a few veggies: red pepper, carrots, and onions. Mince a few cloves of garlic. Grab ground beef, olive oil, a can of crushed tomatoes, and a bottle of Worcestershire sauce. Measure out your herbs and spices. Shred some cheese or buy it prepackaged. Pretty basic stuff.
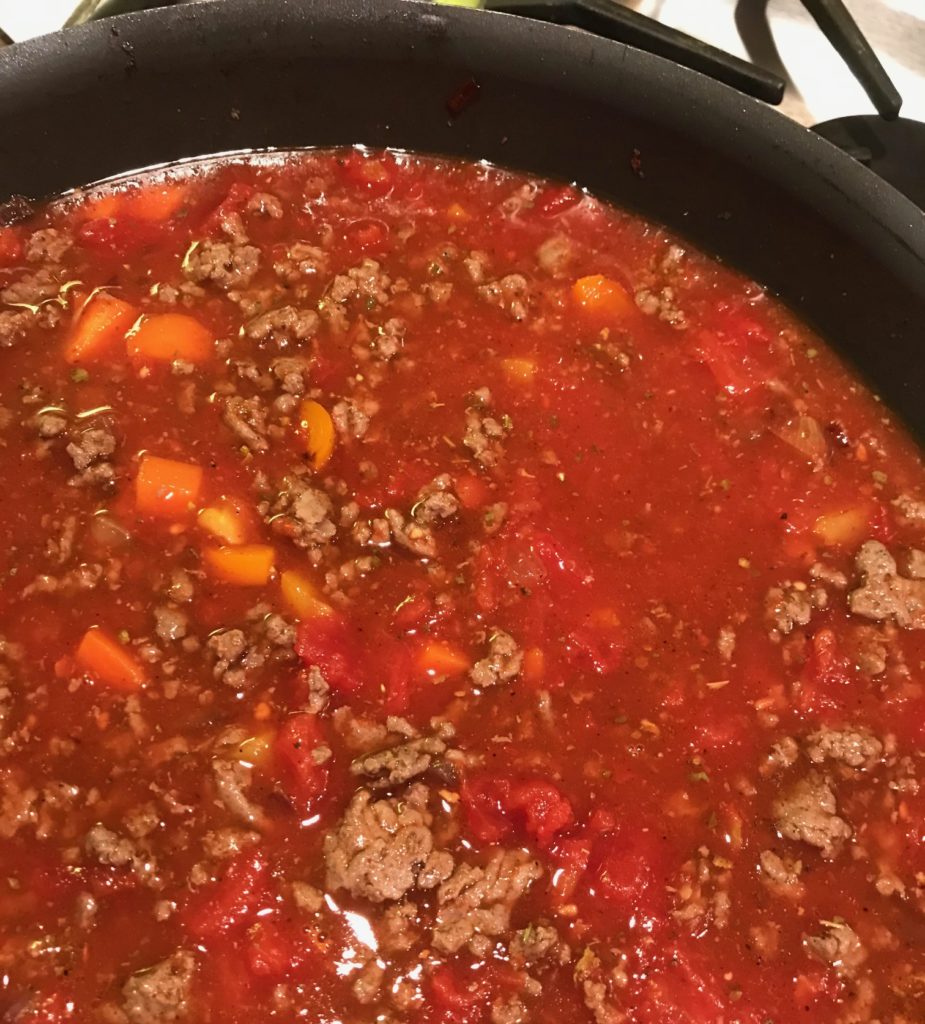
Brown the ground beef, season with salt and pepper, drain the fat, and set it aside. A lot of recipes, including this one, don’t have you season the meat, but I think it’s a really important step. Salt brings out the flavor in meat. Use about a 1/2 teaspoon of salt per pound of meat. Throw in a little pepper to balance it out. I’ve found that if you season early on, you probably don’t need to add more salt later.
Add some oil and throw in your veggies and garlic. You’ll cook those until they are slightly soft for about 5 minutes. By the way, this is a sneaky way to add some veggies to your meal.
Put the beef back into the skillet and add your herbs, spices, tomatoes, Worcestershire sauce, and 2 cups of water. Let that come to a simmer.
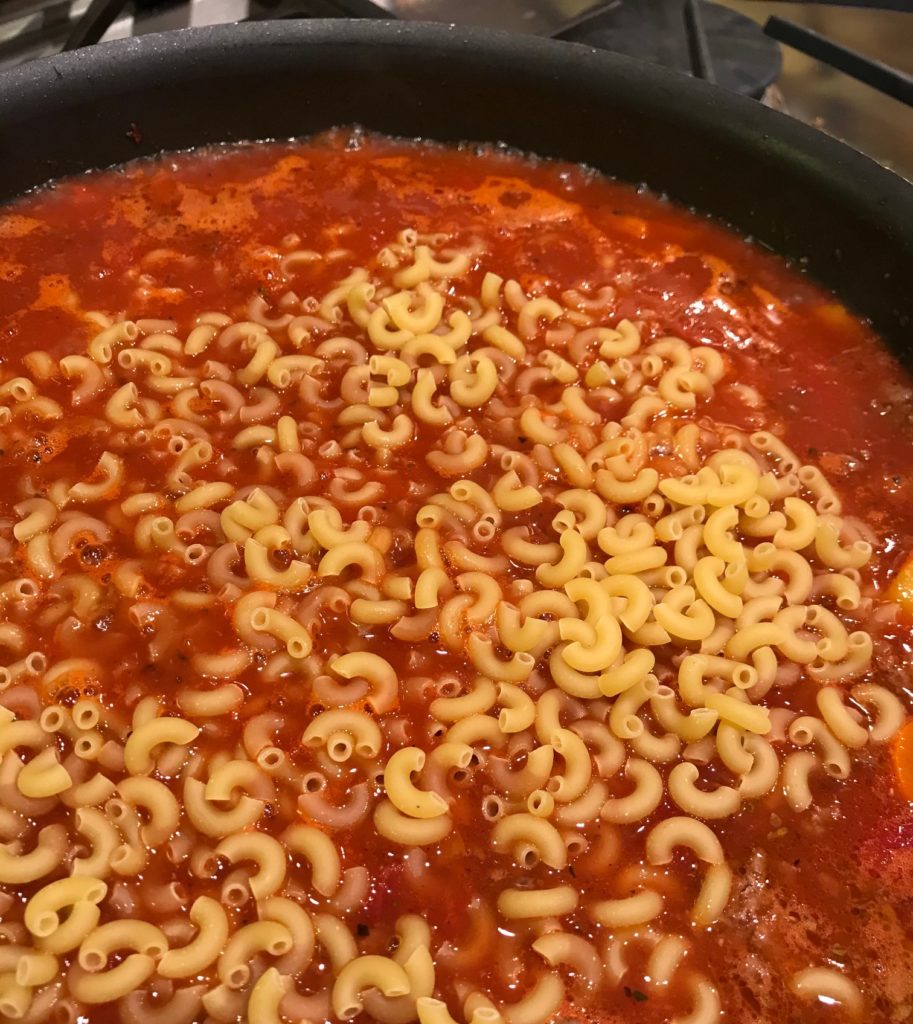
Once it’s simmering, add the pasta. I love this kind of meal because it doesn’t require you to boil the pasta separately. Oh, and let me remind you that I halved recipe and the ingredients are as close to the top as they should get. How ginormous was their skillet?!
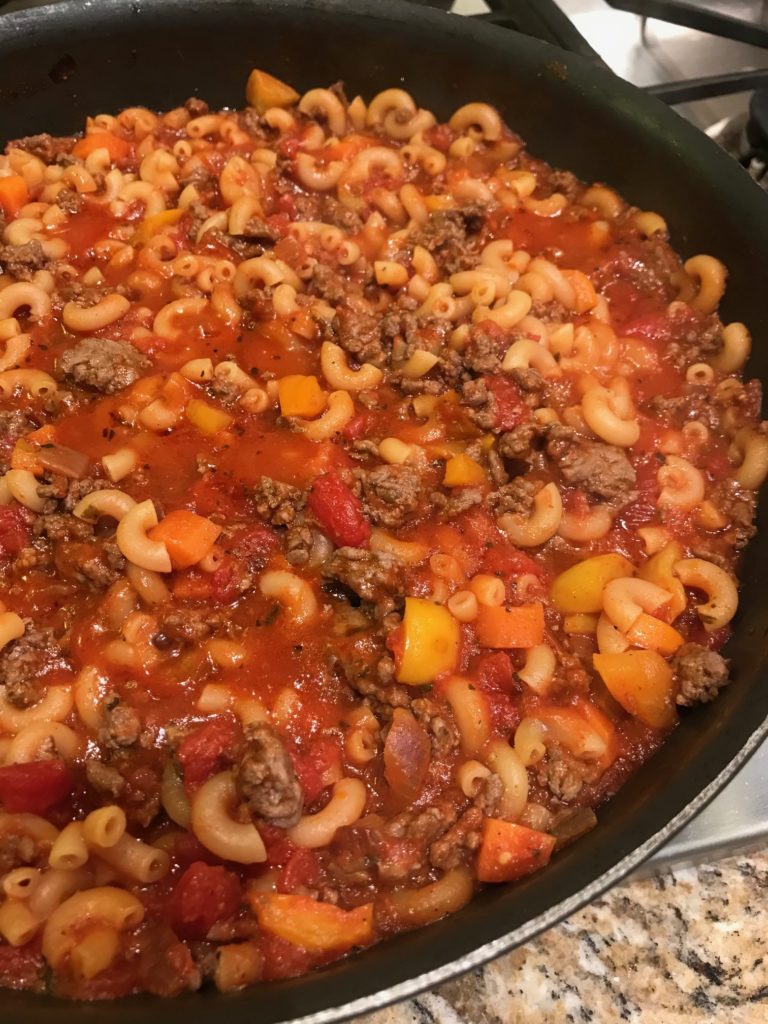
Cook until the pasta is tender, which is about 10 minutes.
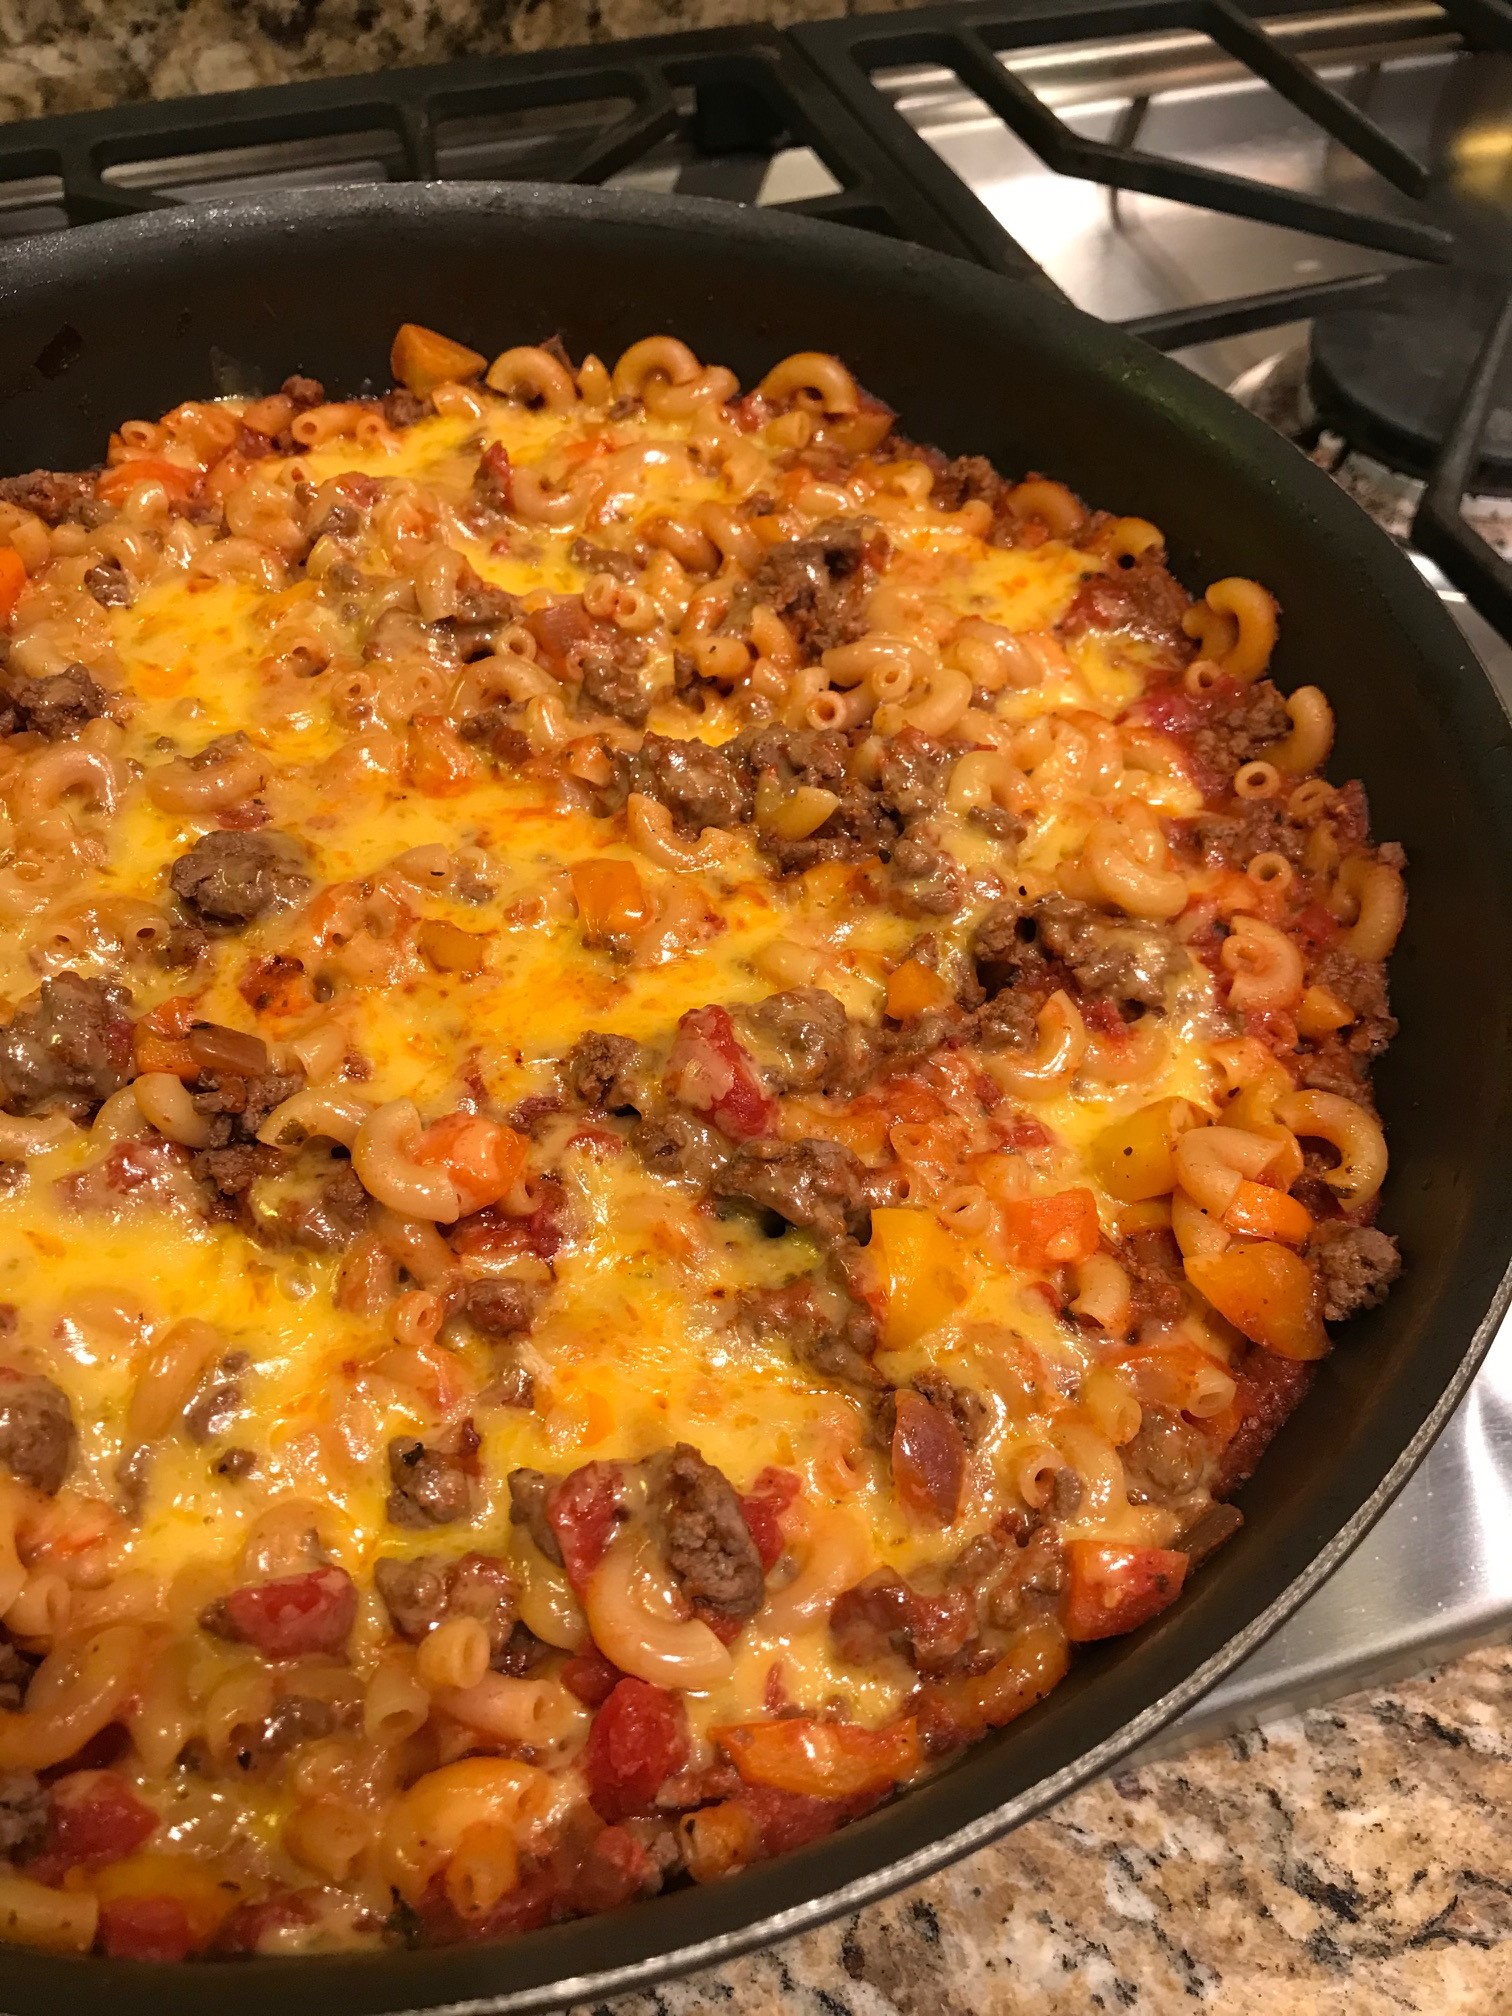
Throw some cheese on top and let it melt. I used a cup of cheese. At the time I thought I could have used more because I was expecting this dish to be more cheesy like mac and cheese, but the amount of cheese was perfect.
And that’s it! Like I said, not fancy, but a little fancier than your typical spaghetti and red sauce. Super comforting and delicious. Really easy to make in no time. You only use one skillet so clean-up is quick. Win-win.
Heat a 12-inch skillet over medium-high heat. Add beef seasoned with 1/2 teaspoon salt and 1/4 teaspoon pepper. Crumble and cook until browned, about 5 minutes. Set beef aside.
Wipe out the skillet. Heat oil over medium heat. Add bell pepper, carrots, onion, and garlic. Cook until almost tender, about 5 minutes.
Return the beef to the skillet. Add the basil, oregano, tomatoes with their juice, Worcestershire sauce, chili powder, and 2 cups of water. Season with salt and black pepper to taste. Increase the heat to high and let come to a simmer.
Add elbow macaroni, stir, and cover the skillet. Reduce the heat to medium and let simmer, stirring occasionally, until the macaroni is tender and most of the liquid has been absorbed, for 8 to 10 minutes. Taste for seasoning, adding more salt and black pepper as necessary.
Sprinkle the cheese on top. Cover the skillet and cook until the cheese is melted, about 1 minute. Serve from the skillet.
The first time I made this recipe was an utter failure and I don’t think it was me. There. I said it. My son liked it, but I don’t know why. It was so dry. Where’s the sauce? Where’s the cheese? It was full of peas, which he managed to remove with the precision of a surgeon. This was pretty much the top worst five “edible” recipes I’ve ever made.
Determined to make it right, I changed the recipe so drastically that I don’t consider it to be the same recipe anymore. I struggle to give the original recipe owners any credit because it might actually be bad publicity for them. I hope that’s not too harsh. My Catholic guilt is seeping through about the whole affair.
Ok, I’m over it. Make this. It’s super tasty and an easy weeknight dinner.
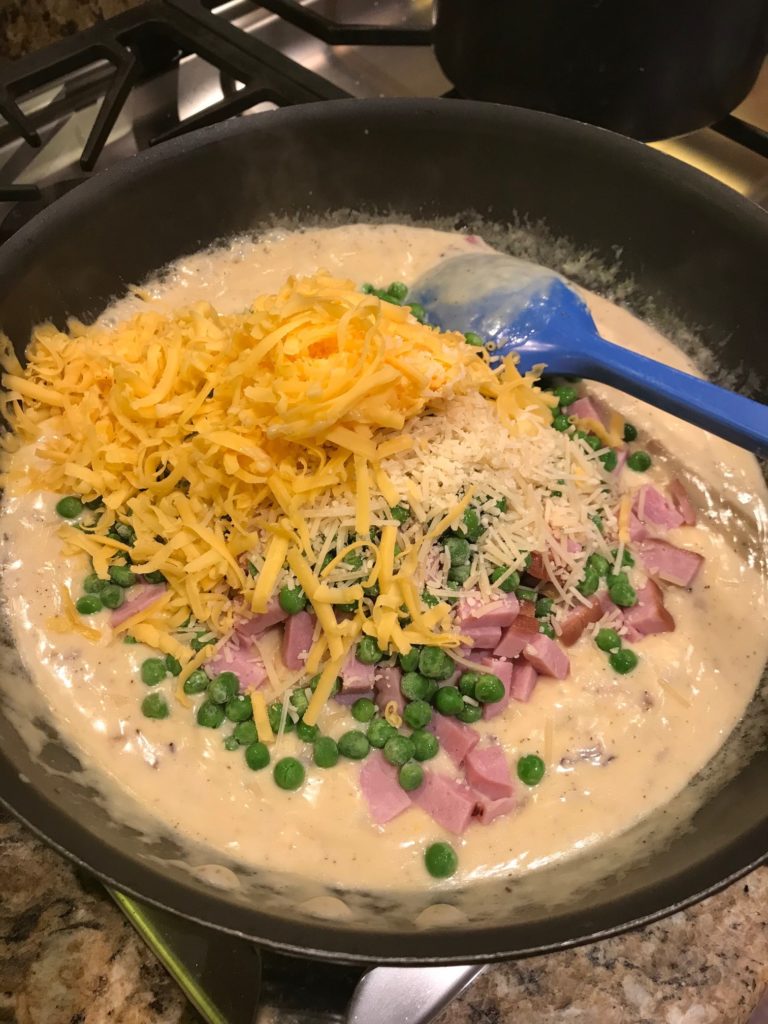
First prep your ingredients like mincing up a shallot and a few cloves of garlic. Dice your ham into bite-sized cubes. Shred your Swiss cheese. Sneak a few bits for yourself.
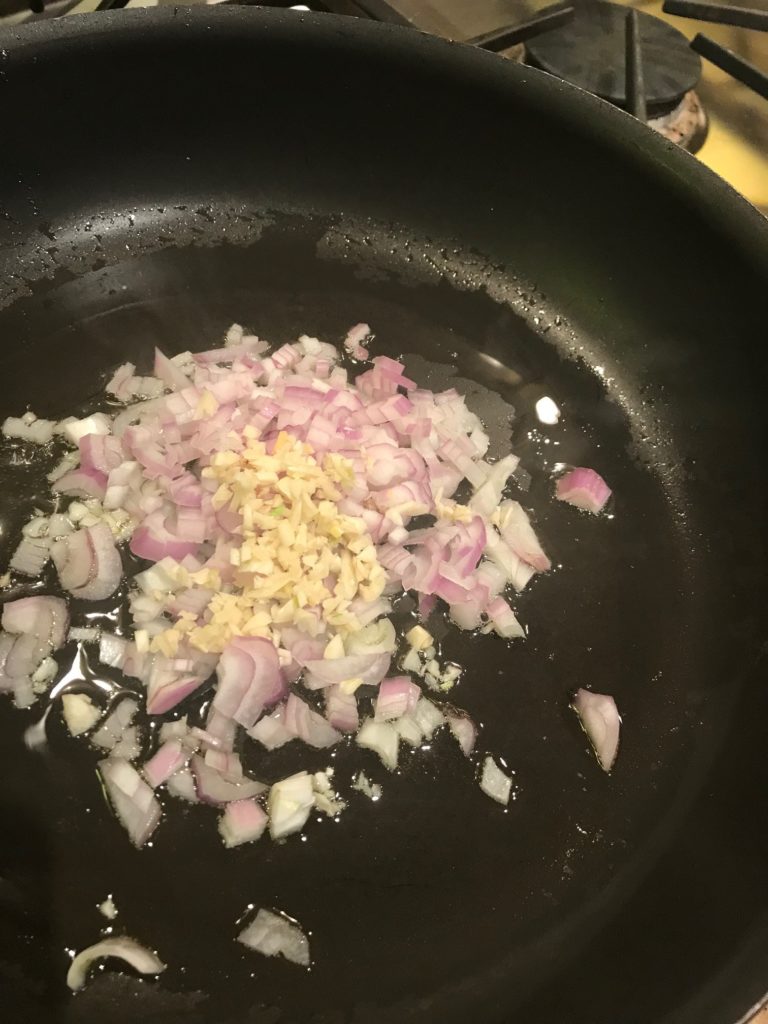
Heat up a pan with some olive oil, and cook the shallot and garlic until soft.
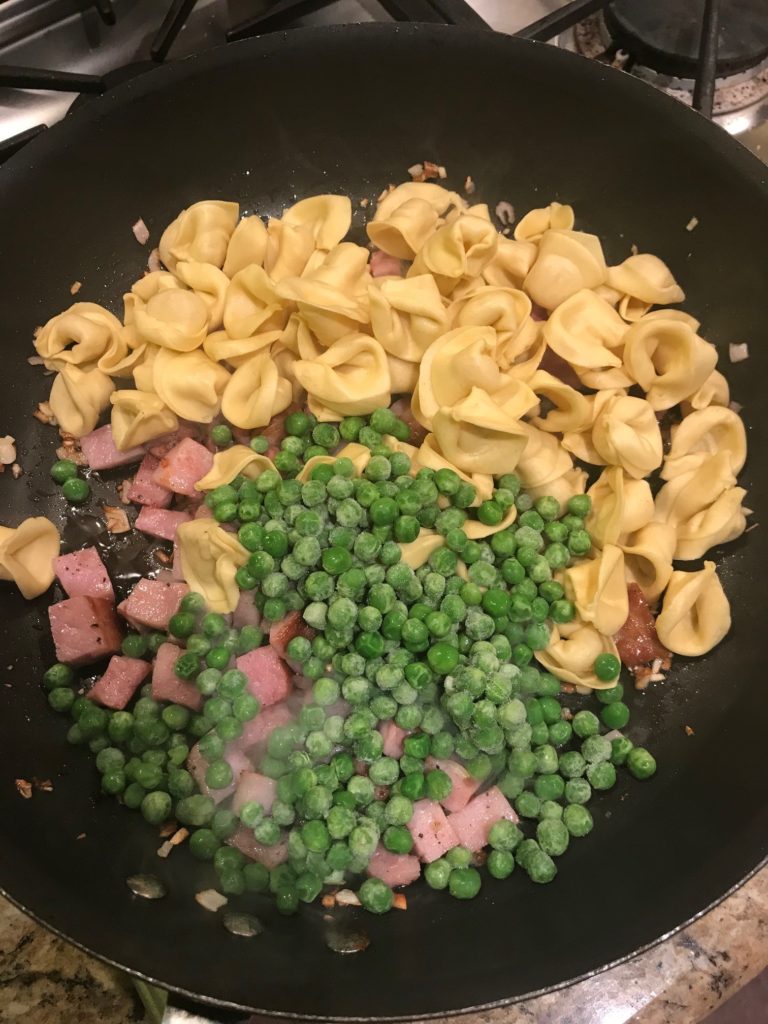
Add ham and cook for several minutes, stirring half way through, until browned on a couple sides. Add some pepper, and then add fresh tortellini and frozen peas.
The original recipe didn’t specify fresh tortellini and had you use twice as much. They also called for 2 cups of peas. I love peas, but way too many peas.
After you’ve stirred it up a bit, add broth and cover. The original recipe called for less broth and not cover. Adding sufficient liquid and covering it is essential to making sure the tortellini is cooked through.
After this mixture has simmered for about 10 minutes (cook for however long your tortellini package tells you to cook it for), add cream and cheeses.
Here was another major flaw of the original recipe. Not enough cream and cheese. I know. Start your diet tomorrow. But seriously, if you want a cheesy sauce, you have to do it right.
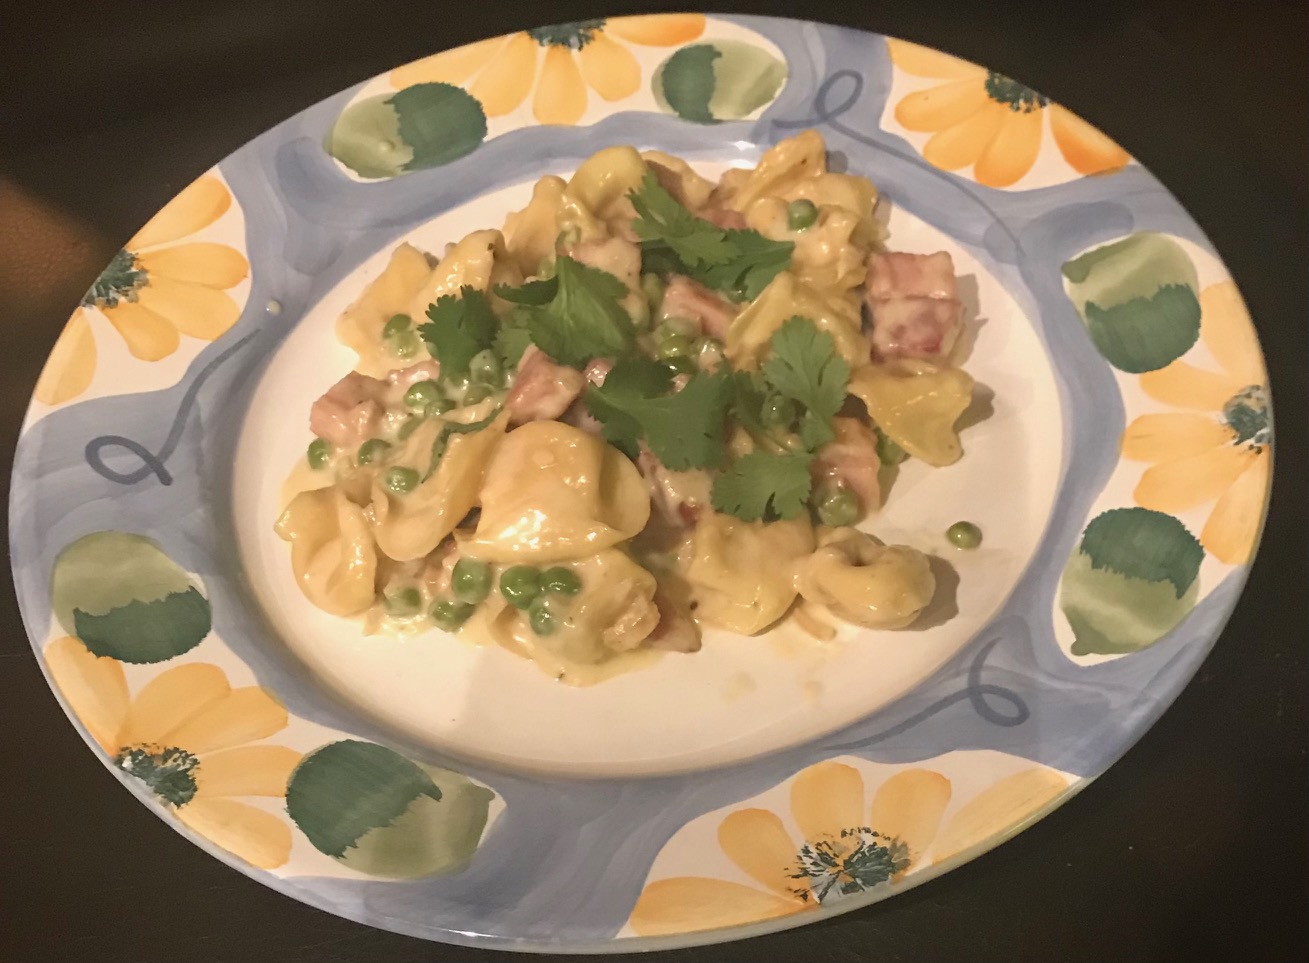
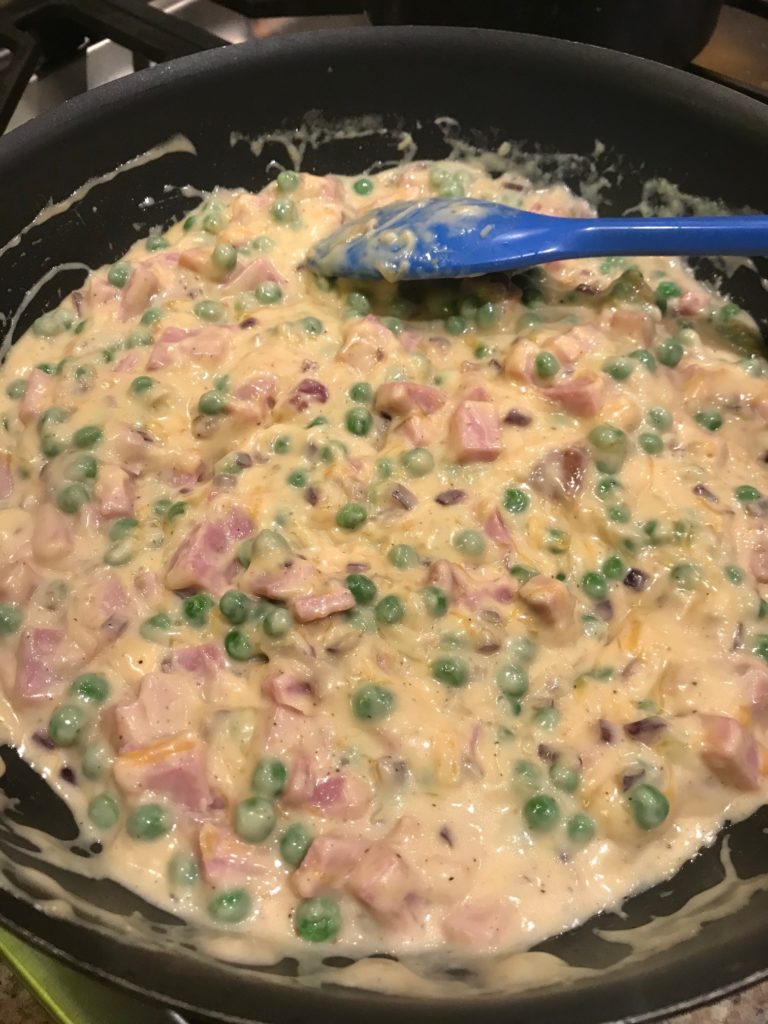
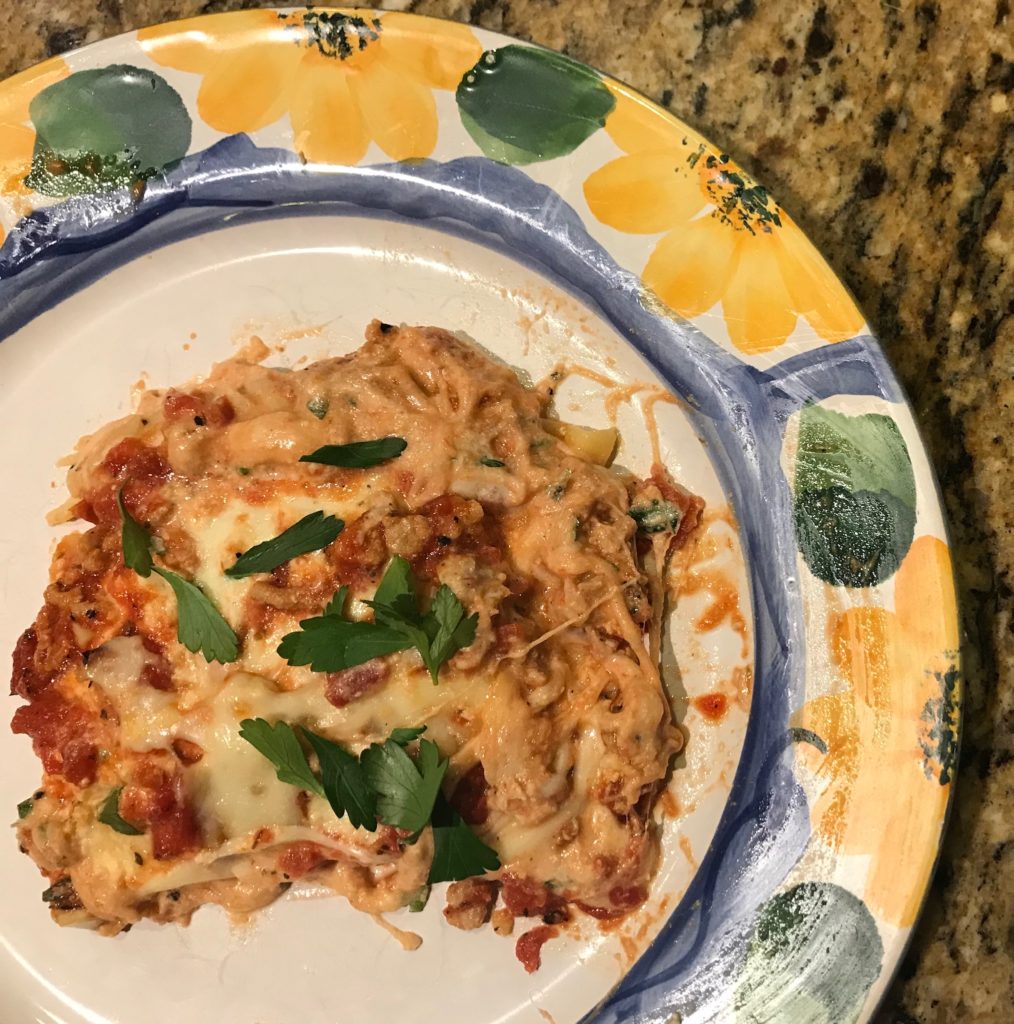
After it’s all mixed up, serve and garnish with a little parsley to make it look pretty.
My family agreed this was 100% better than the first attempt. I’m pleased and you will be too.
In a large skillet over medium-high heat, heat olive oil. Add shallot and garlic. Cook until soft, 3 minutes. Add ham and cook until browned, stirring once half way through, 6 minutes.
Season with pepper. Add fresh tortellini and frozen peas. Stir until mixed and then add chicken broth. Simmer until tortellini are al dente, about 10 minutes (or what the package recommends).
Add heavy cream and both cheeses. Stir until creamy. Serve and garnish with parsley.
For just the three of us, I bought a huge ham for Christmas thinking we’d be eating ham all year. Funny how delicious and easy ham is for a main course, sandwich, or just a snack. By the time I made this Ham Tetrazzini recipe by Spicy Southern Kitchen, the ham was gone. We ate it all. Wow. I’m tempted to buy another one. Who says who can’t order a huge hunk of ham any time of year?
Instead, I made this recipe with a ham steak, which is pretty easy to find at the grocery store and relatively inexpensive unless you buy the organic, uncured kind that I feel compelled to buy. I think it tastes better, but it’s probably just my imagination. Buy whatever ham you want.
This recipe is definitely a make again. The only change I made was to leave out the mushrooms since the boys won’t touch them with a 6-foot pole. I also didn’t cook the frozen peas because I didn’t want them to get mushy. Another thing I noticed is that the recipe didn’t give me any cooking times so I decided to add that to the recipe to help you guys out. I like to be able to time things and I’m sure some of you do too.
By the way, tetrazzini is totally old school and I’m okay with that. You should be too. I remember my grandmother telling me how much she loved it. And what’s not to love? It’s got meat. It’s got carbs. It’s got cheese. These are all good things.
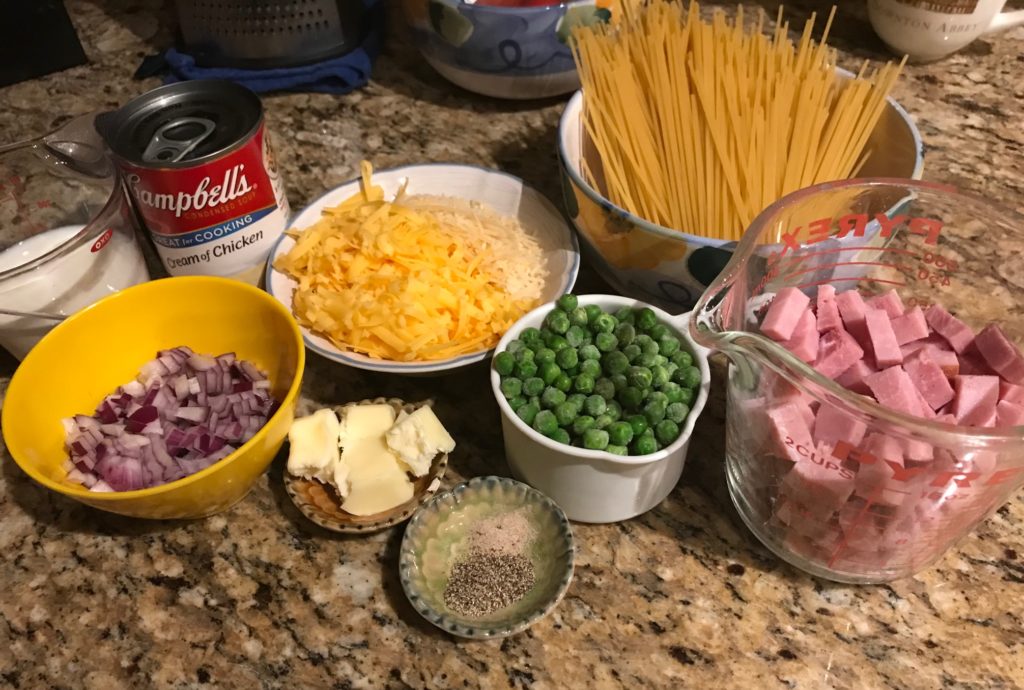
Gather your ingredients. Dice up an onion and some ham. Measure out your peas and cheeses.
Boil some spaghetti. You can use any kind of pasta so I think fettuccine or even egg noodles would have worked. The tall boiling pot I like to use encourages me to break the pasta in half. Frankly, I prefer shorter spaghetti. I know I’m “breaking” the rules. Not sorry.
I waited for my pasta to be done before making the sauce, but you can get a head start if you like. In a skillet, melt some butter and add your onion. Cook for about 5 minutes.
Add the soup, milk, and peppers. I actually ran out of white pepper so I added more than the prescribed black pepper. I actually don’t know why you need both black and white pepper, but let’s go with it.
Mix that all up and then add your ham, peas, and cheeses.
Stir it all up and cook until it’s melted, which is about a minute or two.
The recipe said to salt it to taste, but I think it’s perfect without any additional salt because of the ham and cream of chicken soup.
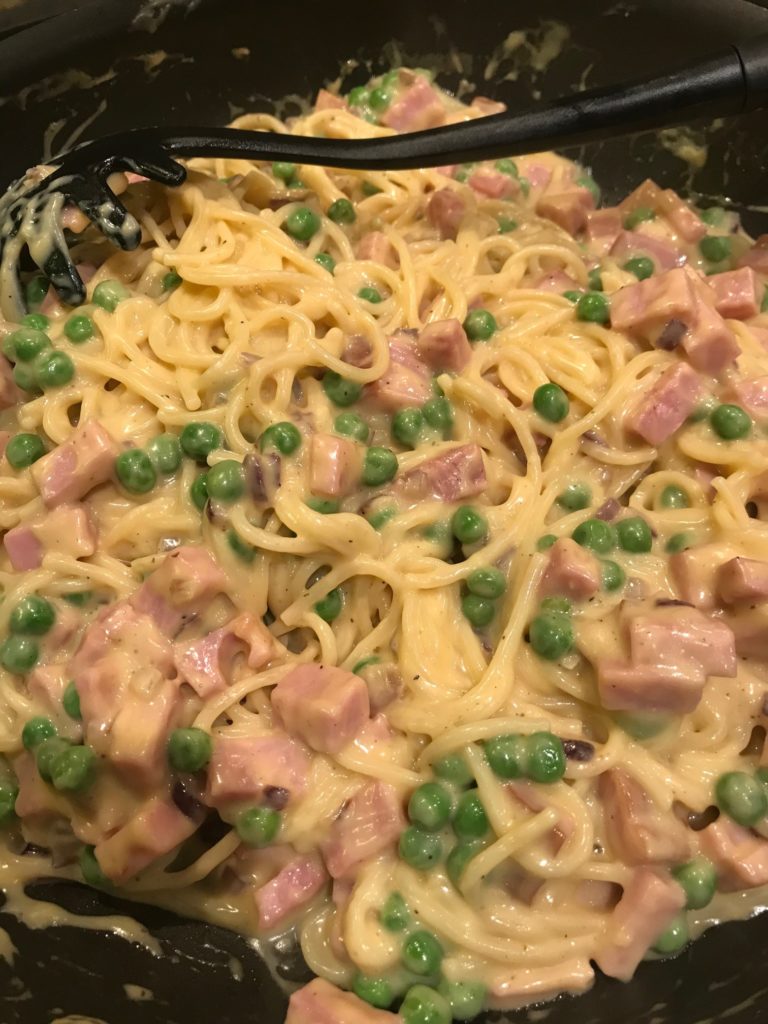
Drain your cooked pasta and add it to the skillet. Mix it up.
Put some onto a plate. Throw some parsley on it to make it look pretty. Voila! Dinner is served!
What I liked about this dish is the creaminess without it being too rich. You can sub out milk for cream, but with the cheeses you don’t really need to do that. The smokiness of the ham adds another depth of flavor that is salty and comforting. Definitely go retro and make this.
Like Sloppy Joes, here’s another nostalgic dish from my GenX childhood. A few years ago I bought a can to remind myself how amazing it tastes. Ugh. It was awful. Mushy pasta. Flavorless sauce. What kind of meat are in those meatballs? How could it be so bad, so not what I remembered? No wonder my parents didn’t want to waste their money on it, and would make plain spaghetti instead. But I felt like I was missing out.
When I came across this recipe, I just smiled. It has all the good memories of SpaghettOs with the deliciousness that the canned stuff didn’t have. This recipe comes from BA with a few tweets of my own. I split the sauce recipe. I had a few items I needed to use up and I wanted more meatballs. One could never have too many meatballs.
Warning. I didn’t take very many pictures. No gorgeous vegetables. No exotic spices. None of that. We’re down to basics here. Tomato. Pasta. Meat. Grunt.
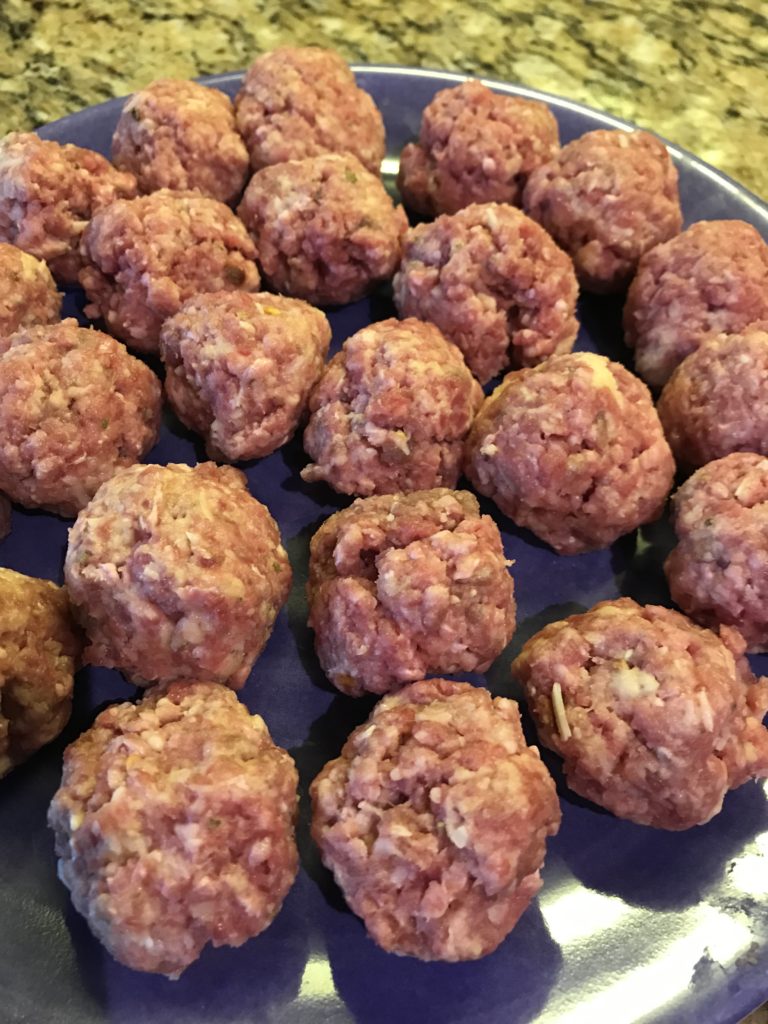
Make your meatballs. Mix together panko, cheese, seasonings, egg, cream, and beef. Form into little balls. You’ve got yourself meatballs. I wasn’t sure if I’d use them all in the pasta, but they make really good leftovers. Like a meatball sandwich. Or on toothpicks, if we’re going old school.
Time to cook these guys. I grabbed my gorgeous Le Creuset dutch oven. I love this thing. It’s expensive, but you only need one and it’s so durable that I’ll probably pass it on to my son. Hopefully, he’ll cook for himself by then. Right now we’re in the cheese and crackers phase. Another classic not to be overrated.
So, I have a love/hate relationship with meatballs. Mine NEVER stay together when I cook them. Maybe the mixture is too soft? Maybe I’m flipping them over too soon (but I don’t think so)? I honestly don’t know. If I had to do this over again, I’d make my favorite meatballs instead: Ina Garten’s Roasted Italian Meatballs. These never fall apart and are super easy to make.
Cook them up.
Move them to a separate plate when they are cooked. Try not to obsess they aren’t perfect. know that they will taste fantastic.
Now it’s time to make your sauce. In the same pot, you’ll start layering your flavors. Cook up some chopped onion and minced garlic. Add tomato paste and cook. Throw in some spices, a little sugar (yes, sugar….it makes the tomatoes taste better…it’s science…something to do with bringing out the sweetness by toning down the acidity to unripe tomatoes), fresh basil (I’m sure the original SpaghettiOs didn’t use this), and ground tomato sauce. Cook it for at least 20 minutes. If you can cook it longer, you should because it’ll just taste better. It was time to get dinner on the table so after 20 minutes, I gently added my meatballs and meatball pieces, and cooked that for another 10 minutes.
While all this simmering is going on, cook the pasta. You want to use any pasta that looks like rings or is a short tube, like ditalini, which is what I had on hand. Anelleti looks more like rings (I looked it up…I don’t know what all these shapes look like), but I had made macaroni salad a while ago and had a bunch of ditalini leftover. I was tired of it staring at me every time I opened my pantry door.
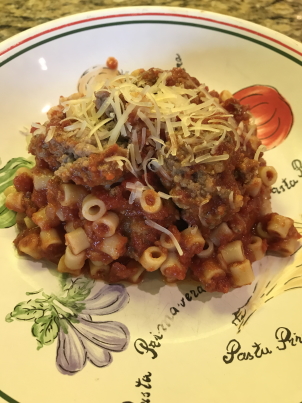
When the sauce is done simmering and the pasta is cooked al dente. Gently mix together. To preserve what was left of the integrity of my meatballs, I spooned some sauce into the pasta, spooned some on a plate, added a few meatballs, spooned more pasta on top, added another meatball or two, grated some fresh Parmesan cheese, and called it good.
The results were pretty good. Two thumbs up from the boys. The older “boy” laughed at the name. The younger boy thought we were crazy like usual.
1tablespooncoarsely grated Parmesanplus more for serving
1/2teaspoondried oregano
1/4teaspoongarlic powder
Kosher salt
1largeeggbeaten
5tablespoonsheavy cream
1poundground beef chuck20% fat
2tablespoonsolive oil
1/2mediumonionfinely chopped
1largegarlic cloveminced
freshly ground pepper
1tablespoontomato paste
1teaspoonpaprika
1/4teaspooncrushed red pepper flakes
1/2tablespoonsugar
2largebasil sprigs
28ouncesground tomatoes
6ouncesanelletti, ditalini, or other short tubular pasta
Method
Whisk panko, cheese, oregano, garlic powder, and 1 1/2 teaspoons salt in a medium bowl. Whisk in egg and cream. Add beef. Mix with your hands until just combined, being careful not to overwork (if packed too firmly, meatballs will be dense). Form into 1"-diameter balls, about 24. Transfer to a plate.
Heat oil in a large skillet or dutch oven, preferably cast iron, over medium-high. Cook meatballs, turning occasionally, until lightly browned on all sides but not fully cooked through, about 5 minutes. Transfer to another plate.
Cook onion and garlic in same skillet, stirring occasionally, until onion is translucent and begins to soften, about 5 minutes. Season with salt and pepper. Add tomato paste and cook until brick red, about 1 minute. Add paprika and red pepper flakes. Cook until fragrant, about 1 minute. Add sugar, basil, and ground tomatoes.
Reduce heat and simmer until sauce is slightly reduced and flavors have melded, about 20 minutes. Add meatballs and any accumulated juices.Continue to cook until meatballs are cooked through, 5–10 minutes.
Meanwhile, cook pasta in a large pot of boiling salted water, stirring occasionally, until al dente. Drain and return to pasta pot. Pour sauce and meatballs over pasta and stir to combine. Transfer to a platter and top with cheese.
This is super simple and quarantine friendly. All you need is chicken (oh please tell me you can still buy that), cherry tomatoes, and pasta. The original recipe (from The Food Network) calls for ravioli, but the hoarders took it all so I settled for tortellini, which frankly, worked out better in my opinion. We skipped the mushrooms because the boys detest them. The younger boy just had to deal with the tomatoes. Life is rough.
Boil your tortellini. You really can use any type of pasta. The shelves are bare of most pasta except spaghetti, which you can easily use here if that’s all you have. Be sure to salt you water (I just pour a bunch until it’s almost like the sea). When they are cooked (al dente!), drain and drizzle with a little olive oil so the pasta doesn’t stick while you work on the rest of the stuff.
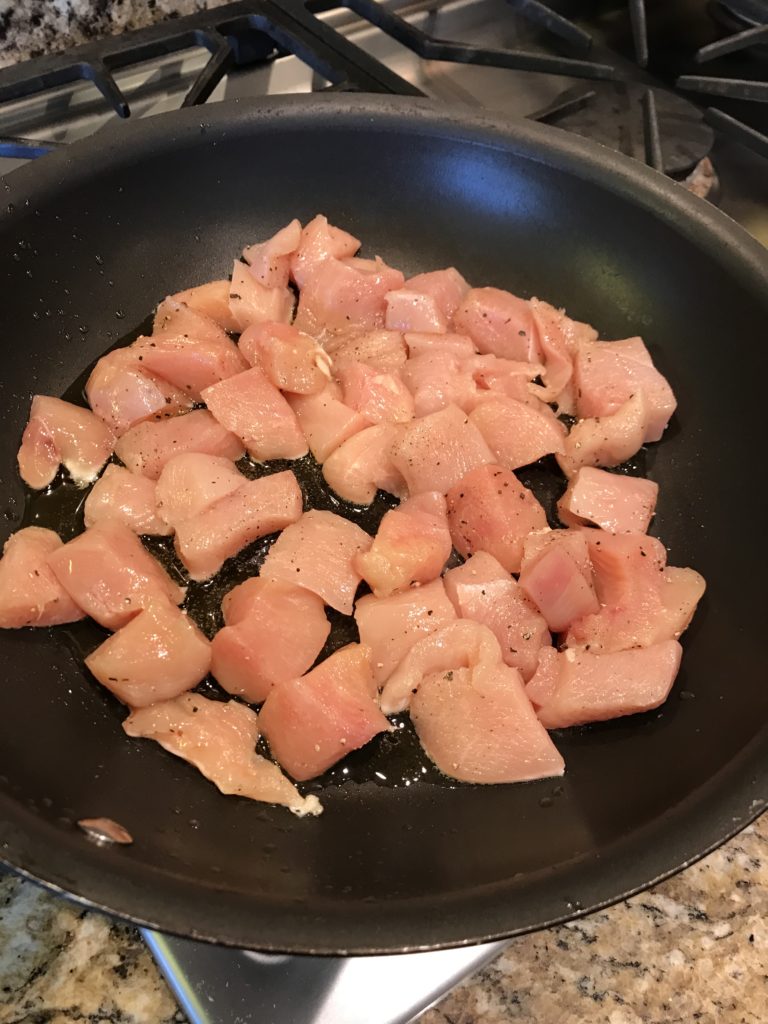
Cut your chicken breasts into chunks, and then season with salt and pepper. I used what the recipe calls for, 1.25 pounds of chicken, but next time I’m using just a pound. That’s plenty. Gather the rest of your ingredients together.
If your store is out of chicken breasts, you can substitute with thighs. In a pinch, you can probably use chicken sausage or rotisserie chicken. Heat up a pan with olive oil and cook until browned, but not cooked all the way through. If you are using rotisserie chicken, don’t season the meat and skip this step. Once cooked, transfer to a plate and set aside.
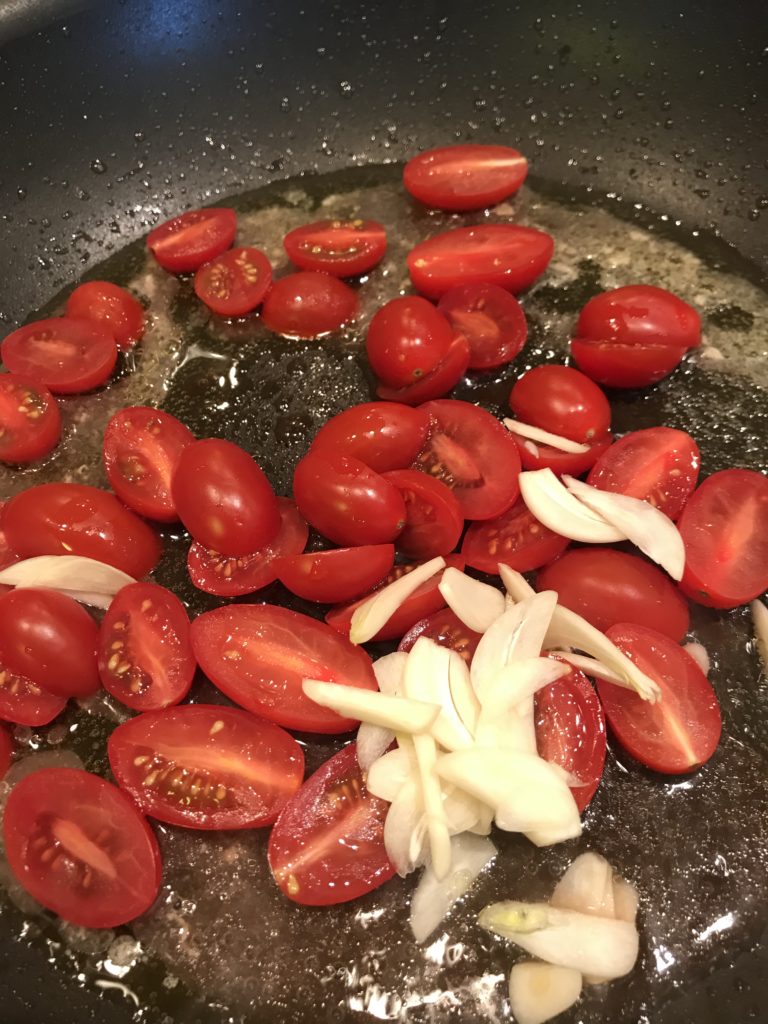
In the same pan, saute tomatoes, garlic, and vinegar. I love the colors here. Cook a bit until the tomatoes are soft.
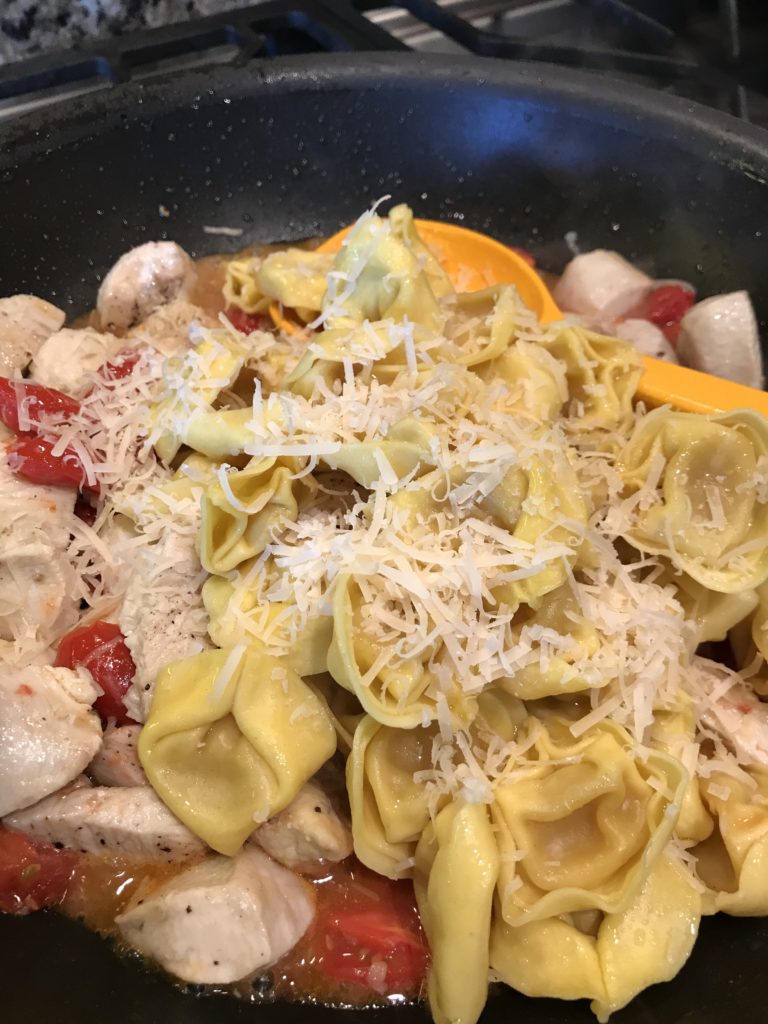
Return the chicken to the skillet and then add your pasta, broth, and Parmesan cheese. I was a bit heavy handed with the cheese. You can never have too much cheese. Or bacon. Mmmm…now I wish I had thrown in some diced cooked bacon into this. That would have been good. Next time.
Cook all this until the chicken is cooked through. That’s it. I told you it was easy.
My biggest fear was that it was too simple and would be bland. Definitely not. The boys dug in and I barely had any leftovers. The garlic and tomatoes added most of the flavor while not making it heavy at all. I would call this pretty healthy if you’re not watching your carbs. If you are, there’s a lot of chicken here so it is protein forward.
1poundskinless, boneless chicken breastscut into chunks
freshly ground pepper
1cupcherry tomatoeshalved
2clovesgarlicthinly sliced
2tablespoonsred wine vinegar
1/3cuplow sodium chicken broth
3tablespoonsParmesan cheesegrated
fresh parsley for garnish
Method
Bring a pot to a boil. Salt water. Add tortellini and cook al dente. Drain. Drizzle and toss with olive oil.
Meanwhile, season the chicken with salt and pepper. Heat olive oil in a large nonstick skillet over medium-high heat. Add the chicken. Cook, undisturbed, until beginning to brown, about 2 minutes. Continue to cook, stirring, 1 more minute. Transfer to a plate.
In the same skillet, add tomatoes, garlic, and vinegar. Cook until the tomatoes begin to soften, about 2 minutes. Return the chicken to the skillet and add the tortellini, broth, and Parmesan. Cook, stirring occasionally, until the chicken is cooked through, about 4 minutes. Garnish with the parsley.
Last week, I combined two wonderful foods: taco and soup. Today, I’m sharing a taco + pasta recipe from Delish. I’m starting to see a theme here. Maybe next week I’ll invent taco ice cream. Kidding. That sounds awful.
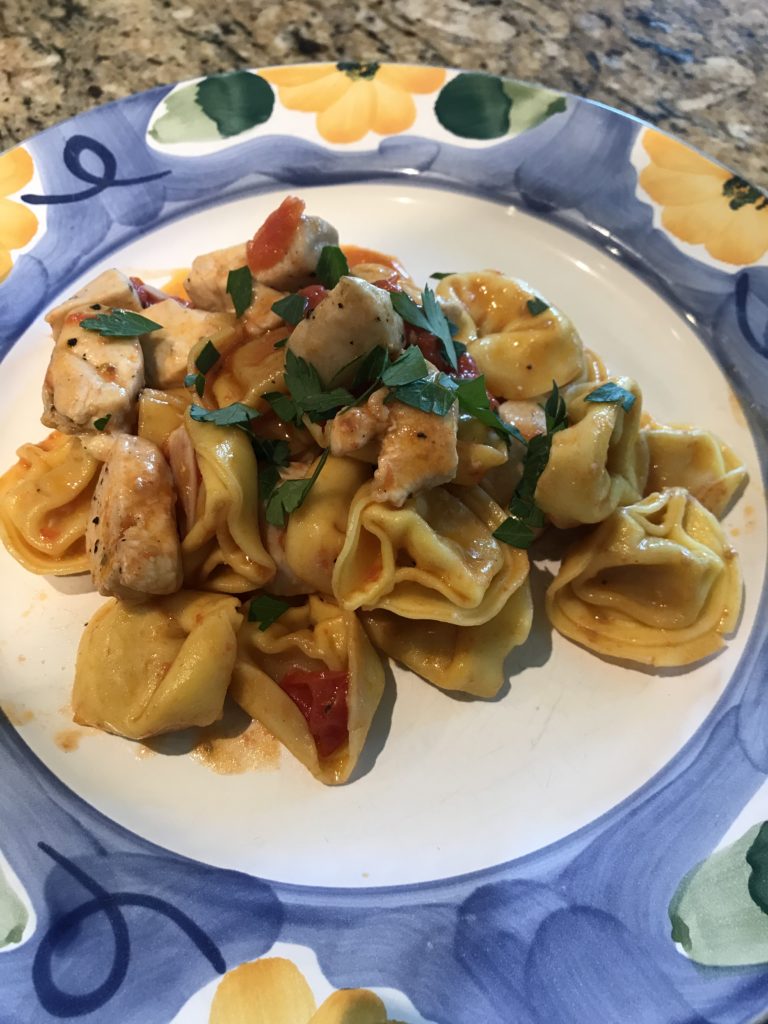
At first I thought this was a mac n cheese recipe with taco meat, but far from it. It’s definitely cheesy, but the main star is still the pasta sauce, which happens to have a lot of cheese in it. Better yet, it’s absolutely delicious and super easy to make. You seriously can whip this up in 30 minutes on a weeknight and everyone will love it. What’s not to love? There’s cheese. There’s taco-ness. There’s pasta. Win-win.
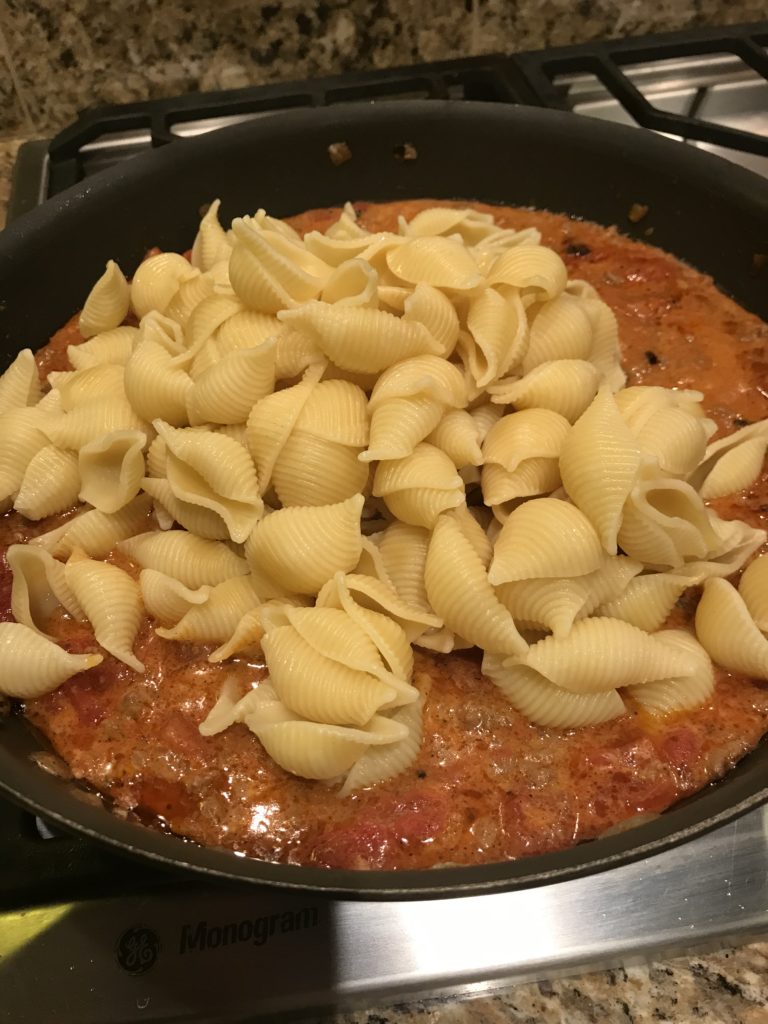
First, boil some pasta until al dente, and it’s really important not to overcook your pasta because you’ll cook the pasta some more in the sauce later. When you drain the pasta, be sure to save some of the pasta water too. You can use any type of pasta. The original recipe uses macaroni, but lately, I’ve been using pasta shells because it has pockets to trap the sauce inside and I like that.
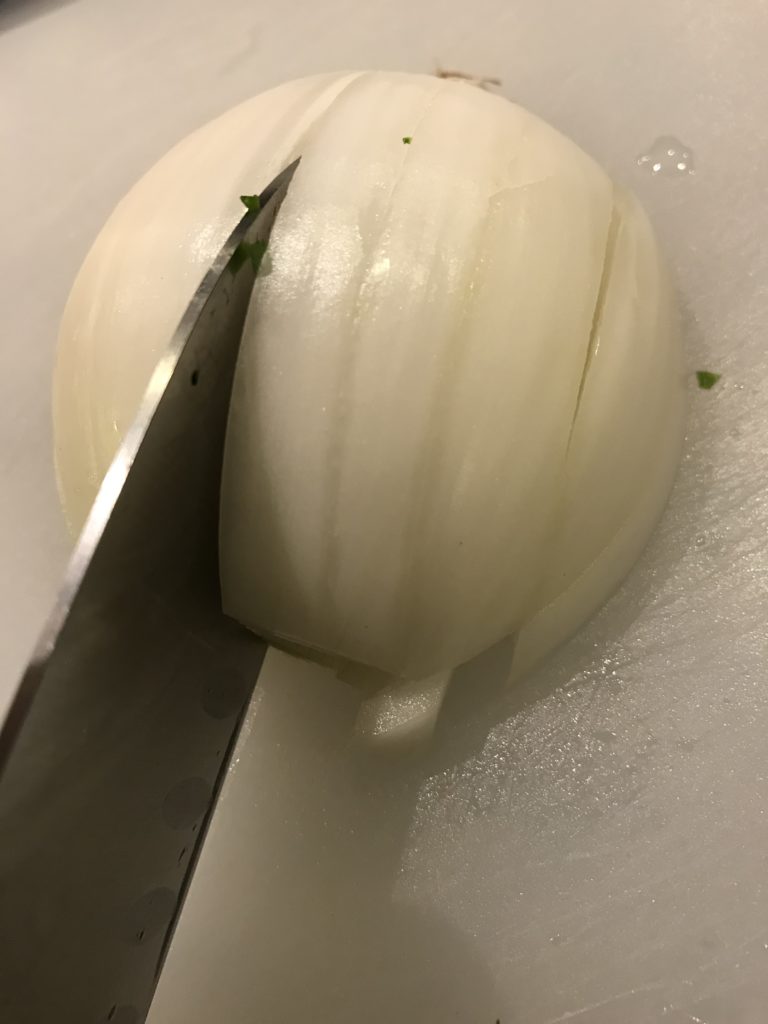
Now for a little lesson on chopping an onion. If you know about this trick, skip ahead. Otherwise, this will be life changing for you. I don’t know what I used to do before other than nick my fingers and end up with unequal pieces of stuff. Unfortunately, the onion will still make you cry, but let’s just pretend they are tears of joy.
Cut off the non-root end of the onion and then peel the skin off. Next, cut it in half through the root. Flat side down, cut in half towards the root.
Now, slice the onion lengthwise.
Finally, cut across and admire your handiwork.
After you’re done patting yourself on the back for you perfectly chopped onion pieces, you can apply your new trick to a jalapeño. If you want a spicier dish, include the membranes when you chop up the pepper.
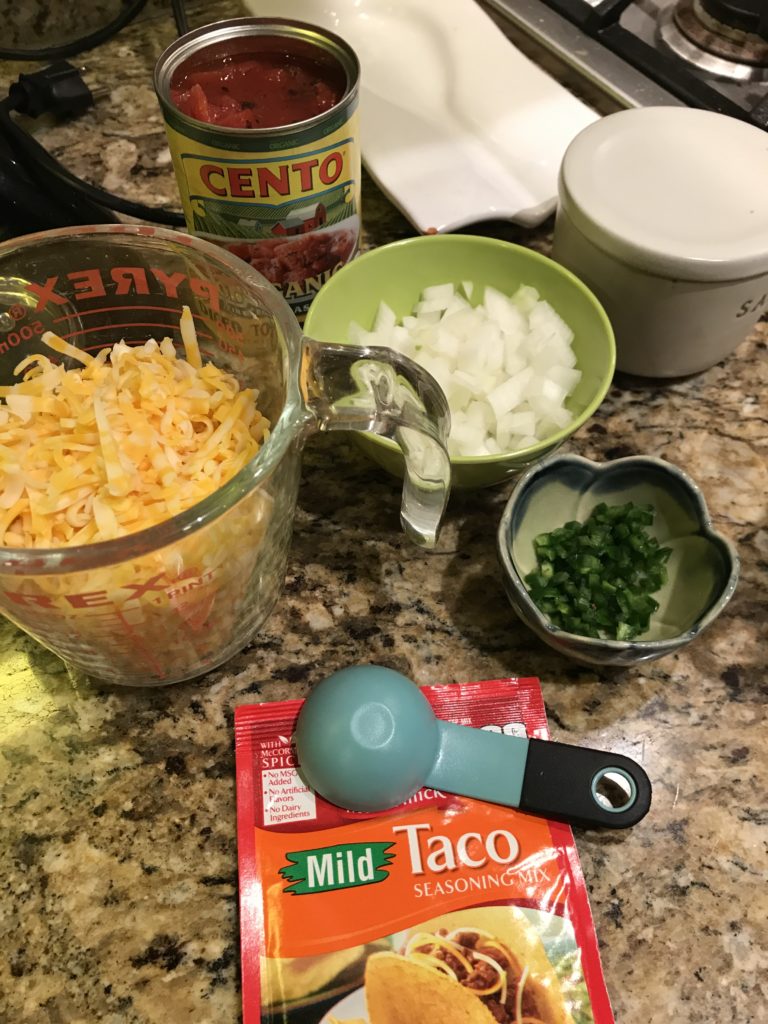
Gather the rest of the ingredients and arrange them next to the stove you can dump them in the pan as you go.
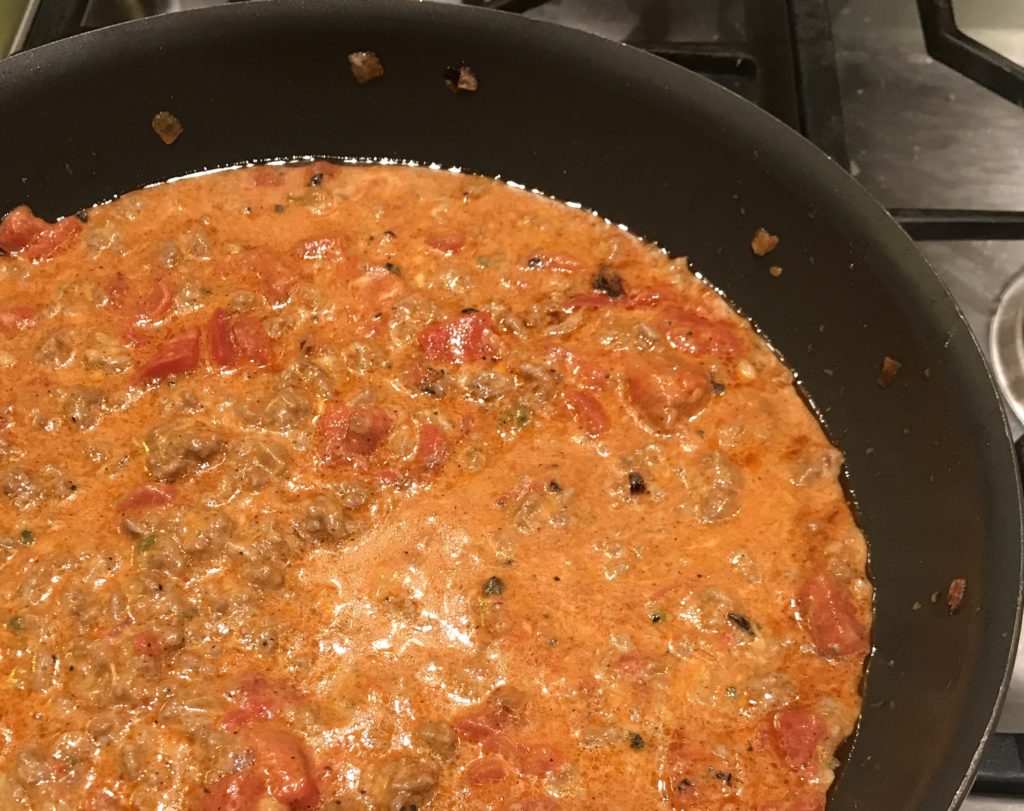
Saute the onion and jalapeño. Add your ground beef. When that’s cooked, throw in your taco seasonings. Next, add the canned tomatoes. Fire-roasted are best, but you can use any type of canned diced tomatoes. Hopefully your pasta is done by now because you need some of that reserved pasta water too.
Drop in the grated cheese and let it melt. Stir.
Dump the cooked pasta in.
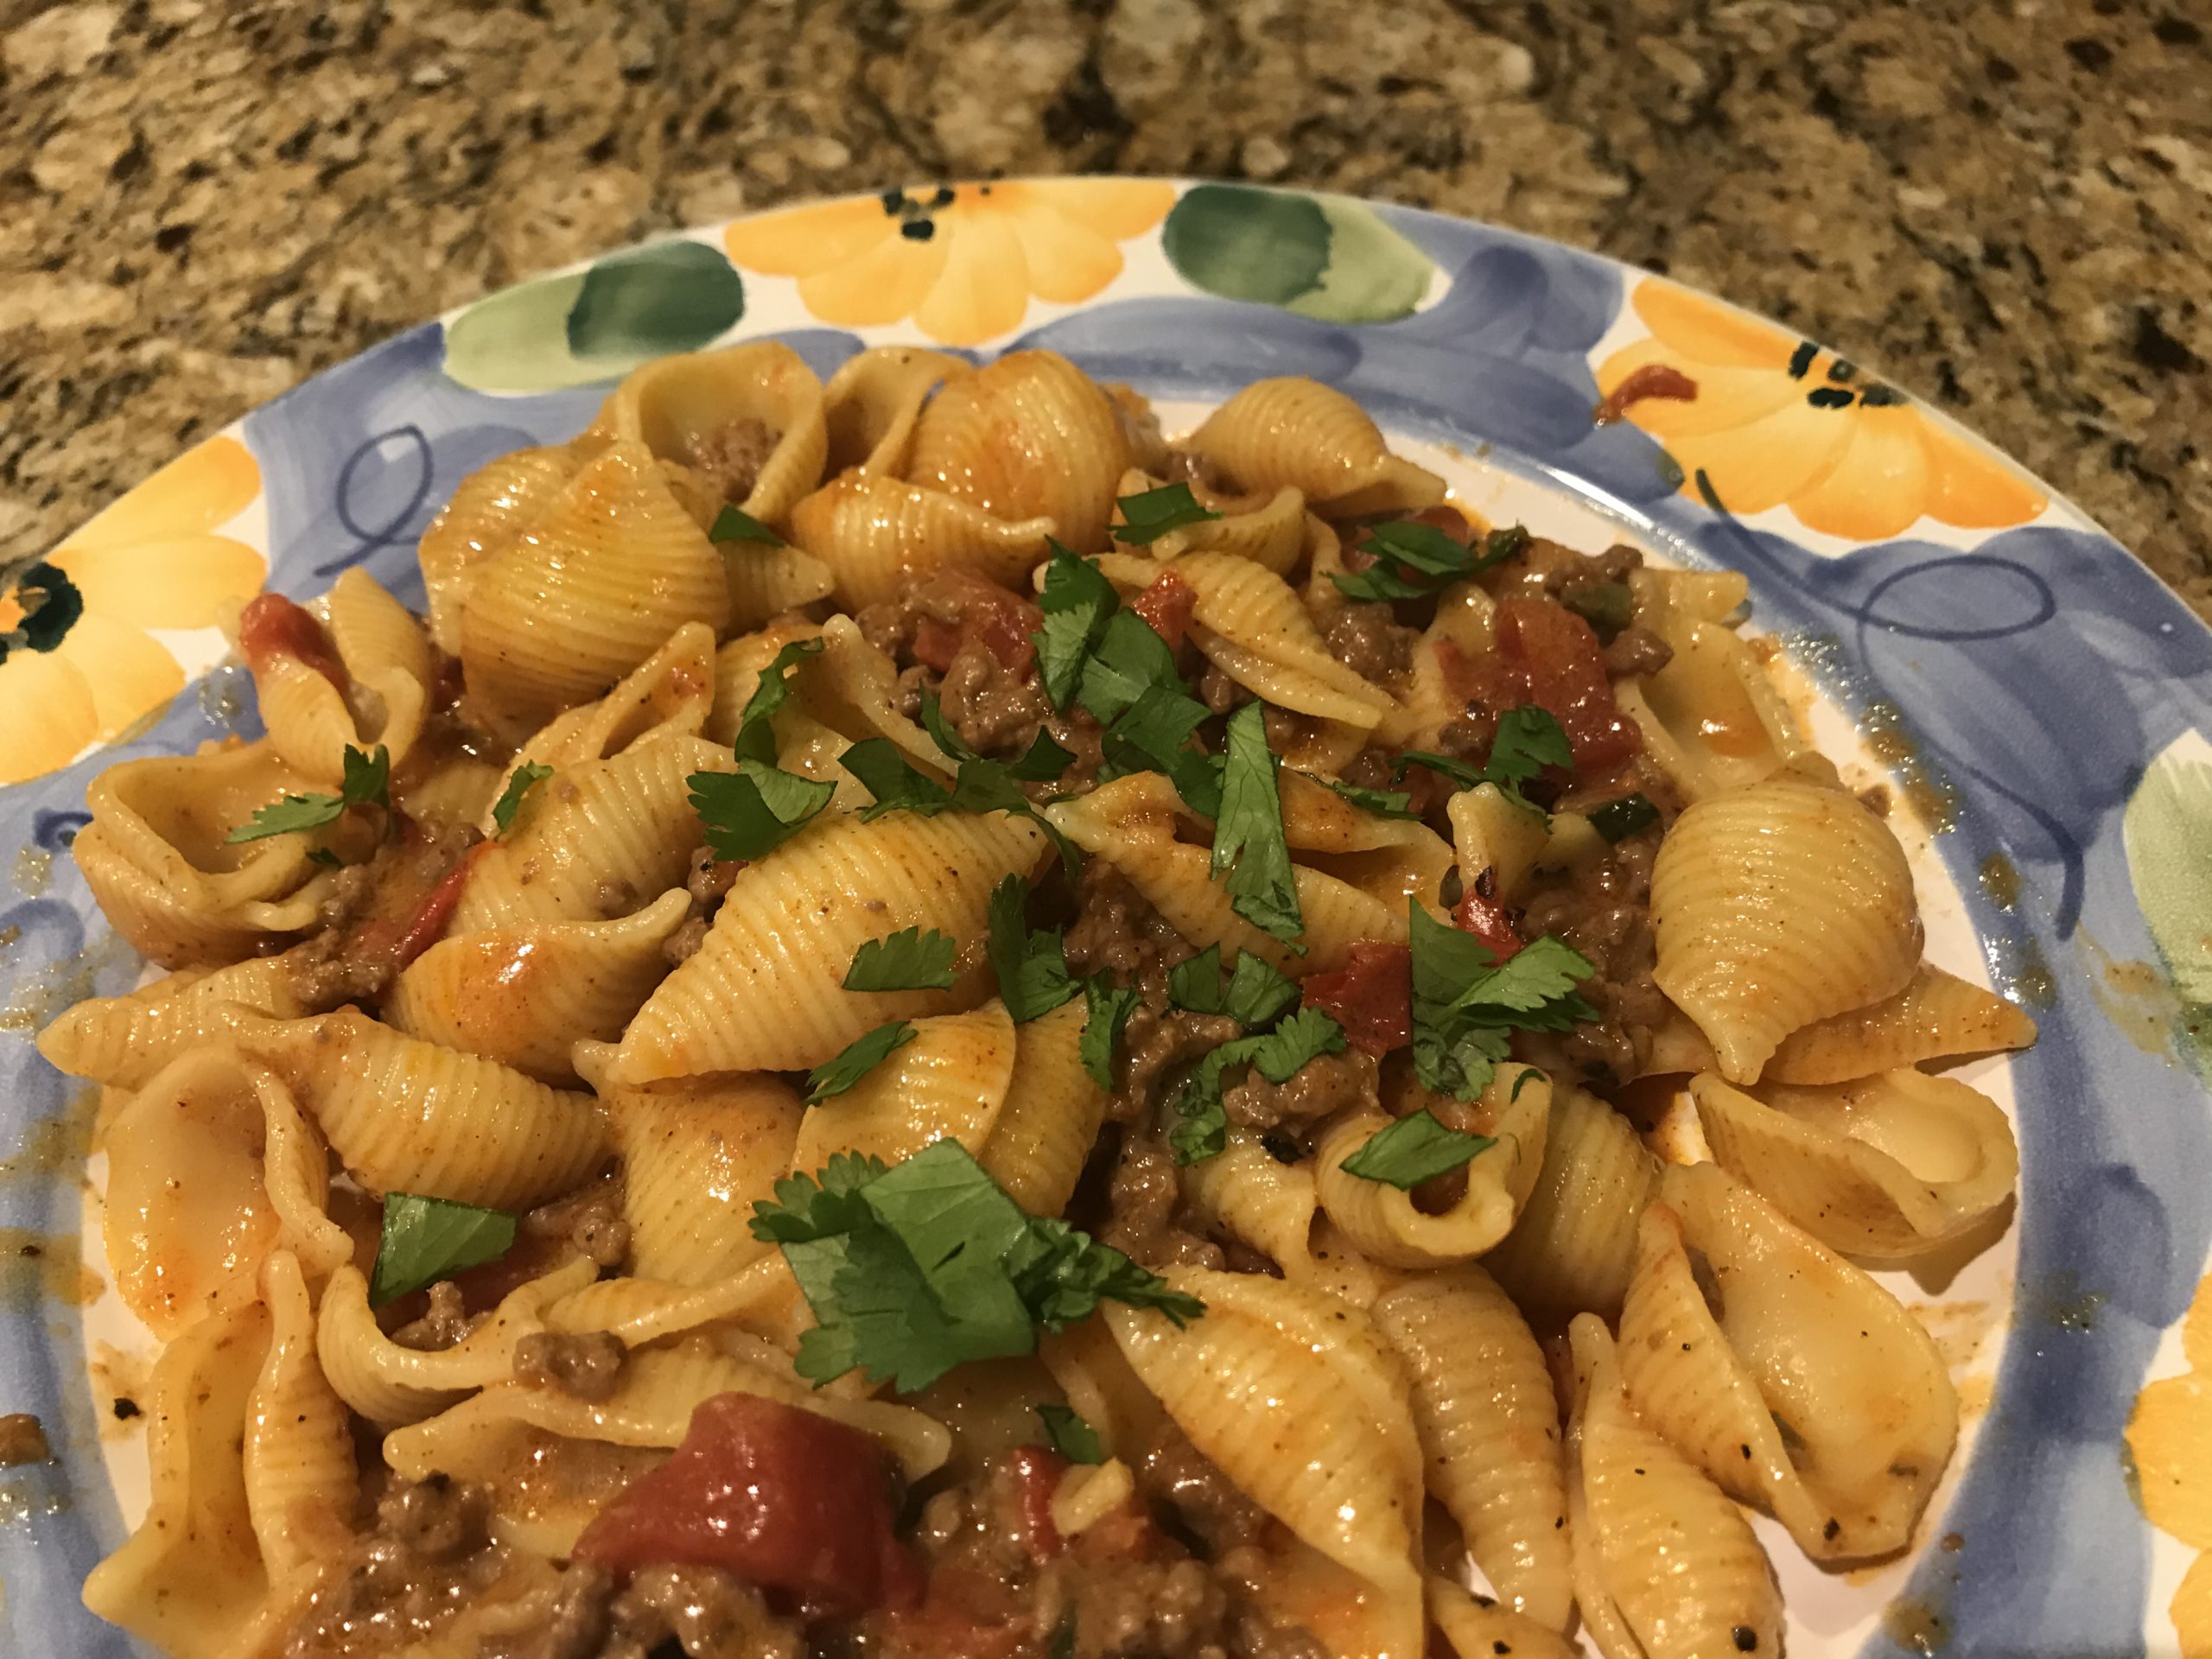
Stir it all up until the pasta is well coated and combined with the sauce. Dish it out, garnish with cilantro, and eat!
As you can see, it’s not mac and cheese, but your familiar and comforting pasta and meat sauce, enhanced with a bunch of cheese and taco seasonings. It makes great leftovers, but you might not have any. Instead, you’ll breakdown, have seconds, and soon it’ll be all gone.
Boil a large pot of water. Salt the water and then add the pasta. Cook according to package directions until al dente. Drain, saving at least 1/4 cup of the pasta water. Return pasta to the pot.
In a large skillet over medium heat, heat olive oil. Add onion and season with salt. Cook until tender, 5 minutes.
Add jalapeño. Cook 2 minutes more.
Add ground beef and cook until no longer pink, 6 minutes. Add taco seasoning. Drain fat.
Add canned tomatoes and 1/4 cup reserved pasta water. Stir.
Add cheese. Let it melt in while stirring occasionally for about 2 minutes.
Add cooked pasta and toss until completely combined.
Lasagna sort of seems daunting and time-consuming. There’s a lot of work involved with all those layers. Cooking the noodles, making the meat sauce, prepping the ricotta mixture…you get the idea. But the reward really is worth it. It’s so comforting and tasty. It’s a great dish to take make for parties, or take to a new parent or sick friend who needs a night off from cooking. If you’re into meal prepping, you can make a couple pans of lasagna to keep in the freezer. Lasagna is easy to pop in the oven for those nights when you don’t want to lift a finger or you have surprise guests. Why not buy a frozen lasagna instead? Because it’s just not as good as homemade. Period. And it’s way cheaper to make your own.
I found some ground pork sausage in my freezer, which I wanted to use up, so I looked for a recipe with that in mind. I found a good one on The Spruce Eats, but changed it up a little. I prefer a saucier meat sauce using fire-roasted tomatoes. I’ve had some bad experiences with dry lasagna so I’m on the school that you can’t have too much sauce. As a result, my lasagna isn’t the prettiest, but it definitely tastes good.
Grab your ingredients and get to work. Smash your garlic. Open those cans. Measure out the seasonings. Chop the parsley. Shred the cheeses. Yes, lots of prepping.
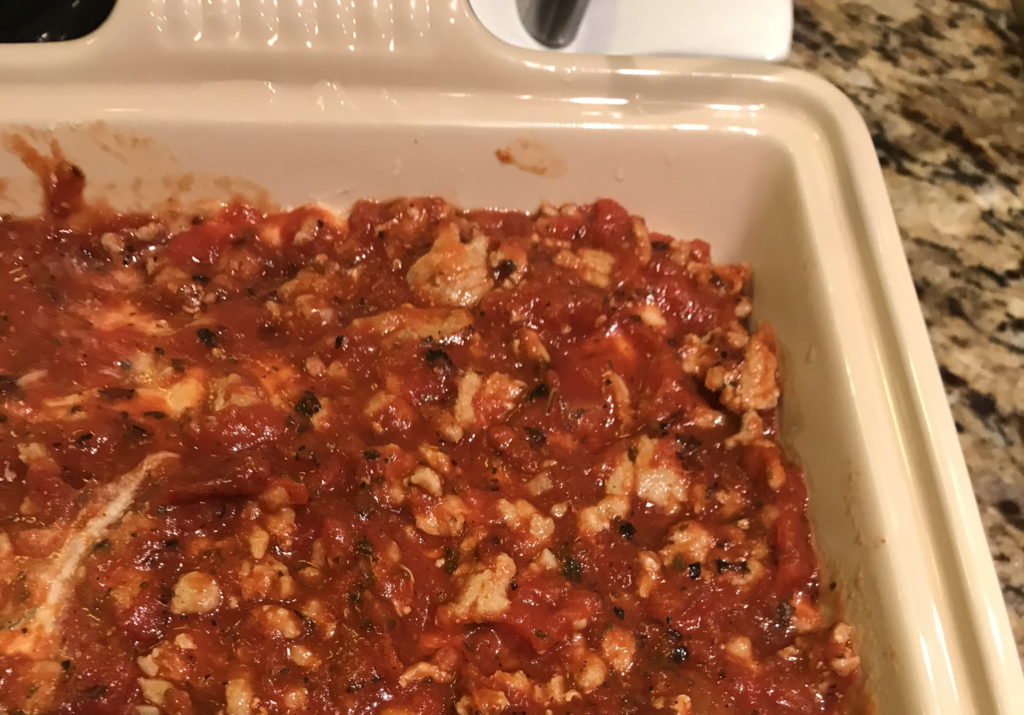
Brown the sausage and then add garlic, tomatoes, seasonings, and tomato paste. You need to let it simmer for at least 30 minutes. The longer the better, really. Tomato paste has a raw taste that needs to be cooked out for at least 30 minutes. Like tasting baking chocolate (the kind without the sugar), tasting your tomato paste is not something you want to try. Yuck. So cook it for a while to get that tomato flavor going.
While this is going on, boil your noodles al dente. Do not overcook them or you’ll end up with mushy noodles. This recipe doesn’t use no-cook noodles, but they would probably work. Just put them directly in your lasagna. For a lower carb alternative, I like using Dreamfields lasagna noodles. Although not a true low-carb pasta, they are higher in fiber and more filling. Just don’t eat half a pan of lasagna! I’ve used them before and they hold up really well. You can also use thin strips of zucchini, but is that really lasagna? Probably not.
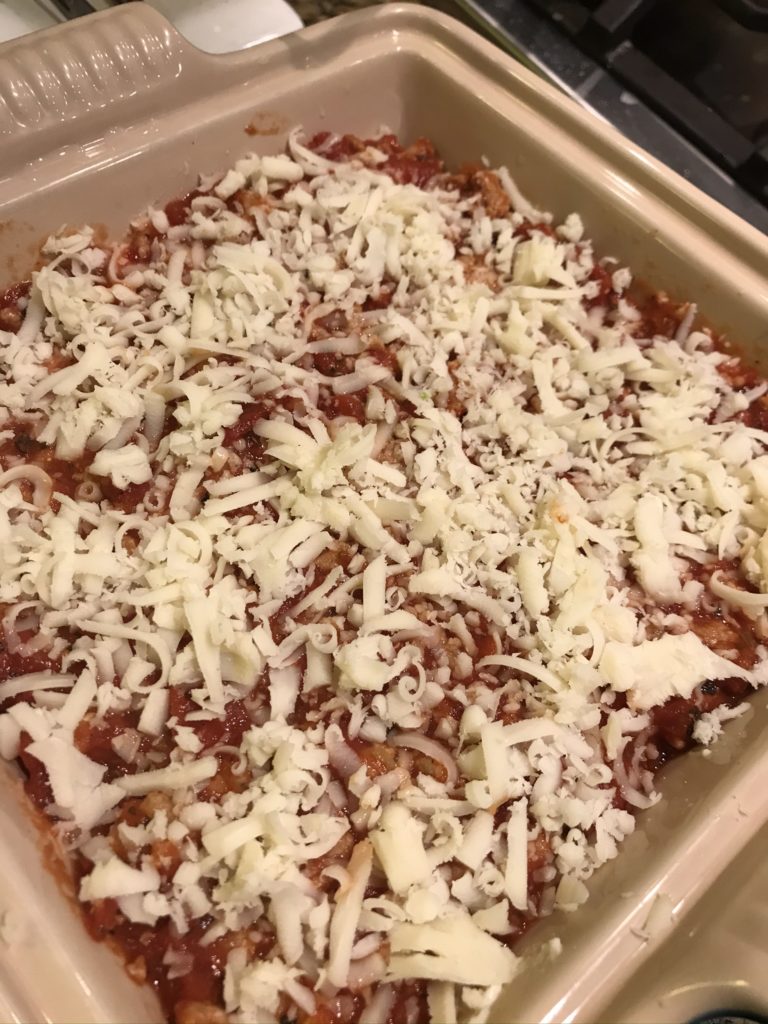
Make your ricotta cheese mixture last. When your meat sauce and noodles are done, the fun starts! I made half the original recipe so use a 9 x 9 x 2 inch casserole dish and start with a layer of noodles. Cover the noodles with a layer of mozzarella cheese. If you’re like me, be sure to taste the cheese to ensure it’s good and not poisoned. Yes, I love cheese.
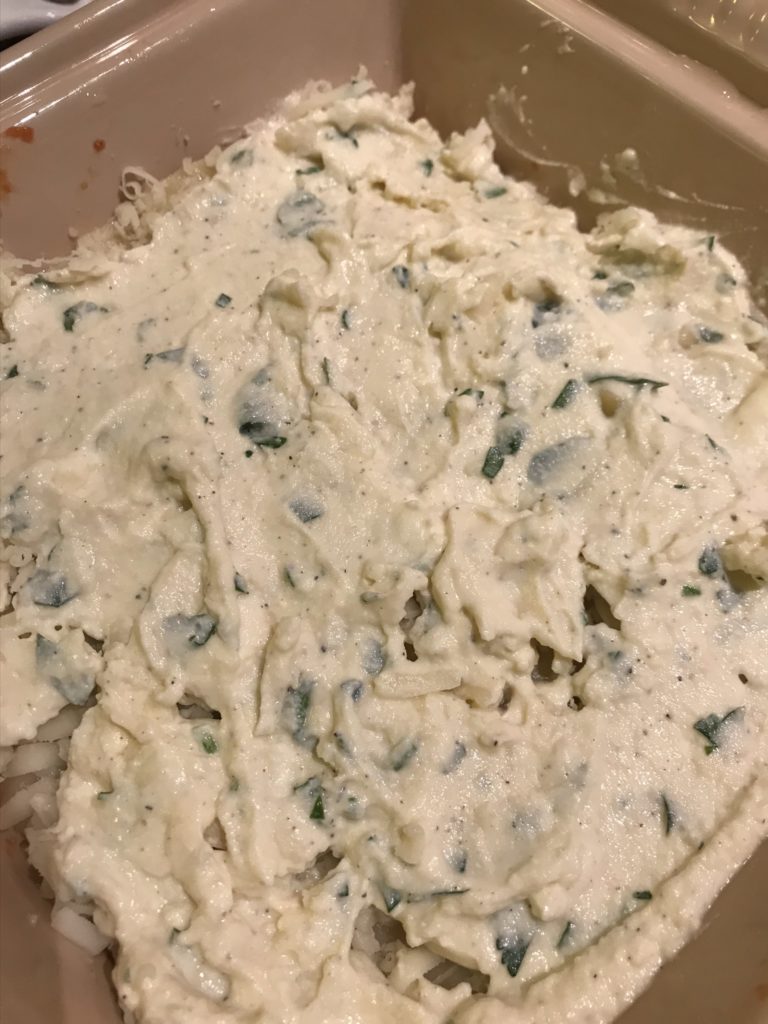
Add a layer of ricotta. Don’t get obsessive about it. Dollop spoonfuls, spread it out until the edges are touching, and call it good. It’ll all blend together anyway.
Next a layer of meat sauce.
Do it all over again with another layer of noodles, ricotta, and meat. Top it all with mozzarella cheese.
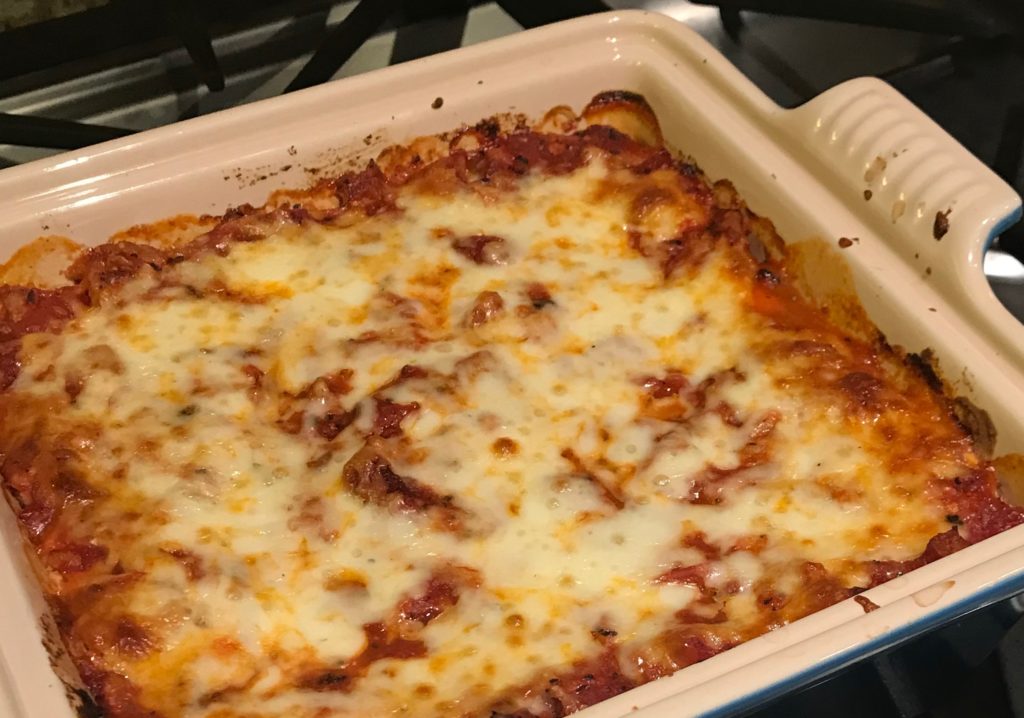
Bake it in the oven until the cheese is all melty on top, about 30-40 minutes.
Let it rest a bit so you don’t burn the rough of your mouth when you take a bite. It also helps the cheese to solidify a little, but that didn’t seem to help my case. A hunk of lasagna does not photograph well, but tastes delicious so who cares?
In a skillet, brown the sausage and then drain the excess fat. Add the garlic, tomatoes, basil, oregano, 3/4 teaspoon salt, and tomato paste. Simmer, uncovered, for 30 minutes. If the sauce is too thick, add a little water.
Meanwhile, cook the lasagna noodles al dente, according to the package directions.
In a bowl, combine the ricotta cheese, Parmesan cheese, parsley, eggs, 1/2 teaspoon salt, and pepper.
In the bottom of a 9 x 9 x 2-inch casserole dish, place one layer of the noodles.
Cover the noodle layer with a layer of mozzarella cheese, and then add half of the ricotta mixture over the mozzarella. Add half of the meat sauce over the ricotta cheese layer. Repeat the layers (starting with the noodles), ending with mozzarella cheese.
Bake for 30 to 40 minutes in the preheated oven. Remove the lasagna from the oven and allow it to rest a few minutes before serving.
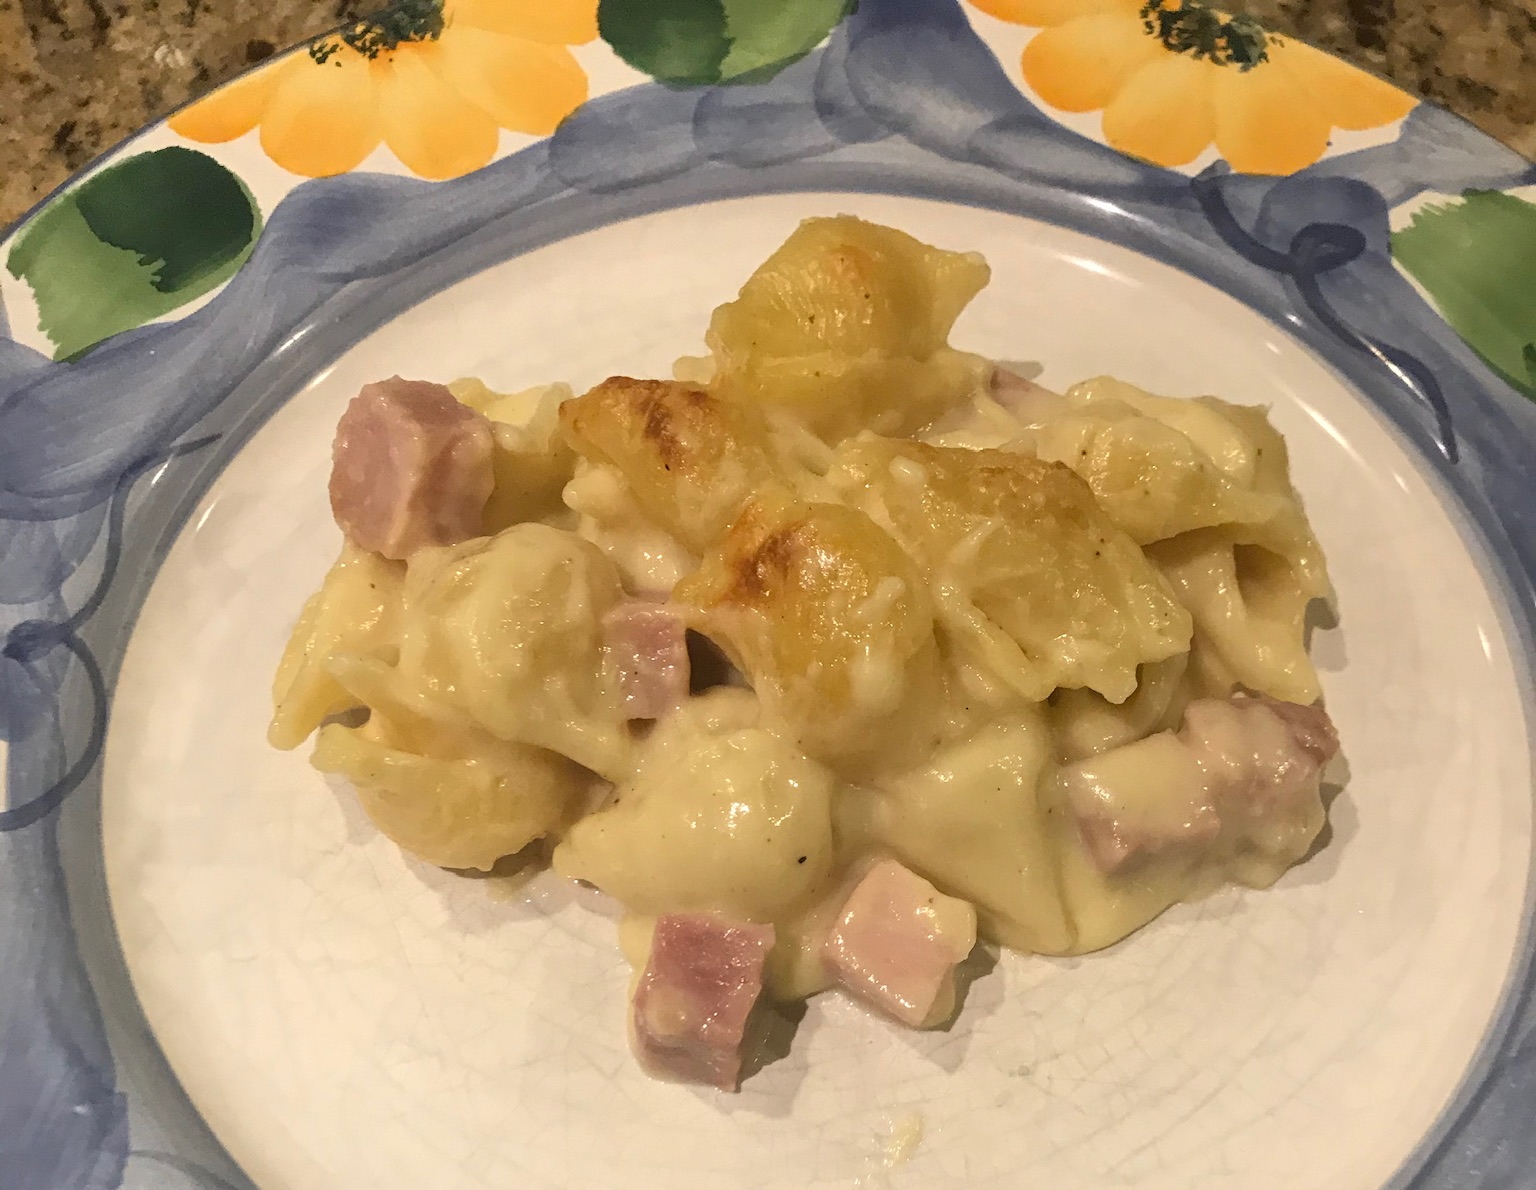
I love mac and cheese. Pasta. Cheese. Gooey deliciousness. What’s not to love? To make a more hearty meal, add a protein or mix it up a bit. Use tortellini instead of macaroni or shells. Top with a cracker crumble. Throw in some chicken and broccoli. That makes it healthy, right? Other add-in ideas: meatballs, bacon (mmmm…bacon), spicy sausage, veggies, pesto, or even tuna. I decided to take it up a notch by throwing in some diced ham.
I have a super yummy recipe when I don’t want to make boxed mac and cheese. You can use any kind of cheese that melts easily, like American (which does have its place but not today), but this is fancy mac and cheese so you swap out the American for a more grown up cheese: Gruyere. Gruyere is a type of Swiss cheese that doesn’t taste anything like that strong, holey Swiss cheese. Instead, it’s sweet, salty, and nutty without being overpowering. It’s also really creamy and melts easily so it’s perfect for fondue, grilled cheese, and of course, mac and cheese.
Making homemade mac and cheese is not hard, but is a little more time consuming that the box. The “hardest” part is making the actually sauce, but it’s a lot easier to make than you think. You won’t mess up. It won’t come out lumpy or burnt if you follow a few simple steps. I promise.
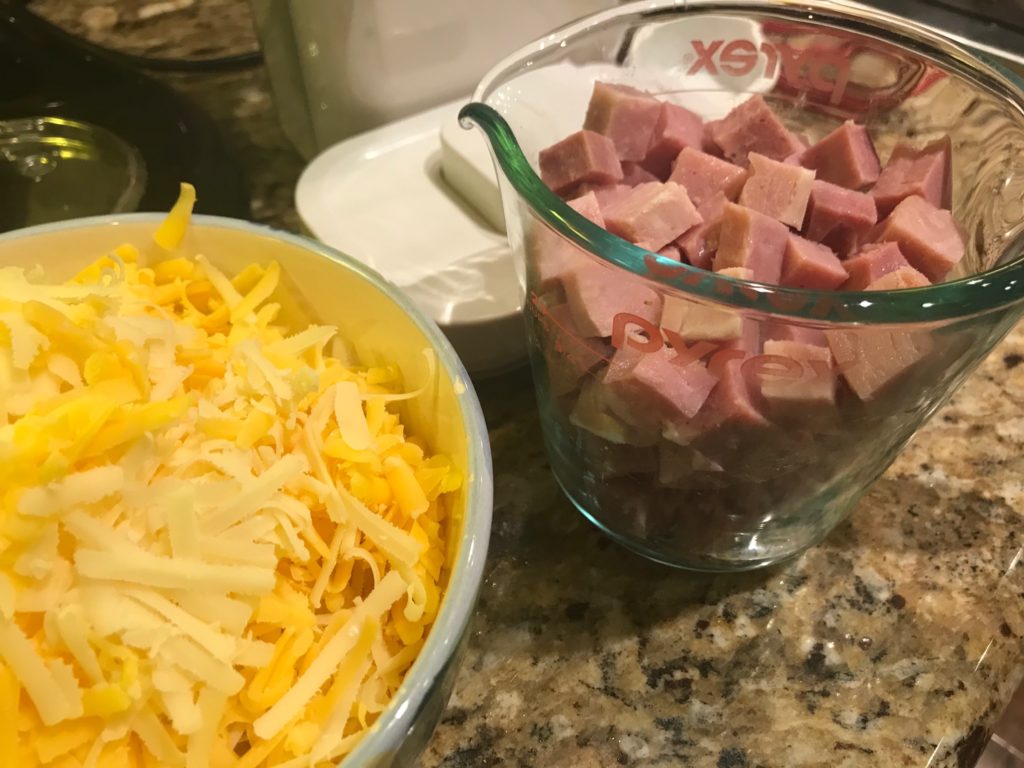
Do your prep work. Shred a bunch of cheese and dice your ham into bite-sized pieces.
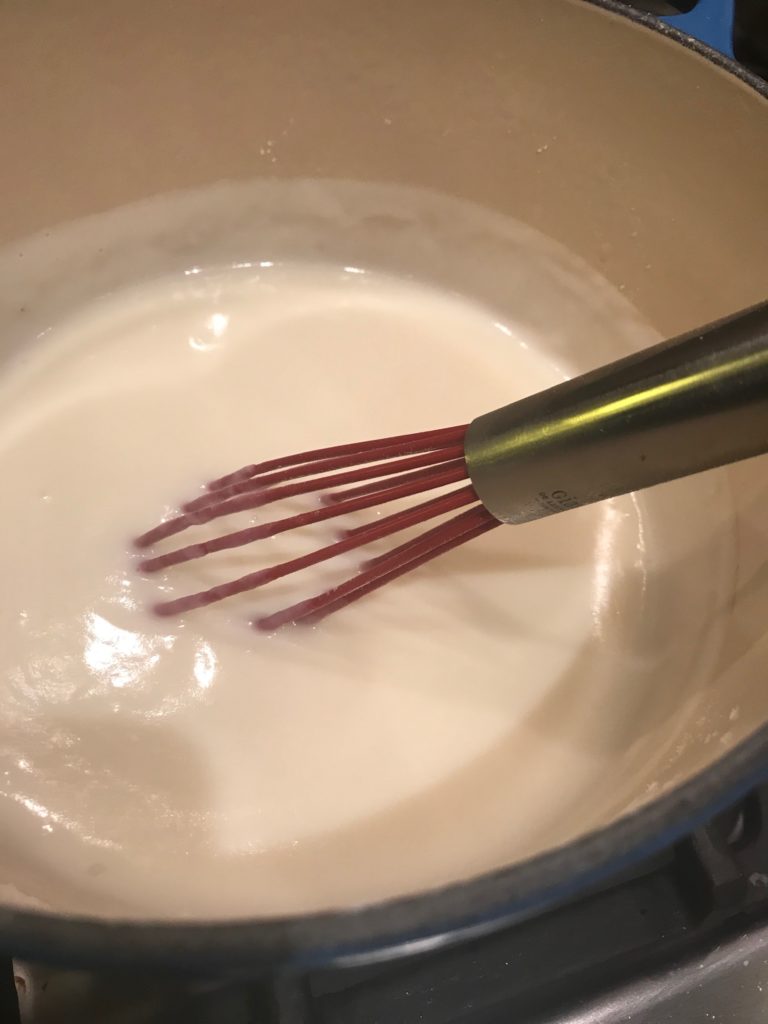
While you’re cooking your pasta (to slightly under al dente because it’ll continue to cook a little in the oven), make your sauce. Heat up some milk. When it’s ready, it should be hot, but not boiling. If you can stick your little finger in it and it’s a little uncomfortable, but not burning, it’s perfect. It’ll also coat the spoon and pan a little. It took about three minutes for me on medium heat.
The key is not to heat it on high and or it might scorch the bottom of the pan. If that happens, just start over and be patient. It’ll do the right thing if you don’t rush it.
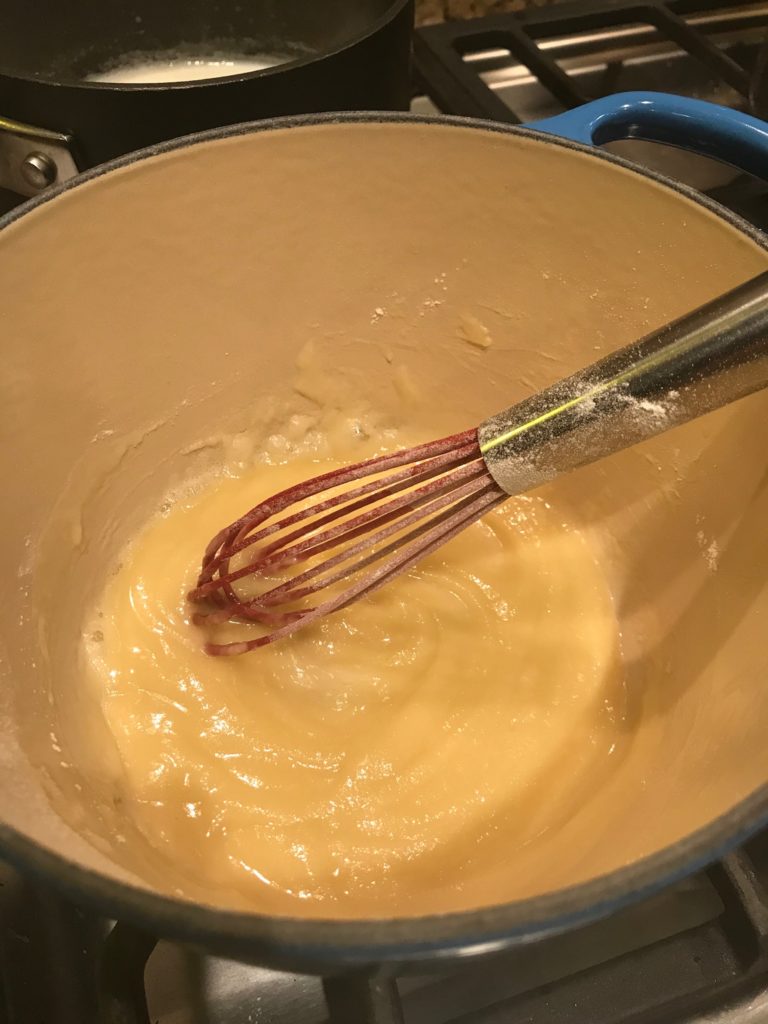
While this is going on, melt some butter that you’ve cubed into smaller squares so it melts quickly and more evenly than if you threw the whole stick in. Add the same amount of flour and whisk over low heat for about two minutes. Watch you go! You’re now making a roux, which is just a fancy way of saying you’ve combined some butter and flour that you can use to thicken a lot of stuff.
I depend on time to make sure the roux comes out right. After you’ve made a roux a few times, you’ll know what to look for, but for now, just stick to stirring for two minutes and note that it’s bubbly, no longer has that raw flour taste, and slightly darker than before. You can cook it longer to a more golden-brown if you want a darker, richer sauce, but I prefer mine fairly blond.
Add the hot milk and whisk the entire time for one to two minutes. The sauce will be thickened and smooth. Next comes the cheese. Throw that all in along with your seasonings and ham. When it’s well mixed and melty, it’ll look like fondue and it’ll be difficult not to dip cubes of sourdough bread into it. Resist the temptation. I mean, you should taste it to make sure it’s ok, but use some self-restraint.
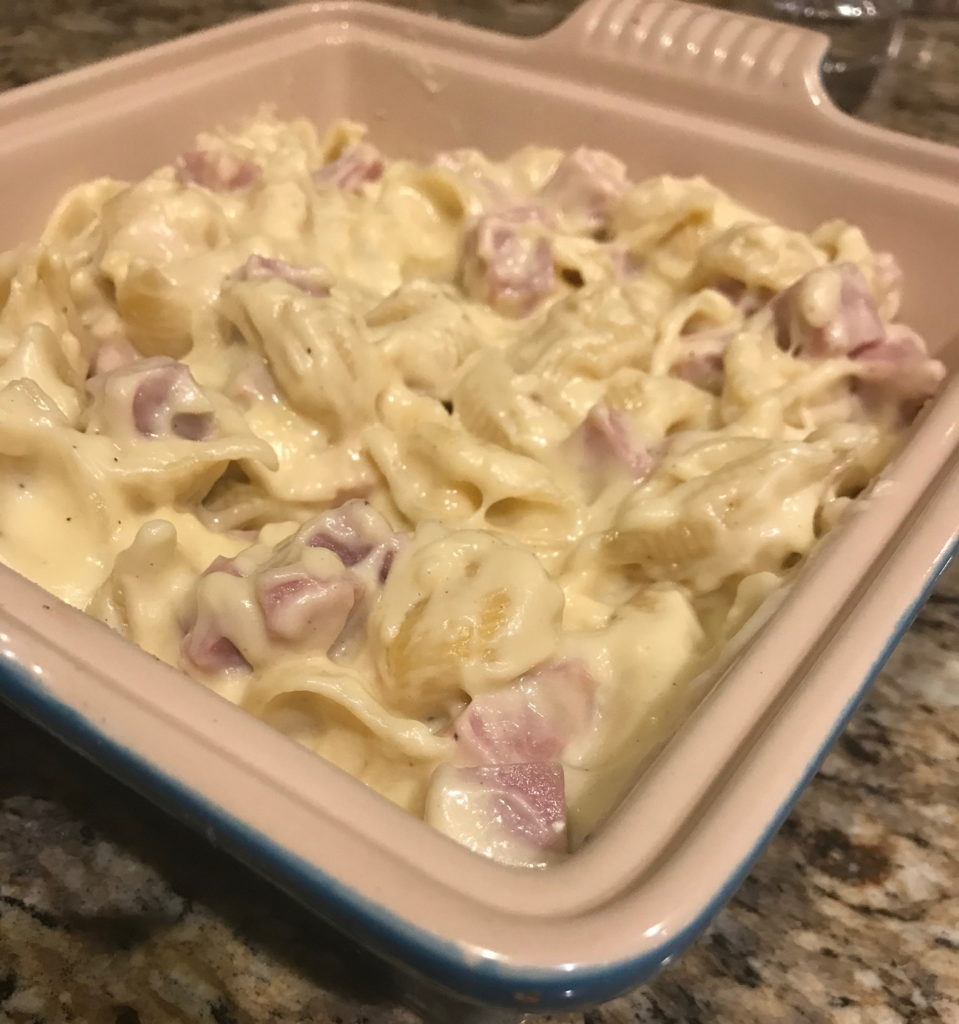
Mix it with the cooked pasta, stir again until all the pasta is well coated. Plop it into a casserole pan.
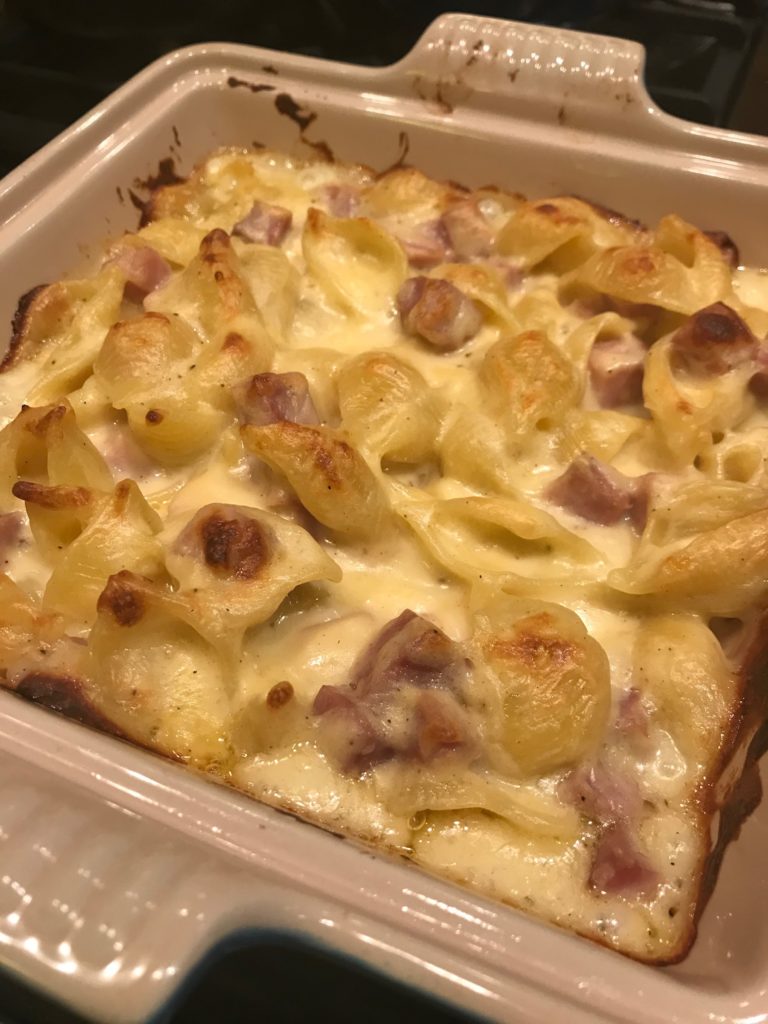
Bake it until bubbly and slightly toasted on top.
That’s it.
The original recipe comes from Ina Garten, who makes a ton of amazing food. I completely trust all of her recipes. This recipe has been halved and macaroni has been substituted with shells. I also skipped the tomato and bread crumb topping.
Add the pasta to boiling, salted water and cook according to the directions on the package, 6 to 8 minutes. Drain well.
Meanwhile, heat the milk in a small saucepan, but don't boil it. Melt butter in a pot and add the flour. Cook over low heat for 2 minutes, stirring with a whisk. While whisking, add the hot milk and cook for a minute or two more, until thickened and smooth. Off the heat, add the Gruyere, Cheddar, 1 tablespoon salt, pepper, nutmeg, and ham. Add the cooked pasta and stir well. Pour into a baking dish.
Bake for 30 to 35 minutes, or until the sauce is bubbly and the macaroni is browned on the top.
In my opinion, the sides make the Christmas dinner. I don’t dislike turkey, but I’m not its biggest fan (except this Expertly Spiced and Glazed Roast Turkey might have changed my mind) so I like to focus on the side dishes. There are too many delicious sides I like so the problem turns out to be which ones to make. The list starts out long, is cut, grows again when I ask the family if I’m missing anything (why do I ask them?!), and then finally reduced to something manageable and not too gluttonous.
I make all the sides the day before and heat them up on Christmas. I used to make them the day off, but that’s just insane. Nothing was ready on time and I would end up running around like a crazy woman with my family telling me to sit down. Sit down? This food doesn’t make itself! Do you want dinner or not?! See the tension I’m talking about? Ahhhh! No, thank you.
This year I trimmed the list down to cranberry sauce, dressing, mashed potatoes, mac and cheese, and a salad. There’s only five of us this year so this was plenty. We also had gravy (from a jar doctored with turkey drippings), brioche rolls (from the store), and my MIL’s famous Frozen Cranberry Salad. Five days later, we’re still eating leftovers.
I’ve made these recipes a few years in a row because I’ve found they are the best of the best. I really don’t need to go any further and they are not complicated to make.
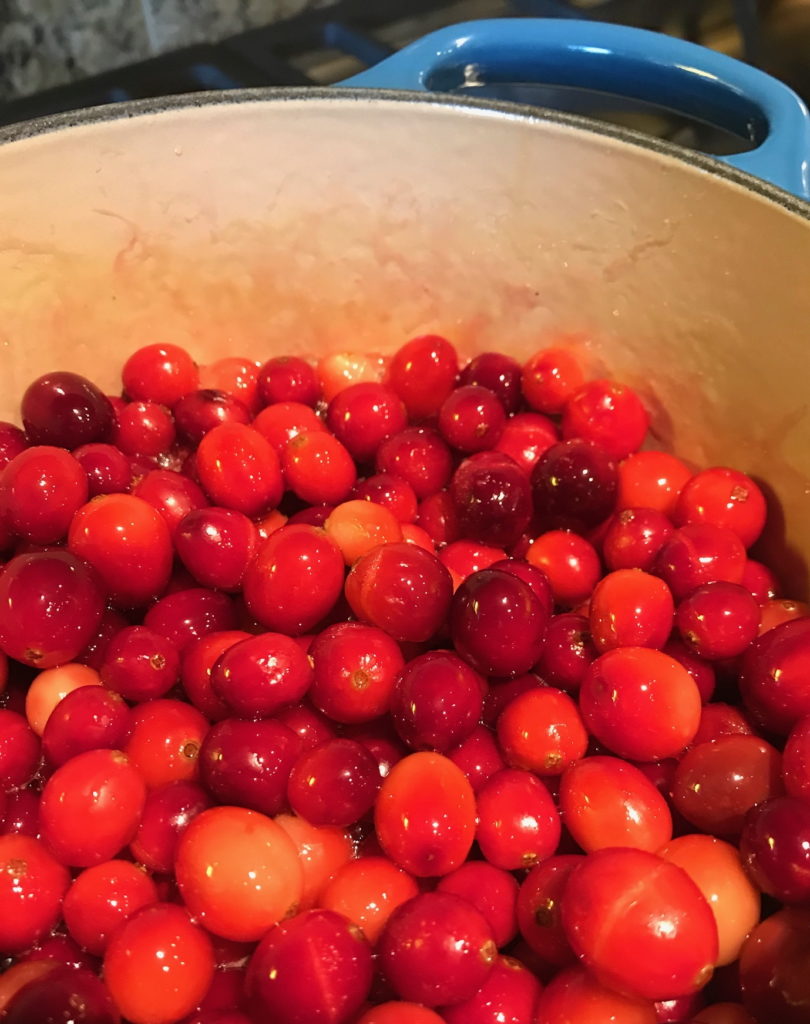
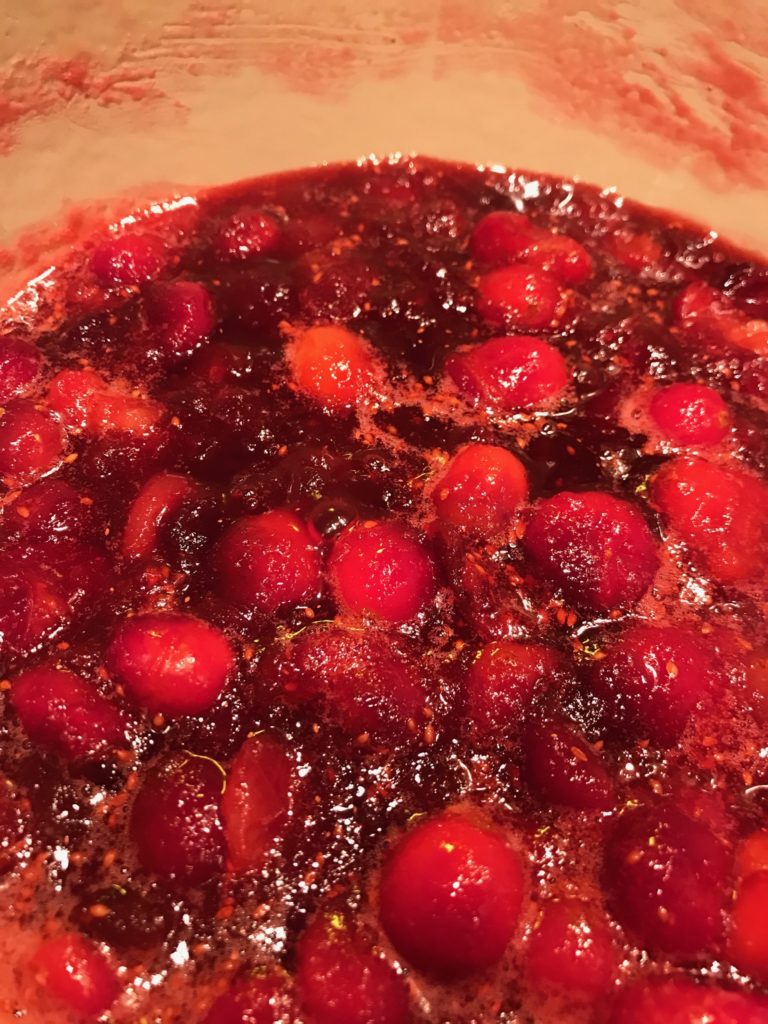
Let’s start out with the cranberry sauce. It sounds fancy, but it’s the easiest thing to make. You just need fresh cranberries, juice, and honey. It’s also so much better than store bought cranberry sauce. You won’t go back.
Simmer it down. Cranberry sauce.
Told you it was easy.
Get the recipe: Alton Brown’s Cranberry Sauce. BTW, I’ve never found a recipe of his that I didn’t like. He’s goofy, but smart, backing up his mad methods with science.
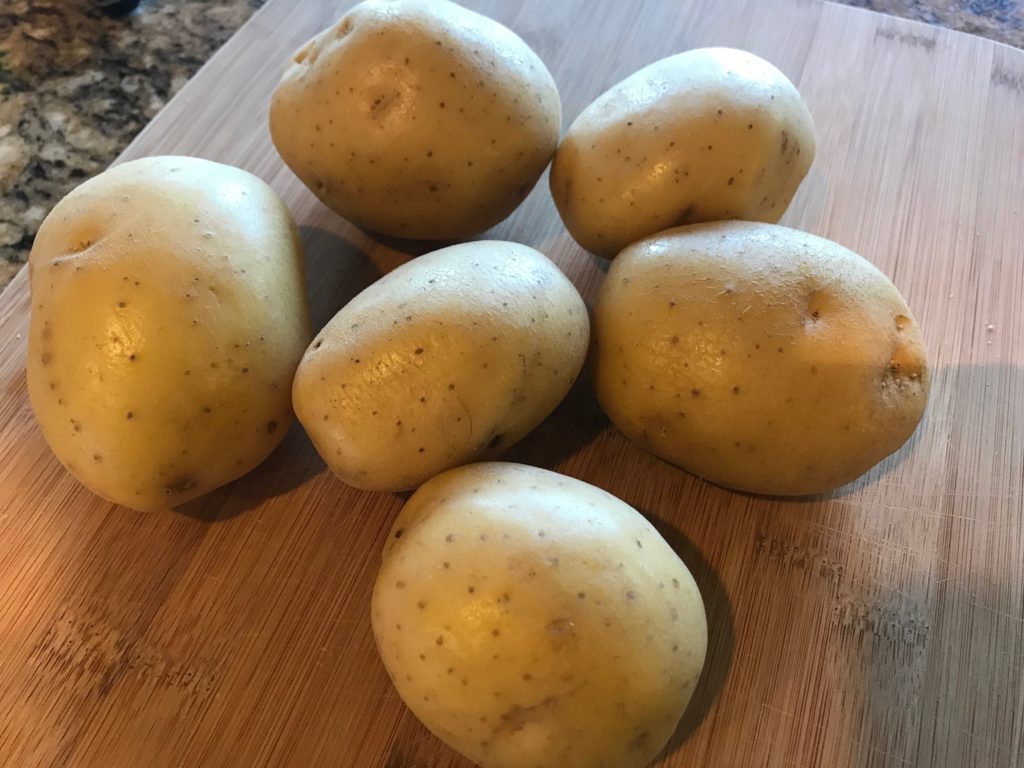
Speaking of Alton and his mad methods, he taught me how to make the best mashed potatoes. I used to cringe when people said that mashed potatoes are so easy. If they’re so simple, why do mine come out so gluey? Science. I was using the wrong potato and the wrong mashing method. Yes, you can use russet potatoes, especially if you like fluffy mashed potatoes, but if you like creamy mashed potatoes like I do, go with Yukon gold potatoes. It has to do with the amount of starch in the potatoes. Russets have more starch than Yukon gold potatoes. Using Yukons makes for a creamier, less fluffy mashed potatoes. Like I said, science.
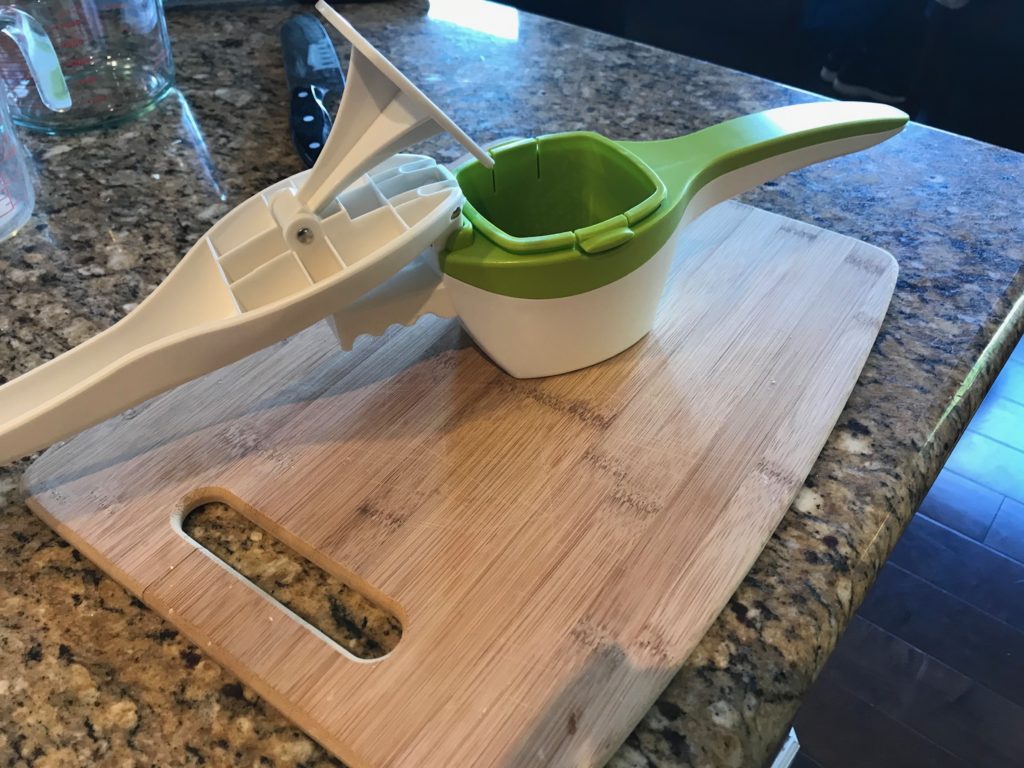
A potato masher works, but you know what works better? My new best friend, the potato ricer.
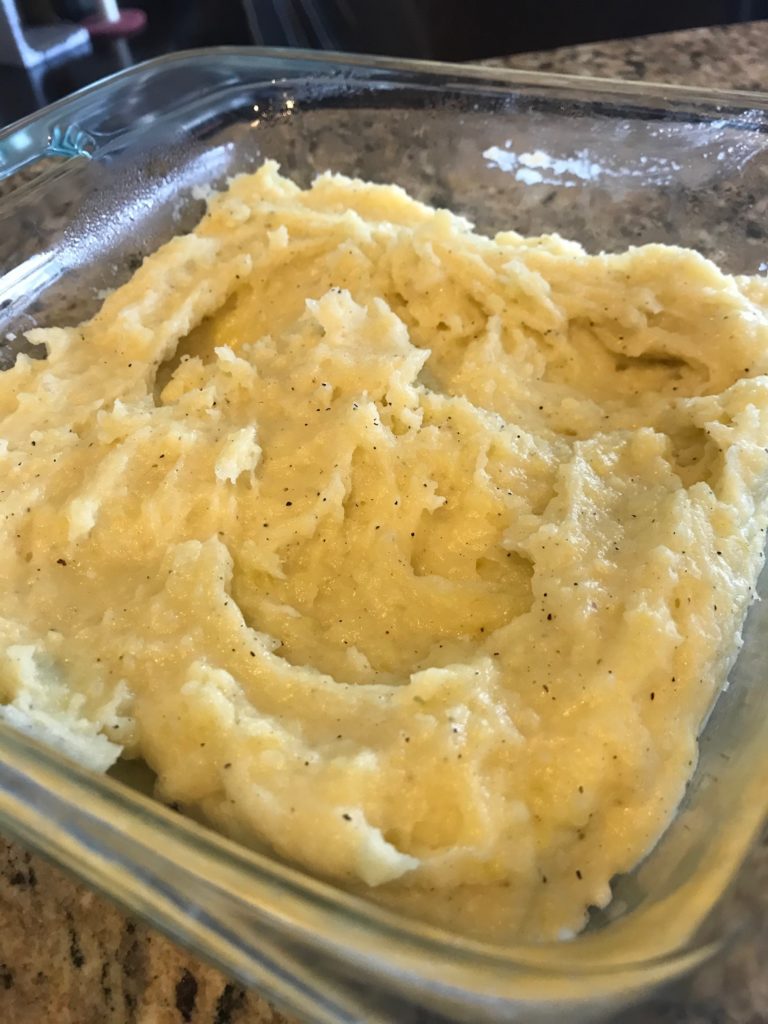
With these two tools in my back pocket, my mashed potatoes are now amazing. Creamy, buttery, with a hint of pepper…everything mashed potatoes should be.
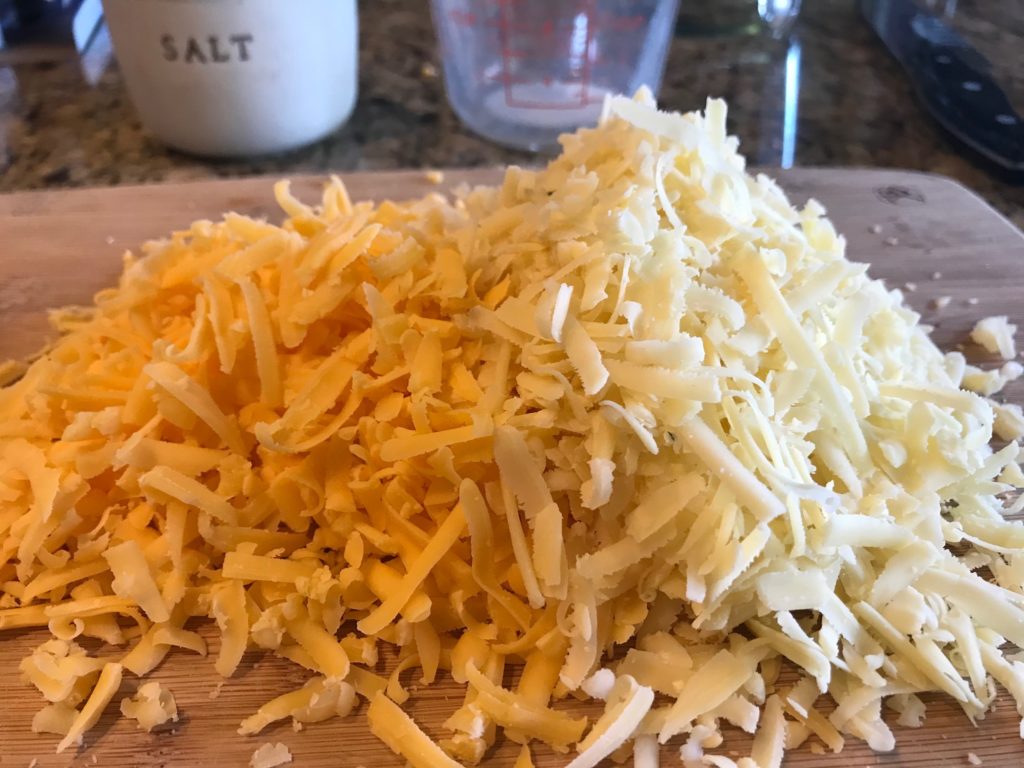
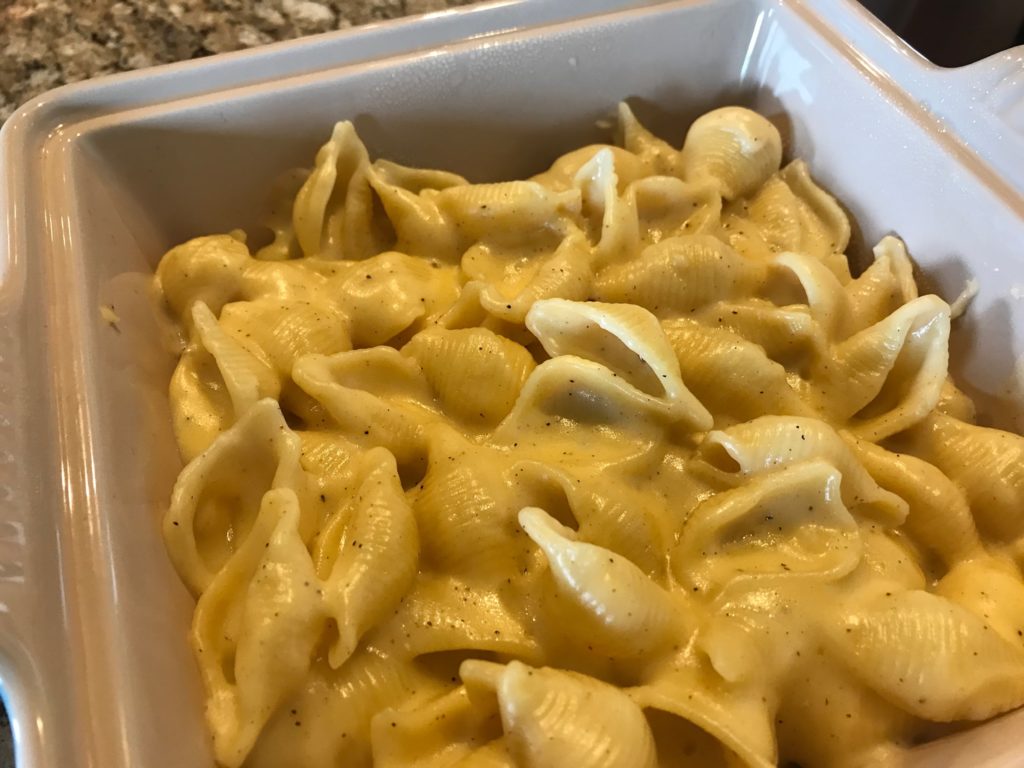
While I do love mashed potatoes, I love love LOVE mac and cheese. I rarely eat pasta (carbs) so this is a decadent treat for me that is worth every calorie. This recipe requires a little extra work, but it’s well worth it. It has both Gruyere and cheddar cheeses. This turns out to be the perfect marriage of cheeses. Cheddar is gooey and buttery, but needs another cheese to melt properly. Meet Gruyere, which is mild, nutty, tangy, AND melts easily. Mmmmm…cheese.
The recipe calls for 12 ounces of Gruyere to 8 ounces of cheddar, but you can use any amounts of each that you happen to have as long as it adds up to 20 ounces of cheese. I discovered this when this year, I might have accidentally nibbled on too much Gruyere and noticed I bought a little less than I should have. Doh. So there was more cheddar than Gruyere this year. It’s all good.
This recipe also makes a lot of mac and cheese so I split the recipe and we still have leftovers. Feel free to make the whole recipe if you have a ton of guests. All this cheesy goodness will disappear quickly.
Get the recipe here: Macaroni and Cheese. It’s another good recipe from Ina Garten. I prefer it without the tomato breadcrumb topping, but I encourage you to try it either ways. I think the Gruyere is the secret, but give credit to the nutmeg that brings it all together. This is not your Kraft mac and cheese.
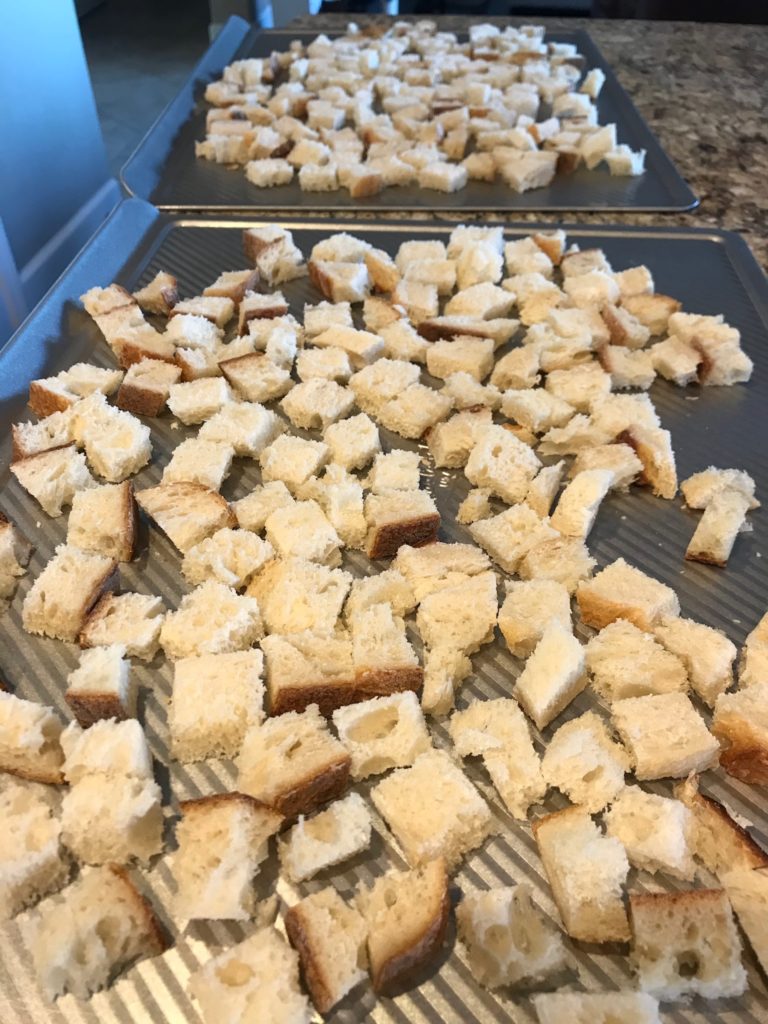
Now speaking of Ina Garten, she makes the best turkey dressing. I’m super picky about my dressing. I’ve tried a million different ones: store bought (ugh), cornbread (too crumbly), sage (not exciting enough), whole wheat (too healthy), cauliflower (not authentic)…you get the idea. Although I adore her (who doesn’t?) and think her recipes are spot on, I had been disappointed so many times that I had low expectations when I tried her recipe. Wrong. This dressing is amazing and gets rave reviews by everyone at home. It doesn’t have any unusual ingredients. I just think it’s the right mixture of everything you’d expect, but using toasted sourdough bread cubes and dried cranberries puts it over the top.
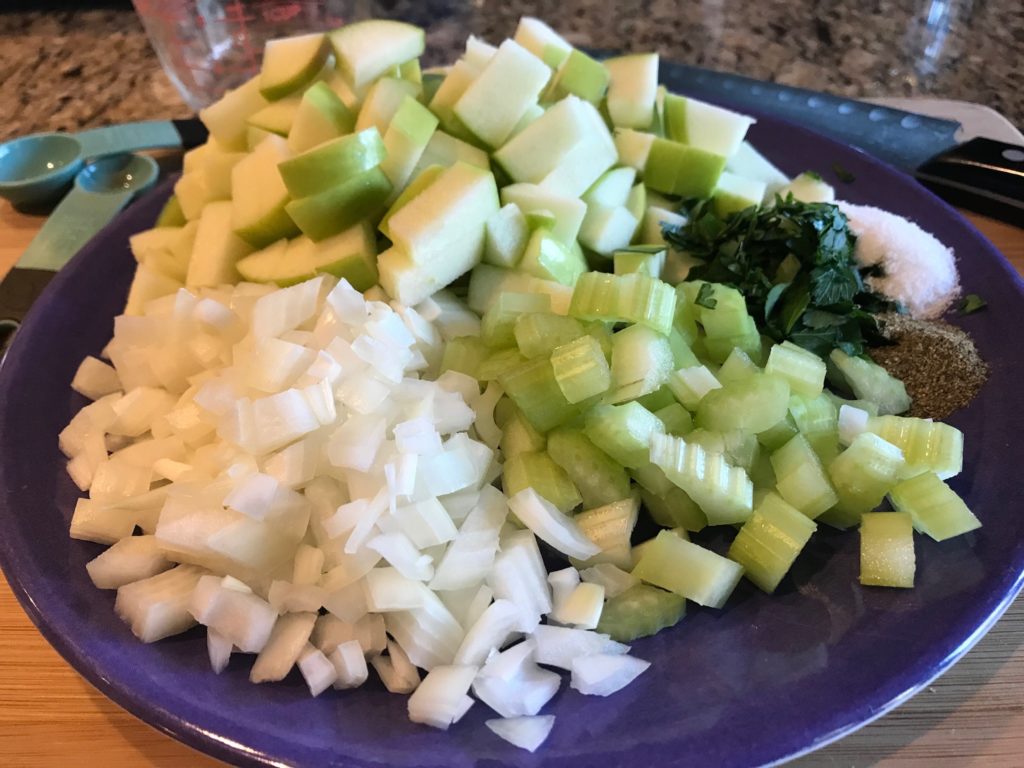
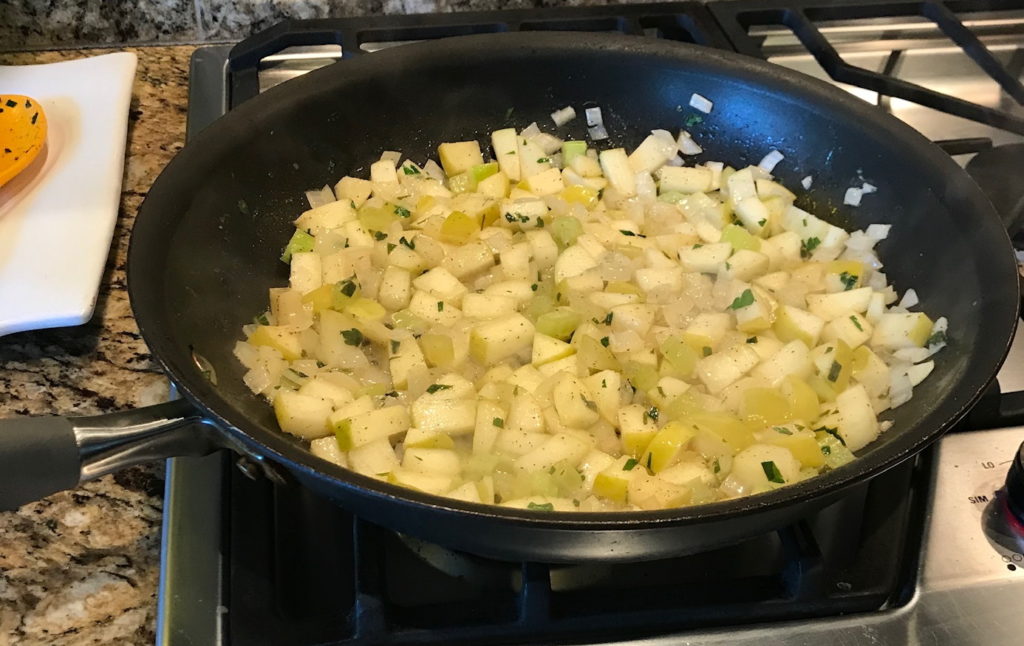
Along with your standard ingredients of celery and onion, use apples, which adds sweetness and prevents a dry dressing.
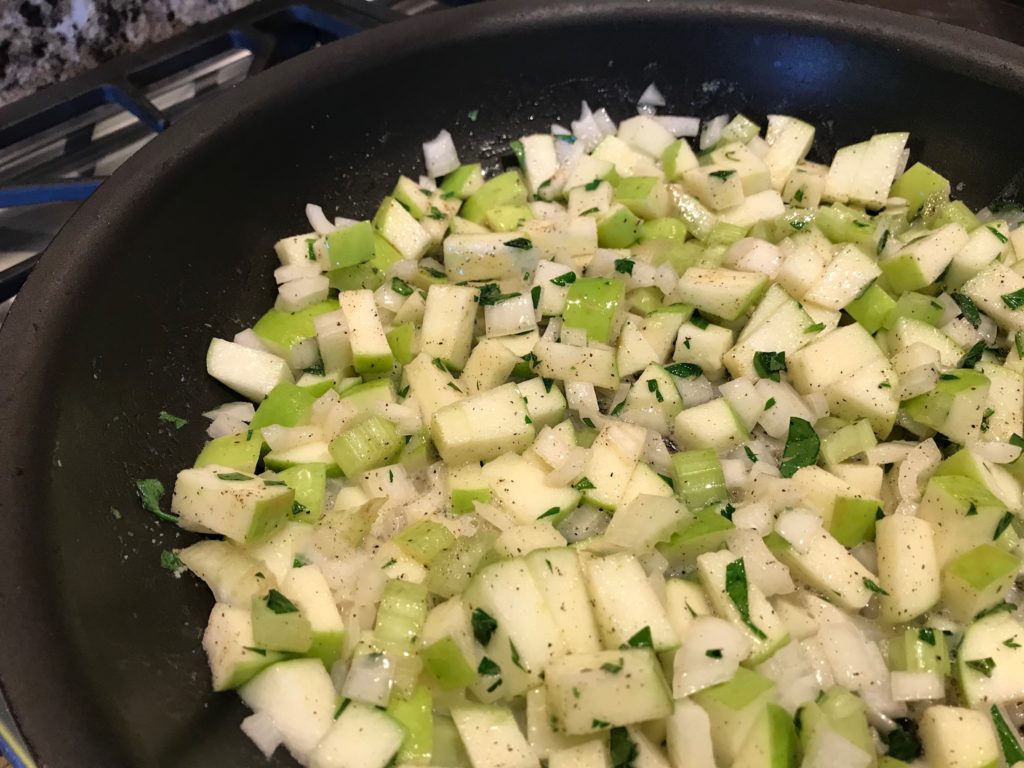
Using a VERY generous amount of butter (let’s not talk about how many sticks of butter today), saute the veggies and apples in a pan.
Ten minutes later, every will be soft and yummy. I could probably eat this straight out of the pan, but I used some self-control, unlike the Gruyere cheese incident.
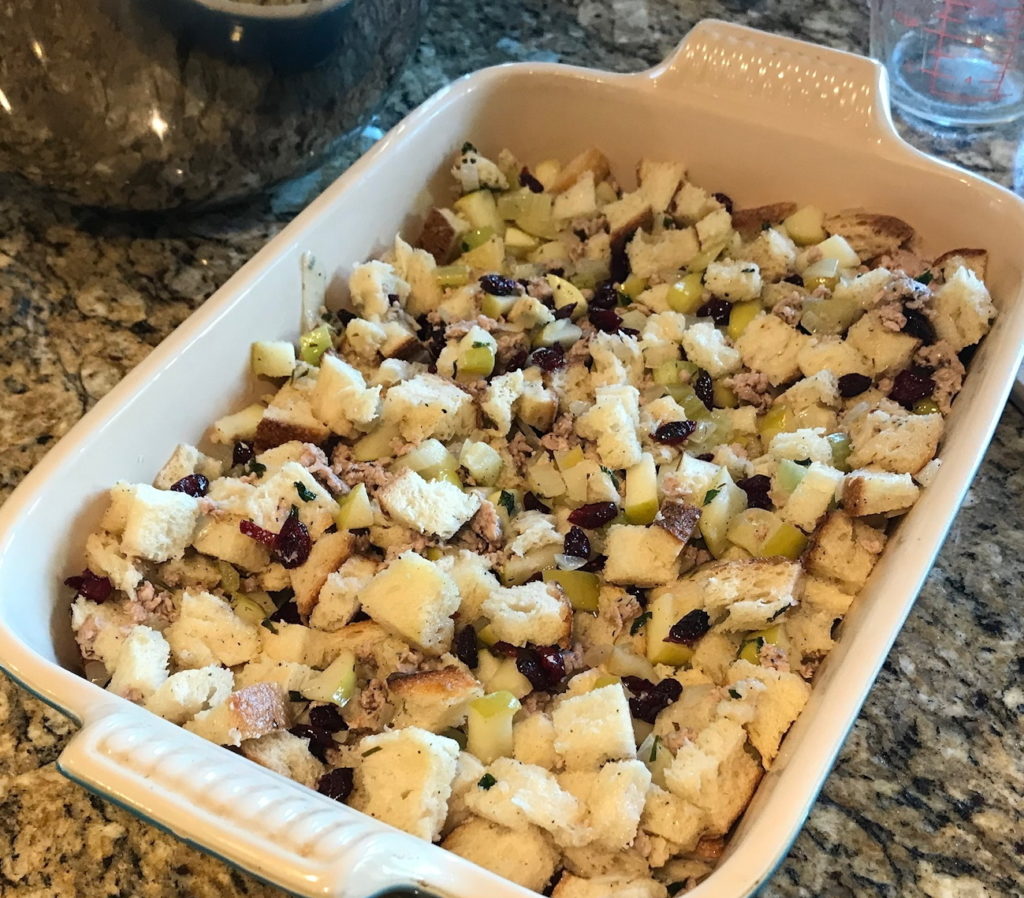
In a very large bowl with the bread cubes, add this mixture along with browned crumbled sausage, broth (homemade if you want to show off), and dried cranberries. The cranberries add another dimension of sweetness against the onions and a chewy texture that complements the toasted bread. Plus cranberries scream turkey so you gotta have them.
Mix well and plop it into a baking dish.
Because I bake it the next day, I add additional broth right before it goes into the oven to ensure it won’t dry out.
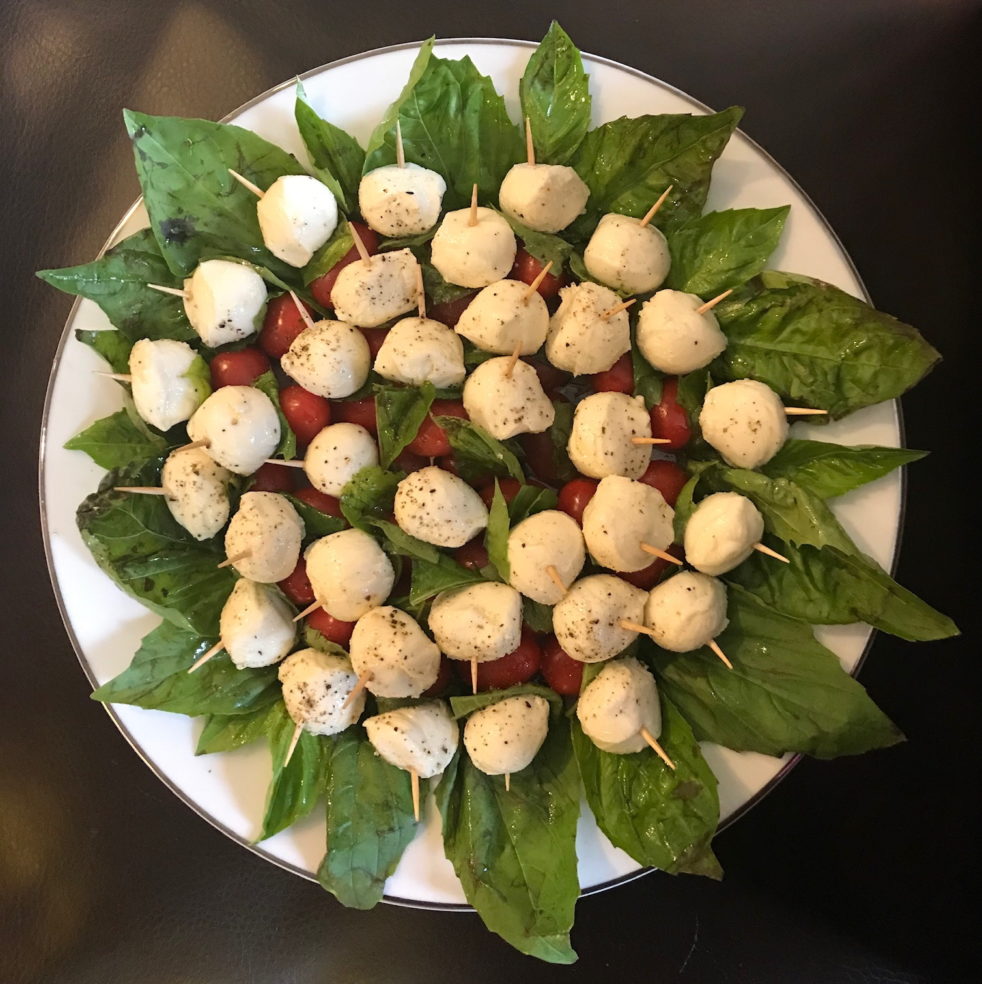
With all these heavy side dishes, I wanted to make a salad to balance it off. Well, this salad wasn’t exactly as light as I originally planned, but it turned out to be clever. You see, I love cute food. My crazy smooshed looking Spooky Peppers is evidence of my insanity. I came across the cutest idea for a caprese salad so I decided to make my own Caprese Christmas Wreath Salad.
small mozzarella ballsmarniated in herbs and olive oil
Method
Remove the basil leaves from the steams. Use the larger leaves to create a ring around the plate.
Using a toothpick, skewer a tomato, a basil leaf, and a mozzarella ball.
Arrange in a circle on the basil leaves. Continue until you've created enough circles to fill the wreath. Add small basil leaves to fill in the wreath as needed.
Merry Christmas! I hope I made your dinner a little easier with these dependable side dish recipes.