Blog

Beef Stew

Jump to Recipe

Beef stew is comforting. Don’t deny it. It’s also really easy to make. Mix all your ingredients together and let it do its thing. No babysitting. The problem is that it takes sooooo long to cook for the meat to become tender. Then again, it’s called stew for a reason. By definition, it means to cook something…slowly. Stewing is not fast.

There are a lot of methods to make stew, like using a slow or pressure cooker, which I do like, but the best stew I’ve ever had is braised in the oven for at least 2 hours. You could make this during the week if you had the time. Right. I don’t know about you, but I just don’t have two hours between work (or taxiing the boy around to various extracurricular activities) and dinner time. Therefore, I like to make this dish on a lazy Sunday afternoon when I can smell the homey deliciousness of beef and veggies. There needs to be a candle for that.

For stew meat, I’ve learned to avoid the stew meat packages like the plague. Yes, it’s all pre-cut and very convenient, but you really have no idea what cuts of meat you’re ending up with. It could be a combination of different types, all that cook at separate times, so in the end, you end up with some tender pieces and some tough ones. Blah. Instead, buy chuck meat and cut it up yourself. I’m sorry, but trust me on this one.

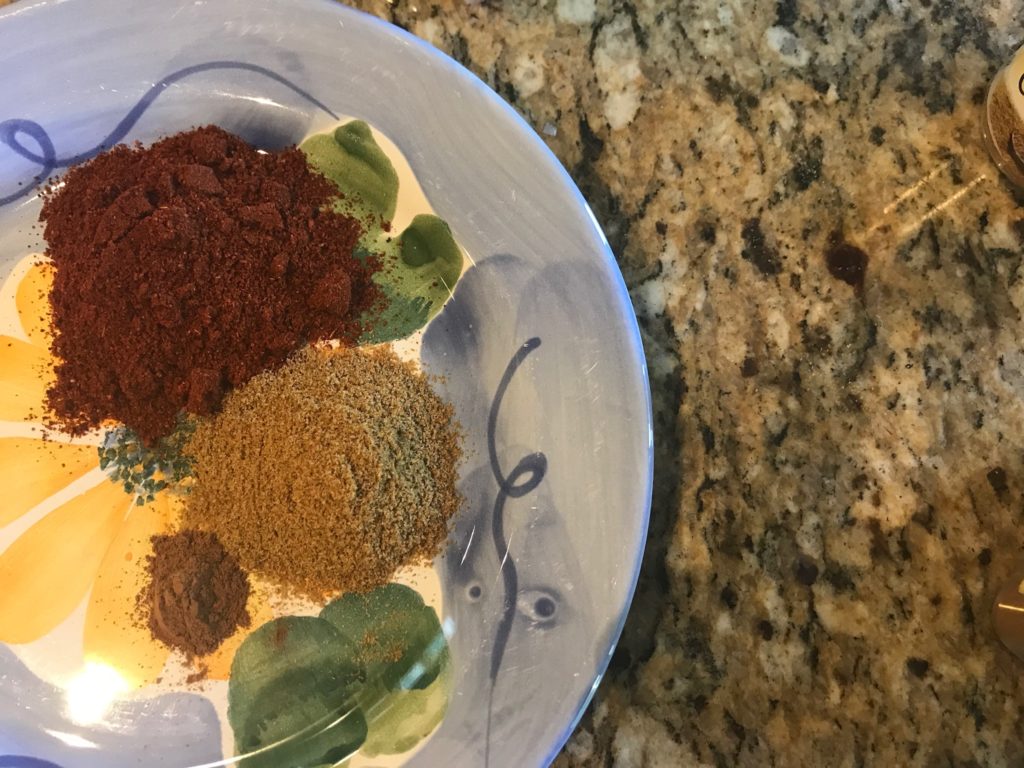
Don’t forget to season the meat liberally with salt and pepper. Unless you are on a medically prescribed low salt diet, you do not need to avoid salt. It brings out the flavor of meat. It’s also better to season as you go instead of all at the end so start now.

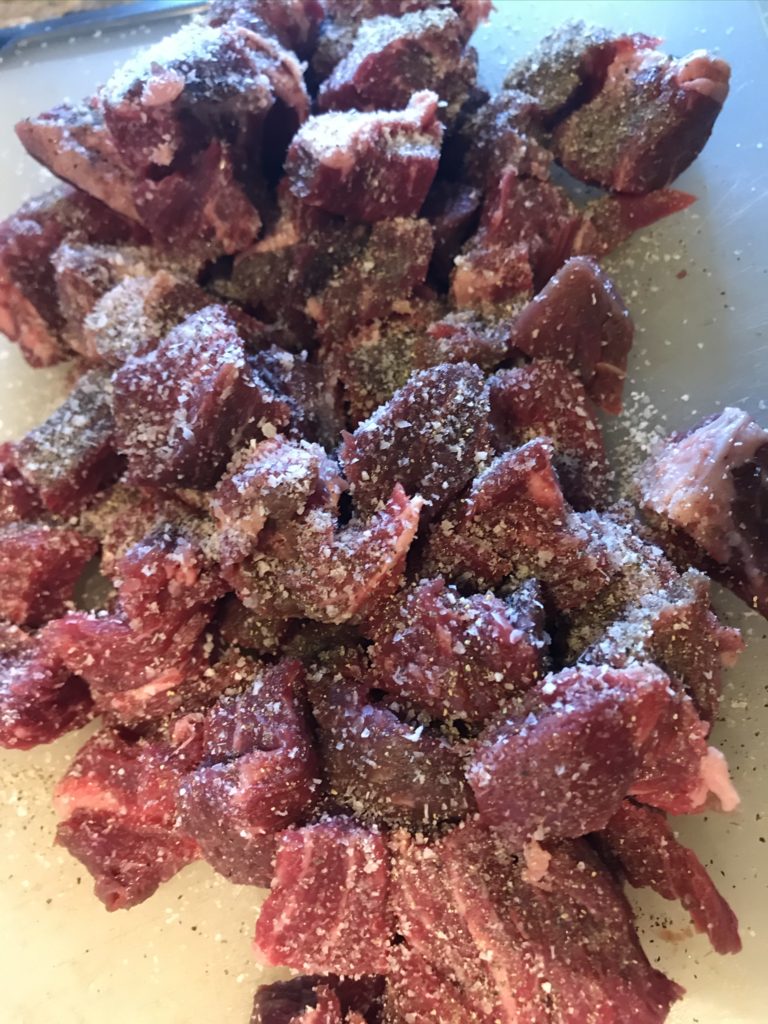
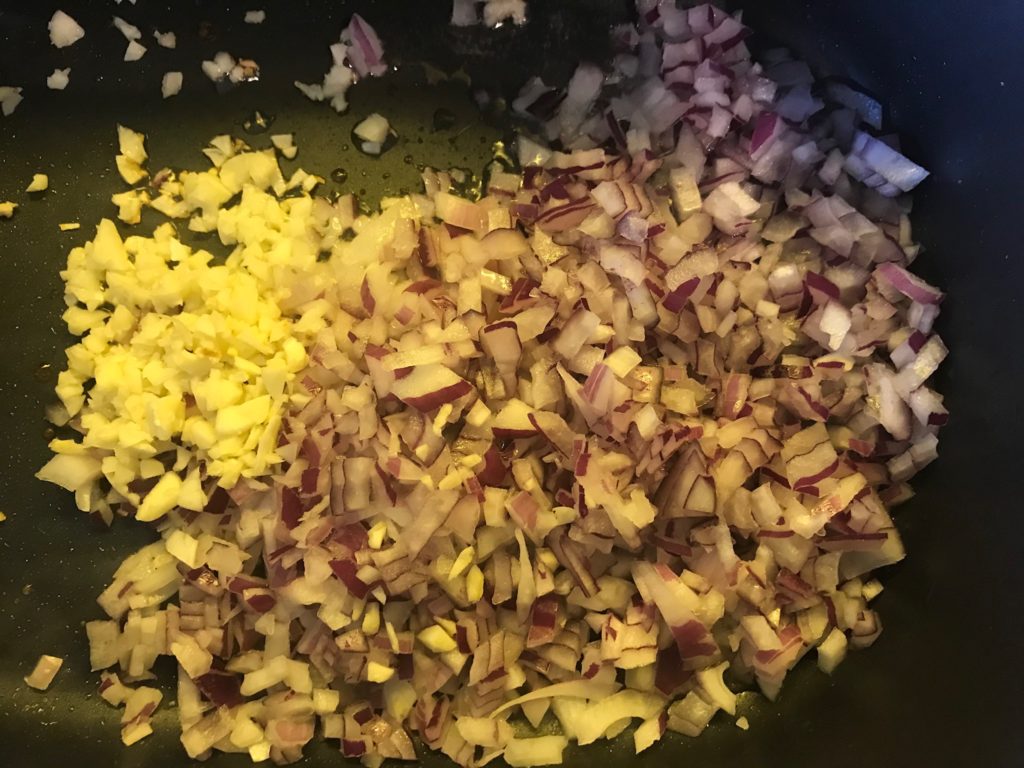
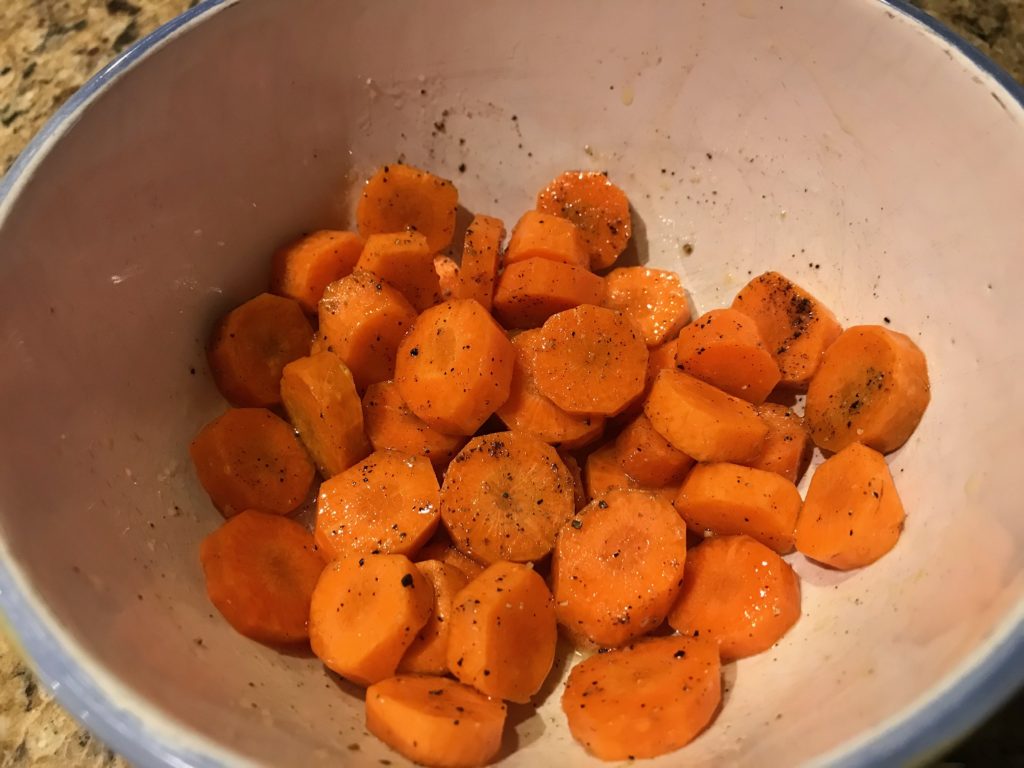
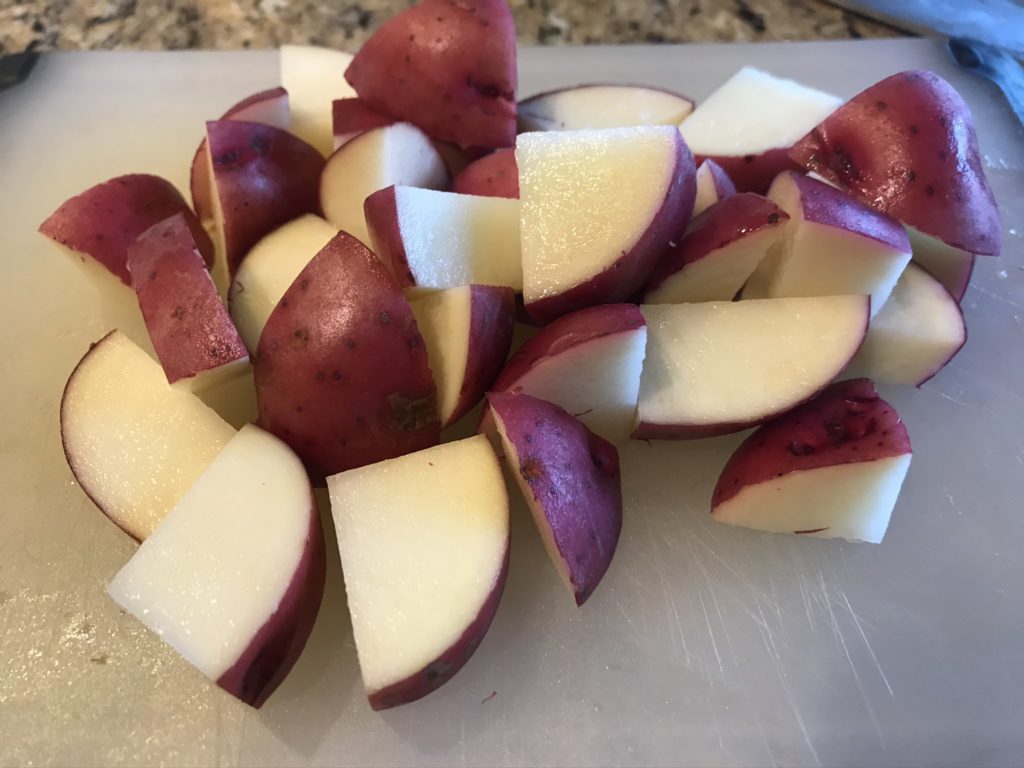
When you’re cutting up your veggies, try to cut them in similar sizes. Your carrots don’t need to be the same size as your celery, but your potatoes should be the same size to each other. I tried that here by cutting in half and then in quarters.

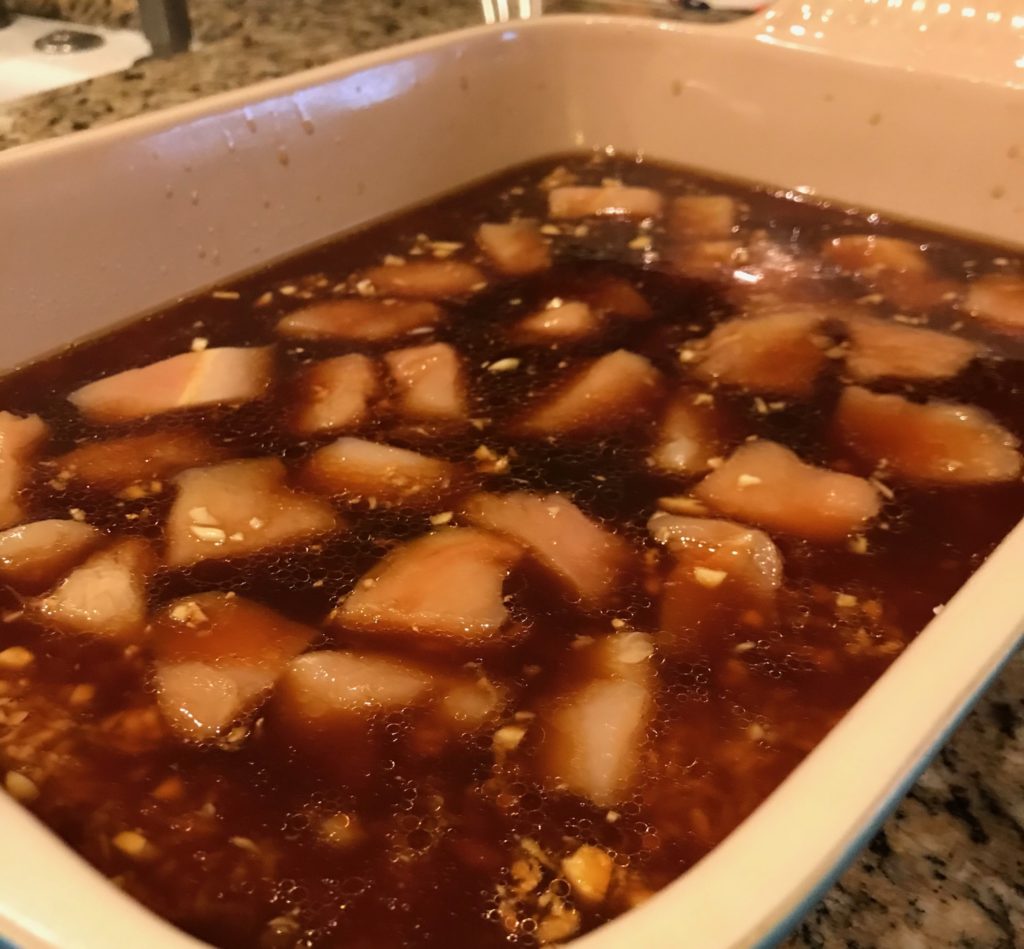
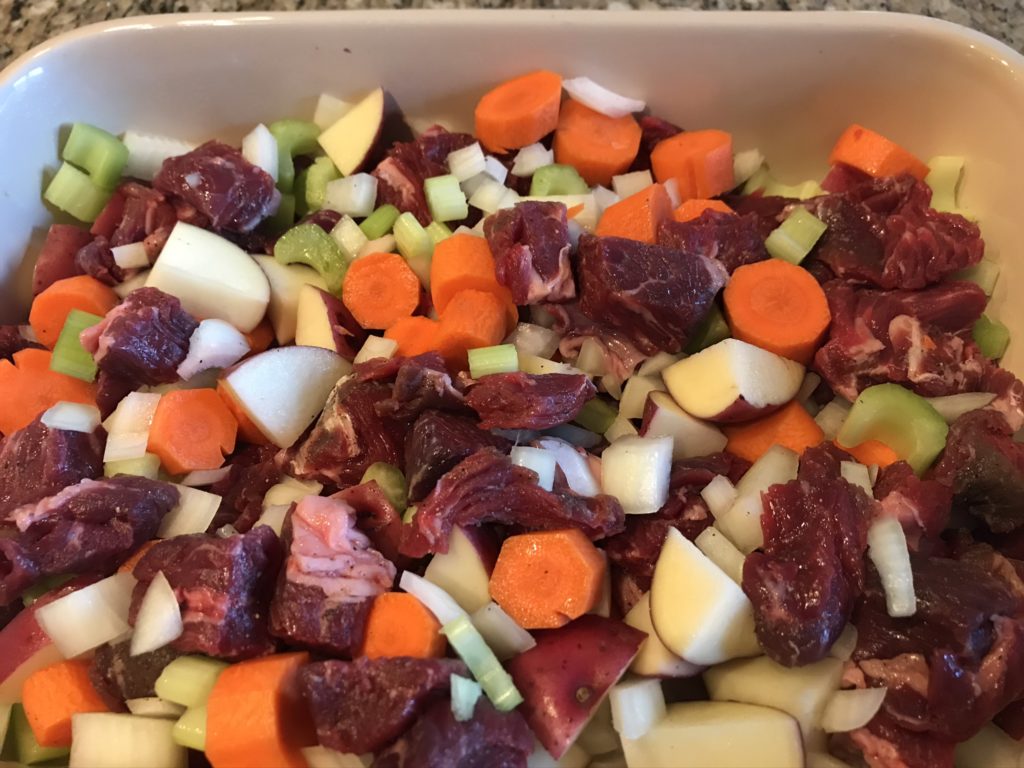
After you’ve chopped your meat and veggies, toss it all together in a baking dish.

Combine tomato juice (the secret ingredient!) instead of beef broth, water, tapioca (your thickener instead of flour), and seasonings. Pour it over the meat and veggies. Cover it with foil (to braise it) and pop it in the oven. Then, go find your happy place. Maybe that’s watching a TV show or reading a book. For others, it’s hiding in the closet, taking a nap. Not judging.

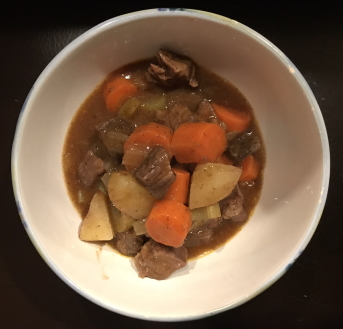
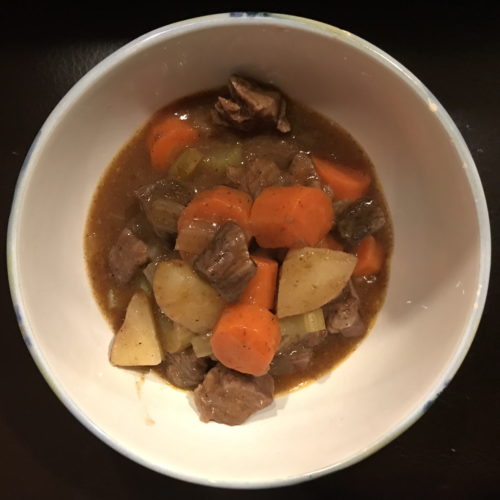
A couple hours later, check on it. The meat should be tender and your vegetables fork tender, but not falling apart or mushy.

Eat with bread. Yum. This is also a great dish to make ahead, chill, and bake later.

Beef Stew

Beef Stew

Servings 8

Ingredients
  

  • 2 pounds chuck beef cubed, seasoned with salt and pepper
  • 2 medium potatoes halved and then quartered into 1" pieces
  • 4 medium carrots cut into 1/2" chunks
  • 2 stalks celery cut into 1/2" chunks
  • 1 medium onion large dice
  • 2 cups tomato juice
  • 1 cup water
  • 3 tablespoons quick-cooking tapioca
  • 1 teaspoon sugar
  • 2 teaspoon salt
  • 1/2 teaspoon black pepper

Instructions
 

  • Preheat oven to 350F.
  • Coat a 9×13" baking dish with nonstick cooking spray. In the baking dish, combine beef, potatoes, carrots, celery, and onions. Mix well.
  • In a large bowl, combine tomato juice, water, tapioca, sugar, salt, and pepper. Pour over beef and vegetables.
  • Cover tightly with aluminum foil and bake for 2 – 2 1/4 hours.
  • To make ahead, follow the recipe and then chill. Bake for 2 1/2 – 3 hours.
Blog

Balsamic Chicken

Jump to Recipe

Anything balsamic is one of my favorite things. I used to think balsamic was this watery vinegar stuff, but I’ve since learned that it should be syrupy and packed with flavor. Because it’s so flavorful, it makes an awesome marinade for practically everything from chicken and beef to vegetables and potatoes. It’s this wonderful sweet, tangy glaze that comes in a bottle that makes food magically tasty. Win win.

Balsamic chicken also reminds me of Thanksgiving so it’s a great recipe to share the week before. The secret ingredient is sage, which I’m a big fan of when it comes to turkey day. Sage should have a big presence on Thanksgiving and it certainly does with this chicken recipe.

Start with fresh garlic and herbs, like rosemary and sage (of course). I used dried oregano because I was out of fresh.

In a large bowl, mix your garlic and seasonings with balsamic vinegar, olive oil, and a little sugar. Drop your chicken in. Combine it around with your hands until the chicken is well coated. Throw it on a foil-lined baking sheet. That’s it. You don’t have to even wait to marinade.

Bake for about 25 minutes and out comes dinner. Serve with your favorite sides. Now everyone lives happily ever after, or until the next meal.

Balsamic Chicken

Balsamic Chicken

Servings 8

Ingredients
  

  • 8 4 oz pieces boneless, skinless chicken thighs
  • kosher salt
  • black pepper
  • cooking spray
  • 3 tablespoons balsamic vinegar
  • 1 tablespoon olive oil
  • 2 cloves garlic minced
  • 1/2 teaspoon sugar
  • 1 tablespoon fresh rosemary chopped
  • 1/2 teaspoon dried oregano
  • 1/2 tablespoon fresh sage chopped

Instructions
 

  • Preheat oven to 425F.
  • Season chicken with salt and pepper. Line a large baking sheet with foil. Spray foil with cooking spray.
  • Combine balsamic vinegar, olive oil, garlic, sugar, rosemary, oregano, and sage in a large bowl.
  • Add chicken and mix well until chicken is coated. Using your hands is the easiest.
  • Arrange chicken onto the prepared baking sheet in a single layer.
  • Bake for about 25 minutes or until the chicken is cooked through.
Blog

Instant Pot Green Bean Casserole

Jump to Recipe

I’ve said this before (see Instant Pot Spaghetti and Meatballs) and I’ll say it again, I love my Instant Pot. I’m frequently surprised at what it can do. When I heard about the classic Thanksgiving Green Bean Casserole dish ala Instant Pot, I knew I had to see if it was the real thing or too good to be true. I decided to try it out today instead of on Thanksgiving in case it failed miserably. I discovered that was completely unnecessary.

First of all, I don’t want you to think you have to run out and buy an Instant Pot. You can very easily make this recipe on the stove. Instead of using an instant pot, simply follow the recipe to cook in a skillet on the stove and you’ll get the same results. Times will obviously vary, but you should get the same results.

I did my prepping first: measured out the ingredients, diced an onion, shredded some cheese, and trimmed/cut up my green beans. Honestly, green beans are a high maintenance vegetable. I would make them more often if I didn’t have to trim the ends. I didn’t take a short cut this time and use bagged, trimmed green beans, but that route was starting to sound like a good thing after trimming a pound and a half of green beans. That was a lot of beans.

In your Instant Pot (or skillet if you choose), saute chopped onions in butter until they are soft, which takes about 5 minutes. I would have loved to show you some pictures of this, but the lightening was not cooperating (aka the sun was going down, casting a yellow hue) and the onions kept steaming up my lens. I really need to rethink how I take pictures.

BTW, because of the mushroom haters in my family (and let’s be clear, I’m not a hater), I skipped them. Feel free to saute about 8 ounces right now if you can’t live without them.

Season, add broth, and stir in green beans.

At this point, pressure cook the beans on LOW (not high) for 3 minutes.

While this is going on, combine butter, Parmesan cheese, and flour. I was sort of questioning this step. And then I was sort of impressed. It makes a really nice compote to thicken the sauce. Just be sure to use room temperature butter or you’ll struggle mixing it together.

When your beans are done cooking, release the pressure and set the Instant Pot to saute. Add the butter mixture, let it melt, and then mix, coating the green beans completely. Pour in the cream and cook until thickened.

Serve in a large bowl topped with toasted fried onions. Just to let you know, I recommend this recipe. It was oniony, creamy green bean goodness that you must have on Thanksgiving. You can find the original at The Food Network, minus a few of my tweaks.

Instant Pot Green Bean Casserole

Instant Pot Green Bean Casserole

Servings 8

Ingredients
  

  • 2 tablespoons butter
  • 1 medium yellow onion chopped
  • 2 teaspoons kosher salt
  • 1/2 teaspoon black pepper
  • 1 cup low-sodium chicken broth
  • 1 1/2 pounds green beans trimmed and cut into bite-size pieces
  • 1 cup crispy fried onions
  • 2 tablespoons butter at room temperature
  • 2 tablespoons Parmesan cheese grated
  • 2 tablespoons all-purpose flour
  • 1/2 cup heavy cream

Instructions
 

  • Preheat the oven to 350 F.
  • Set a 6-quart Instant Pot® to saute and heat for 3 to 4 minutes. Add 2 tablespoons butter and melt. Add the diced onion. Cook, stirring frequently, until softened and translucent, 4 to 5 minutes. Season with salt and pepper.
  • Add the broth and green beans. Stir until coated. Turn the pot off.
  • Follow the manufacturer's guide for locking the lid and preparing to cook. Set to pressure cook on manual LOW pressure for 3 minutes. After the pressure cook cycle is complete, follow the manufacturer's guide for quick release and wait until the quick release cycle is complete. Be careful of any remaining steam and unlock and remove the lid.
  • While the beans are cooking, toast the fried onions on a baking sheet in a 350 F oven for 5 minutes.
  • In a small bowl, mix together flour, butter, and Parmesan cheese with your hands until completely combined.
  • Set the Instant Pot to saute. Stir the butter mixture into the hot green beans. Add the cream. Stir until all the butter has melted and the cream has thickened the sauce, about 2 minutes.
  • Pour into a serving dish and top with crispy fried onions.
Blog

Slow Cooker Chicken Chili

Jump to Recipe

It’s slow cooker season! Then again, when is it not slow cooker season? It’s great on those hot summer days when you don’t want to heat the house up with your oven, and it’s wonderful during those chilly fall days when you want something warm and comforting for dinner.

Instead of soup, I decided to make chili, but I didn’t want anything too heavy. Chicken chili is the perfect balance of filling, but not as rich as a beef chili. This particular chili is not very thick so it’s almost like a hearty soup.

Warning! This chili has beans. I’m not going to engage in a beans versus no beans debate. I’m from California. We do whatever we want out here.

Measure out your spices.

There’s a little prep work. If you have a slow cooker with a saute setting, even better, but you can do all of this in a skillet and it works just as well.

Brown ground chicken and set aside.

Chop up your garlic and onions, and saute them .

Add your spices and stir. Your kitchen will smell really good about now.

Add the browned chicken and rest of your ingredients, including those ever so controversial beans.

Cook for 6 hours on low. Dinner is served!

Slow Cooker Chicken Chili

Slow Cooker Chicken Chili

Servings 8

Ingredients
  

  • 2 teaspoons vegetable oil
  • 2 pounds ground chicken
  • 1 teaspoon kosher salt
  • 1 teaspoon vegetable oil
  • 4 cloves garlic
  • 1 medium onion finely diced
  • 1/8 cup chili powder
  • 2 teaspoons cumin
  • 1/4 teaspoon cinnamon
  • 1 cup chicken stock
  • 15 ounces canned pinto beans undrained
  • 15 ounces canned cannellini beans undrained
  • 28 ounces canned diced tomatoes
  • 6 sun-dried tomatoes finely chopped
  • 2 teaspoons molasses
  • 2 teaspoons Worcestershire sauce
  • 2 teaspoons kosher salt
  • freshly ground black pepper to taste
  • cheese, onions, etc. for garnish

Instructions
 

  • Heat 2 teaspoon of the oil in a slow cooker on the saute setting (or complete the following 3 steps in a large nonstick skillet over high heat). Add ground chicken and 1 teaspoon salt, cook, breaking the meat apart with a wooden spoon, until browned, about 4 minutes. Set aside.
  • In the slow cooker, add 1 teaspoon of oil, and then add garlic and onions, stirring and scraping up any browned bits, until the onions soften, about 5 minutes.
  • Add the chili powder, cumin, and cinnamon. Stir constantly for 1 minute to cook the spices. Pour in the chicken broth and scrape the bottom of the pan.
  • Add browned chicken to the slow cooker along with beans and liquid, canned tomatoes, sun-dried tomatoes, molasses, Worcestershire sauce, 2 teaspoons salt, and black pepper (to taste).
  • Cover and cook on the low setting for 6 hours. Garnish with cheese, onions, or your favorite chili toppings.

Blog

Oven-Baked Teriyaki Chicken

Jump to Recipe

This easy dish lets you throw a bunch of things together and presto! Out comes a meal! What’s not to love? Plus it’s something you wouldn’t expect: teriyaki chicken. Most teriyaki chicken recipes require you to cook the chicken, then the veggies, and then the rice, usually separately. Although that’s not hard, sometimes you don’t feel like standing over the stove. This recipe doesn’t require you to. Instead, you can prop your feet up and relax while it bakes in the oven. It’s also healthy and a good way to eat your veggies.

There’s a little prep required. In addition to chopping up some veggies, you’ll need to grate some ginger.

I know what you’re thinking. How do I peel this darn this before I grate it? OK, maybe you weren’t thinking that, but you could have been. Let’s go with it.

There are a couple easy tricks. If you want to mince ginger, scrap a spoon along the skin and it peels right off. For this recipe, you need grated ginger so just grate it using a fine shredder. It’ll remove the skin and fibers, leaving you with a pile of pure ginger. Super easy. No peeling required.

You’ll also need to chop up chicken into cubes. Using boneless, skinless chicken is the easiest.

Whisk together your sauce and add the chicken. Throw your raw rice into a 9×13 casserole pan and pour the chicken mixture on top. All the ingredients will end up where they should, but it’s a good idea to spread out your chicken evenly.

Pile your veggies on top. I love veggies. Yes, I’m weird. The more veggies, the better. I used a lot so that it covers the entire casserole dish. Don’t feel like you have to do this. I used red onions, broccoli, and red peppers, but you can use any veggie you prefer.

Cover it with foil, pop it into the oven, and kick back. Play a word game. Chat with a friend. Watch Queer Eye. You’ll need to pause after 25 minutes to briefly remove the foil, but then go back to your “me” time. Assuming you don’t have a kid chanting “Mom…Mom…Mom….”

After another 20-25 minutes, pull out the dish. You shouldn’t see any liquid and the rice will be tender. The veggies should still retain most of their color. You don’t want mushy, overcooked veggies. If that’s what you’re used to, no wonder you don’t like vegetables.

I like to mix it all up and then serve it in a bowl, topped with green onions. Pardon my bowl choice. My pasta bowls were clean. My pretty white bowls were not. Oh well. Life goes on. It all tastes good regardless. 🙂

Oven-Baked Teriyaki Chicken

Oven-Baked Teriyaki Chicken

Servings 6

Ingredients
  

  • nonstick cooking spray
  • 2 cups low-sodium chicken broth
  • 3/4 cup teriyaki sauce
  • 1/4 cup water
  • 2 tablespoons sesame oil
  • 2 teaspoons ginger grated
  • 3 cloves garlic minced
  • 1 pound boneless, skinless chicken breast cubed
  • 1 1/2 cups raw jasmine rice or any other white rice
  • 1 red onion sliced
  • 3 cups broccoli cut into florets
  • 2 red bell peppers sliced
  • 3 green onions white parts, sliced

Instructions
 

  • Preheat the oven to 425F. Spray a 9×13 inch casserole pan with nonstick spray.
  • In a medium bowl, whisk together the chicken broth, teriyaki sauce, water, sesame oil, ginger, and garlic. Add the chicken and stir to coat.
  • Spread the rice evenly in the bottom of the pan. Pour the chicken mixture over the rice, making sure the chicken is evenly distributed. Top with onion, broccoli, and peppers evenly.
  • Cover with foil and bake for 25 minutes. Remove the foil and bake until the sauce has thickened, the rice is tender, and the chicken is cooked through, about 20-25 minutes.
  • Let it sit for another 5 minutes before serving to allow for the rice to absorb any additional moisture.
  • Mix and serve topped with sliced green onions.
Blog

Pork Tenderloin with Seasoned Rub

Jump to Recipe

Originally, I wanted to give you recipes that I tweaked to make better. Apparently I have a knack of finding damn good recipes like this one from The Food Network. What I like about this is how easy it is. You hear about all these recipes where there’s all this chopping and mixing and watching that it’s not really quick and easy. Sometimes you just want to stick it in the oven and poof! Dinner.

This is that recipe.

Mix together your seasonings. To make it super easy, they are all dried so no chopping necessary.

Rub the seasonings over the pork. Don’t worry if it’s not perfectly coated. Now comes the “hard” part. You could skip this, but I think you would miss that caramelized flavor you get from a seared piece of meat plus searing holds in the juices so you don’t end up with a dry pork. My advice is don’t be lazy and do it. You’ll get to relax soon enough. I promise.

Heat up some olive oil. Add in minced garlic. Okay, you do need to chop up the garlic. I suppose you could throw the garlic in whole, which I almost did. I was concerned that the garlic would burn while searing the meat and assumed that you are trying to flavor the olive oil. If you truly don’t want to chop garlic, don’t do it, but if you are a garlic fiend like me, you don’t want to skip this step. Why? Because the little bits of garlic end up on the meat and it’s yummy.

I used to be sort of scared of searing. How long will it take? It’s making a huge mess. Am I searing it enough? Am I searing it too much? Yada yada yada. Don’t freak out. Just sear it until it’s brownish and it’ll all be ok. It took a total of about 10 minutes so about 2-3 minutes, rotate a quarter turn. Another 2-3 minutes, rotate again. When you’re done, it’ll look golden brown and all impressive looking. If it looks pale, just sear it a little longer. You cannot mess it up unless you walk away and burn it to a crisp.

For the record, don’t ever walk away while you’re searing, frying, sauteing, or some other activity that requires your attention. It’s like a toddler. Walk away and weird things happen. Like you suddenly find all your cans stacked into a precarious 4-foot high tower and you wonder what’s possessed your house. So I’ve heard. Anyway, walking away is just a bad idea and that’s when mistakes happen.

But you can now walk away! Place it on a sheet pan, stick it in the oven, and bake for about 20-30 minutes. You have just enough time to make a salad or watch some TV. Or both at the same time. The recipe calls for 20 minutes, but mine was a little thicker than most so it turned out to be 30 minutes. This is where a meat thermometer is handy.

When it’s done… Let it rest a bit, slice, and enjoy.

Pork Tenderloin with Seasoned Rub

Pork Tenderloin with Seasoned Rub

Servings 6

Ingredients
  

  • 1 teaspoon garlic powder
  • 1 teaspoon dried oregano
  • 1 teaspoon ground cumin
  • 1 teaspoon ground coriander
  • 1 teaspoon dried thyme
  • 1 tablespoon kosher salt
  • 1 1/4 pounds pork tenderloin
  • 1 tablespoon olive oil
  • 1 teaspoon garlic minced

Instructions
 

  • Preheat the oven to 450 F.
  • On a cutting board, flat plate, or shallow baking dish, mix seasonings: garlic powder, oregano, cumin, coriander, thyme, and salt. Stir until all the ingredients are well combined and form a seasoning.
  • Roll the tenderloin around in the seasonings and sprinkle the rub over the tenderloin until it's well coated. Gently press the seasoning to adhere it to the tenderloin.
  • In a large skillet over medium-high heat, add the olive oil and heat for about 2 minutes. Add the minced garlic and saute, stirring, for 1 minute.
  • Put tenderloin in the pan and sear for 2-3 minutes. Using tongs, give it a quarter turn, and sear for another 2-3 minutes. Continue to sear until all sides are golden brown.
  • Transfer meat to a roasting pan and bake for 20-30 minutes. Use a meat thermometer to ensure the internal temperature is 145F. Let it rest for about 5 minutes, and then slice and serve.
Blog

Maple Chicken and Carrots

Jump to Recipe

I subscribe to way too many cooking email lists. As a result, I read through a lot of recipes. For this weekend’s recipes, I looked for something to make that reminded me of fall.

No, not pumpkin spice fall.

Leaves falling from the trees, chilly mornings, warm fuzzy socks fall. So when I came across this recipe on Delish, I hit perfection. I imagined maple buckets hanging from trees as the leaves gently fall off the branches. Or at least that’s what’s going on in my Californian mind. Carrots are available year round, but they are still a root vegetable and more common when it’s harder to grow anything above ground. It had fall written all over it.

This main dish is fairly straight-forward and easy to make during the week. I prepped all my ingredients, including chopping the carrots into 1/4-inch round circles.

I chose to use my trusty cast-iron pan to sear the seasoned chicken. Set aside.

In the same skillet you combine the sauce ingredients, including apple cider vinegar, garlic, maple syrup (use the real stuff, not the fake maple-colored corn syrup or whatever that stuff is made of), Dijon mustard, lemon, and thyme.

Add the chicken back in and spoon some sauce over each piece. Add your carrots.

Stick the entire pan in the oven. Twenty minutes later, you end up with chicken that has a sweet, tart blend of maple, apple, and mustard flavors. It was sweet without being cloying. Tart without being too acidic. Spicy without being overwhelming. Perfection. To be eaten in fuzzy socks, next to a warm fire.

Maple Chicken and Carrots

Maple Chicken and Carrots

Servings 4

Ingredients
  

  • 5 carrots peeled and sliced into 1/4-inch thick rounds
  • 2 tablespoons extra-virgin olive oil divided
  • kosher salt and black pepper
  • 6 skinless, boneless chicken thighs
  • 1/4 cup apple cider vinegar
  • 3 cloves garlic minced
  • 1/4 cup real maple syrup
  • 2 tablespoons Dijon mustard
  • 1 tablespoon fresh thyme leaves
  • 1/2 lemon juiced

Instructions
 

  • Preheat oven to 425F.
  • In a medium bowl, toss carrots with 1 tablespoon of olive oil and season with salt and pepper. Season chicken thighs with salt and pepper. Prep the rest of your ingredients.
  • In a cast-iron pan or other oven-safe skillet, heat 1 tablespoon of olive oil over medium-high heat. Add chicken thighs and sear 2 minutes per side. Remove chicken and transfer to a plate. Do not discard pan drippings.
  • Add vinegar to pan and scrape up bottom bits from pan with a wooden spoon. Add garlic, maple syrup, mustard, thyme, and lemon juice. Bring to a simmer.
  • Return chicken to skillet and spoon sauce over thighs.
  • Nestle carrots into skillet. Bake until chicken is cooked through and carrots are tender, 20 minutes. Serve with sauce.
Blog

Slow Cooker Halloween Stuffed Peppers

Jump to Recipe

Aka…spooky peppers. Yes, they were pretty scary alright.

For those of you who know me, you’ll know I love cute food. Give me a theme and like a person who dresses up at parties, I create cute food. What can I say? It’s ridiculous and brings a smile to my face. Someone once accused me of showing off, which actually hurt my feelings because I was having a good time just for being me. Can I help it if I made chocolate dipped strawberry footballs for the Super Bowl?

So it comes to no surprise when I decided to make something Halloween-y. I wanted to avoid making a dessert so I pondered on what dish I could make that is both cute and scary, without being disgusting. Stuffed orange peppers popped into my mind. I have no idea what inspired me.

First, I looked for a stuffed pepper recipe with an Italian bent. I also wanted to be able to make something that I wouldn’t have to babysit…the slow cooker! I didn’t find exactly what I was looking for, but close enough. I came across Crock-Pot Stuffed Peppers from Delish.

Take four orange peppers, slice off the tops, keeping the green stem intact. With a small, sharp knife, carve jack o’ lantern faces. Here’s an example of one of the scary dudes.

Because the original recipe was inspired by Mexican flavors and I wanted Italian, I skipped the black beans and frozen corn, and substituted Italian seasonings instead of cumin, chili powder, and oregano. I also bumped up the amount of garlic powder used.

I recommend using lean or extra-lean ground beef to avoid the grease. I prefer a 90/10 or 93/7 blend instead of a 80/20 blend, which is better for grilling cheeseburgers. If you have no idea what I’m talking about, the next time you buy ground beef, look at the package. Ground beef is measured by the lean-to-fat ratio. 80/20 means that 80% lean to 20% fat. The more fat, the more flavor. Sometimes that’s a good thing, but not when you end up with a oily mess because the fat has melted into a pool of grease.

Mix all your stuffing ingredients together.

Use a spoon to scoop into your cute little pumpkins. Ohhhh…scary!

Stick them in the slow cooker for 3 hours on high. What you get is this little fella.

Ok, so he’s not as cute or as spooky as I had hoped. He’s kind of funny looking with rice oozing out of his mouth and looking a bit wrinkly. I did have to chuckle, but frankly, I was disappointed because the pepper was squishy. I want my cute food to taste delicious too. There’s no way these peppers should have been cooking for 3 hours. If I make them again, I would definitely check on them after 2 hours to see if the ground beef was cooked through and the pepper was soft, not mushy. If you make them, let me know how they turned out.

Happy Halloween! Boo!

Slow Cooker Halloween Stuffed Peppers

Slow Cooker Halloween Stuffed Peppers

Servings 4

Ingredients
  

  • 4 orange bell peppers
  • 1 pound lean ground beef
  • 15 ounces fire-roasted diced tomatoes
  • 2 cups shredded jack cheese divided
  • 1 cup white rice cooked
  • 1 1/2 teaspoons salt
  • 1 teaspoon pepper
  • 1 teaspoon garlic powder
  • 1 teaspoon Italian seasonings

Instructions
 

  • Slice the tops of the peppers and keep the green top attached to the cap. Remove the seeds inside. With a small, sharp knife, carve little jack o' lantern on each pepper.
  • In a large bowl, combine beef, 1 cup cheese, tomatoes, rice, salt, pepper, garlic powder, and Italian seasonings. Stir until all ingredients are fully incorporated.
  • Stuff peppers with the beef mixture. Place them in a slow cooker, top side up. Cover and cook on high for 3 hours.
  • When the peppers are tender, top peppers with remaining cheese and cover. Cook on low for 5-10 minutes more, or until cheese melts.
Blog

Beef Stroganoff

Jump to Recipe

This recipe is a favorite in the Deter household. Beef stroganoff is originally a Russian dish with beef sauteed in a sour cream sauce. It’s morphed into a dish that can contain any type of beef, sometimes has mushrooms, and is often served over egg noodles (although I have been known to serve it over cauliflower rice for myself). It’s incredibly retro and there’s absolutely nothing fancy about it.

My recipe has morphed a few times and probably resembles nothing like the traditional stroganoff of the 70s and 80s. First of all, no mushrooms. I happen to like them, but the boys don’t. So don’t even think adding them or using cream of mushroom soup. Mine doesn’t have any nutmeg, but you’ll find a ton of chopped rosemary. More than any normal person might like so feel free to use less. Finally, no beef tips. This one has ground beef.

I’m starting to wonder how this can even be called beef stroganoff, but let’s go with it because it’s tasty and filling and all that good stuff.

It starts out fresh rosemary, garlic, and red onions. It’s so much better with fresh rosemary, but you can use a teaspoon of chopped dried rosemary instead. Just don’t use that jarred minced garlic stuff. Always use fresh garlic. Never mind that it’s annoying to peel and chop.

Chopped these up and add them to your crumbled ground beef that’s been browning. I like to use the leanest beef possible to avoid a pool of grease.

Warning…the following photos you are about to see might seem scary and disgusting. Apparently beef stroganoff is not the supermodel of foods and looks rather unattractive. I swear it tastes better than it looks.

Add cream of chicken soup and some seasonings. Told you that no mushrooms would be harmed in the making of this dish.

Add sour cream and parsley. I use dried parsley, but fresh parsley works really well too.

Cook a little longer, toss with egg noodles, and this is what you end up with.

This recipe makes plenty for six people. Because there’s only three of us, I usually boil half of a bag (8 ounces) of noodles instead of a full bag, and use half of the sauce. Keep the leftover sauce and boil fresh noodles when it’s time for leftovers.

Beef Stroganoff

Beef Stroganoff

Servings 4

Ingredients
  

  • 2 cloves garlic minced
  • 1 tablespoon fresh rosemary chopped finely
  • 1 cup red onions diced
  • 2 teaspoon salt
  • 1/4 teaspoon pepper
  • 1/2 teaspoon paprika
  • 10.5 ounces condensed cream of chicken soup
  • 16 ounces egg noodles cooked
  • 16 ounces sour cream
  • 1 tablespoon dried parsley

Instructions
 

  • Crumble and brown ground beef with garlic, rosemary, and onion.
  • Add salt, pepper, paprika, and soup. Simmer for 5 minutes.
  • Add sour cream and parsley. Simmer until heated through.
  • Mix with cooked noodles and serve.
Blog

Greek Lemon Chicken and Orzo

Jump to Recipe

Sometimes a recipe comes along that you just don’t change because it’s perfect. This is that recipe. I’ve made it several times and each time, it’s amazing. Better yet, it’s super simple. I wish I could take credit, but alas, I can only provide advice. The prize goes to Jeff Mauro, the Sandwich King from The Food Network, who apparently makes a lot more stuff than sandwiches. His recipe combines dill and lemon along with coriander to make a delicious meal.

Start out with fresh dill and grated lemon for your orzo. The flavor meld together nicely and screams Greek. I should try to make a dip with this. And what is orzo, you may ask. It looks like rice, but it’s a pasta that’s often used in salads, but also in casseroles like this one.

For the chicken, you’ll be using different seasonings, but only three (see how simple this recipe is?). In addition to salt and pepper, you’ll use ground coriander. And what is coriander, you may ask. It’s actually the seeds from the cilantro plant. Who knew? They have a citrus flavor when crushed, which is why it pairs well with dill and lemon.

To cut down on the number of bowls you use, combine the orzo mixture directly in the baking dish. Then, rub the seasonings on chicken. It will be peppery so if that’s not your thing, use half the pepper the recipe states.

Choose chicken that with a consistent thickness, meaning not super thick in the middle and skimpy thin at the ends. If this is not possible, consider pounding the chicken with a mallet to thin out the middle. I have found that two breasts per pound works best for me and doesn’t require any pounding. Just be sure to avoid using large breasts or they won’t cook through.

Place the chicken in the orzo mixture. Don’t freak out. The chicken broth will not wash off the chicken seasonings and make the chicken bland. It’ll all turn out in the end. Make sure your chicken is submerged so you don’t end up with dry chicken. Top with lemon.

And let me take a moment to tell you to use chicken stock, not broth. There’s a difference, they are not interchangeable, and you’ll thank yourself for using the right ingredient.

When baked, you’ll end up with this…

And this…

Did I mention how fancy it looks? You probably could pull this dish off when you have guests to impress.

One of these days, I’m going to try making this dish with other seasoning combinations. I’m thinking that tomato sauce, oregano, and cumin with a little chopped green olives might create a Spanish twist while experimenting with orange and parsley will produce an Italian dish. I encourage you to use your favorite seasonings in the orzo and chicken. Let me know what you discover!

Greek Lemon Chicken and Orzo

Greek Lemon Chicken and Orzo

Servings 6

Ingredients
  

Orzo

  • 3 cups chicken stock
  • 3 tablespoons butter melted
  • 2 teaspoons kosher salt
  • 1 teaspoon cornstarch
  • 2 sprigs fresh dill chopped
  • 2 lemons zested and juiced
  • 1 clove garlic minced
  • 2 cups orzo

Chicken

  • 2 teaspoons ground coriander
  • 2 teaspoons kosher salt
  • 2 teaspoons ground black pepper
  • 4 medium chicken breasts boneless, skinless
  • 1 lemon sliced

Instructions
 

  • Preheat the oven to 375 degrees F.
  • For the orzo: In a 9-by-13-inch baking dish, whisk together stock, butter, salt, cornstarch, dill, lemon zest and juice, and garlic. Mix in the orzo.
  • For the chicken: In a small bowl, mix together the coriander, salt and pepper. Coat the chicken all over with the seasoning.
  • Add the chicken breasts, laying them so most of the chicken is submerged. Top with lemon slices.
  • Bake, uncovered, until the chicken registers an internal temperature of 165 degrees F, 35 to 40 minutes. Let rest for 5 minutes.